How to Make Felt Succulents {that actually look real!}
I’ve been excited to share this post with you for quite a while now! These DIY felt succulents are just SO beautiful and I know you’ll love them!
 A great thing about these DIY felt succulents is that they look REAL.
>> Watch our video to see how easy it is to make these felt succulents! <<
Here’s what you need to make felt succulents:
- Green felt (stiff or soft, depending on what style you want to make – see comparison photos below)
- Our printable template – grab that HERE
- scissors
- hot glue gun & glue sticks
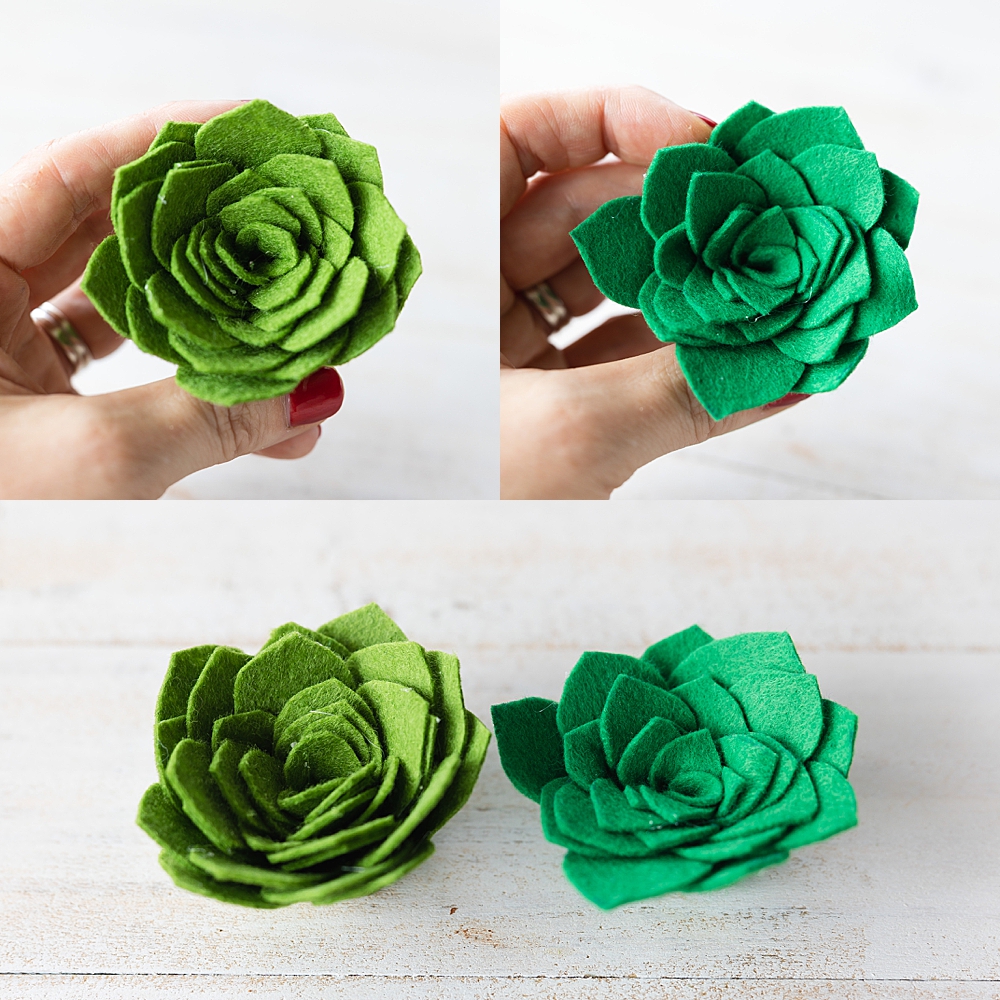
So here are the comparison photos between stiff felt and soft — I preferred the yellow-green of the stiff felt, but the soft felt was easier to work with.
I bought this pack of 8×12 green felt sheets because of the great variety of greens, but I didn’t know until I got it that it was stiff. So be aware that this is a great color, but it’s a little stiff. You can see from my photos though ⬇️ that it still worked out.

HOW TO MAKE FELT SUCCULENTS:
Step one, pin the template pieces onto the felt (or trace them on, I did both) and cut them out.


Now, here’s one thing you can do to make different size succulents — use the biggest template piece and cut out one or two more to add to your succulent.
I’ve got a comparison photo below of a 4-piece succulent next to a 6-piece succulent. All I did was cut 2 extras of the biggest piece and added them on as you’ll see below. ⬇️


I wanted different size succulents for the Pizza Pan Sign I made, and adding extras of the largest piece was a simple way to do that.
:: PIN FOR LATER ::

Step two, get that glue gun heated up because that’s all you need to put the felt pieces together!
Start with the smallest piece…..

Roll it up nice and tight to make the center of your succulent….add some glue to secure it, then keep adding glue and rolling it up.

Now you’ll just keep adding pieces from smallest to largest and gluing them around your succulent center.

Be careful not to roll the outer leaves too tightly – the outside leaves of a succulent are more spread open than in the center.
 Tip: after adding on a new piece, put hot glue on the back of the succulent and pinch the base in while the glue cools and hardens. This helps the “petals” stay open (especially when using stiff felt).
See photo below ⬇️

When you’ve attached the last felt piece to your succulent, you can put glue on the back and then flip it right side up and put some pressure on the top to force those leaves to stay open if you like.
I did this and then peeled the flower off my workspace before it totally hardened.

💚 Soo pretty! 💚
:: PIN FOR LATER ::
⬇️ CLICK ON THE PINK BUTTON TO DOWNLOAD THE TEMPLATE! ⬇️
We ❤️ LOVE ❤️ knowing that our tutorials are helpful to you, so be sure to tag us on social media when you show off your projects – we want to see!
Can’t wait to see what gorgeous projects you use these easy DIY felt succulents for! 😃


