Need some ideas to create a GORGEOUS shower for a GORGEOUS bride?
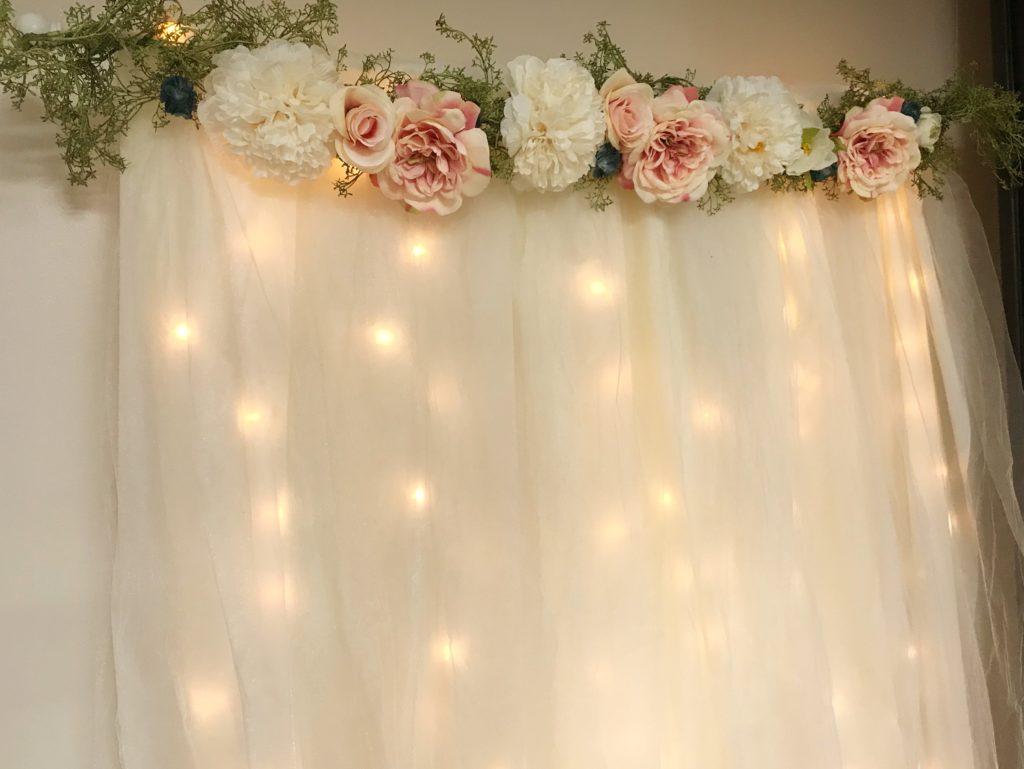
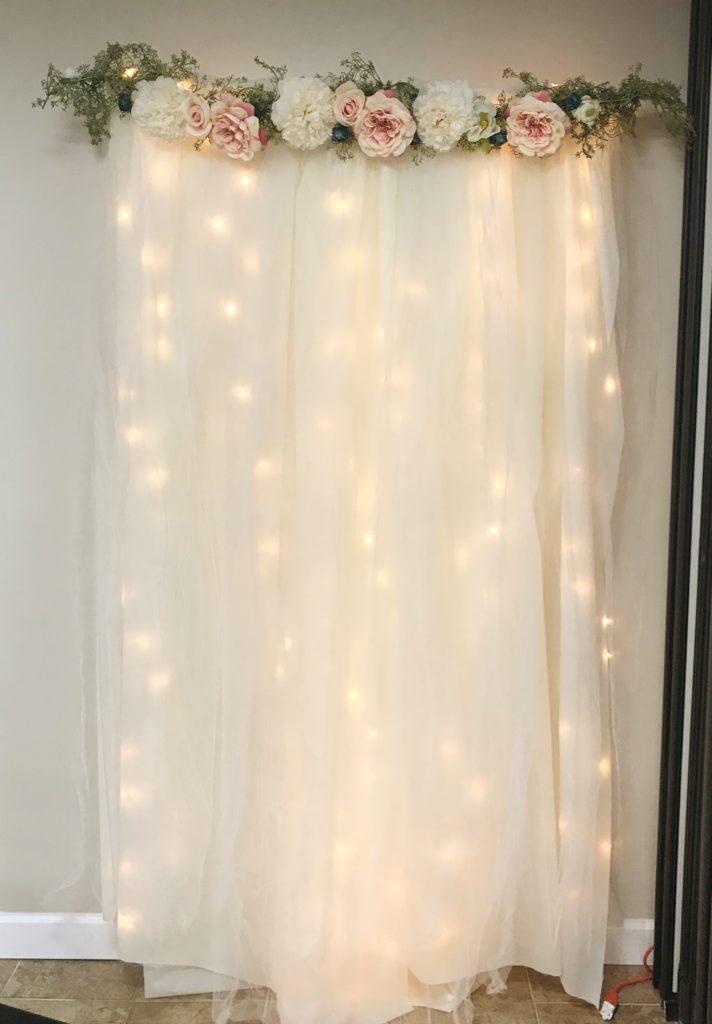
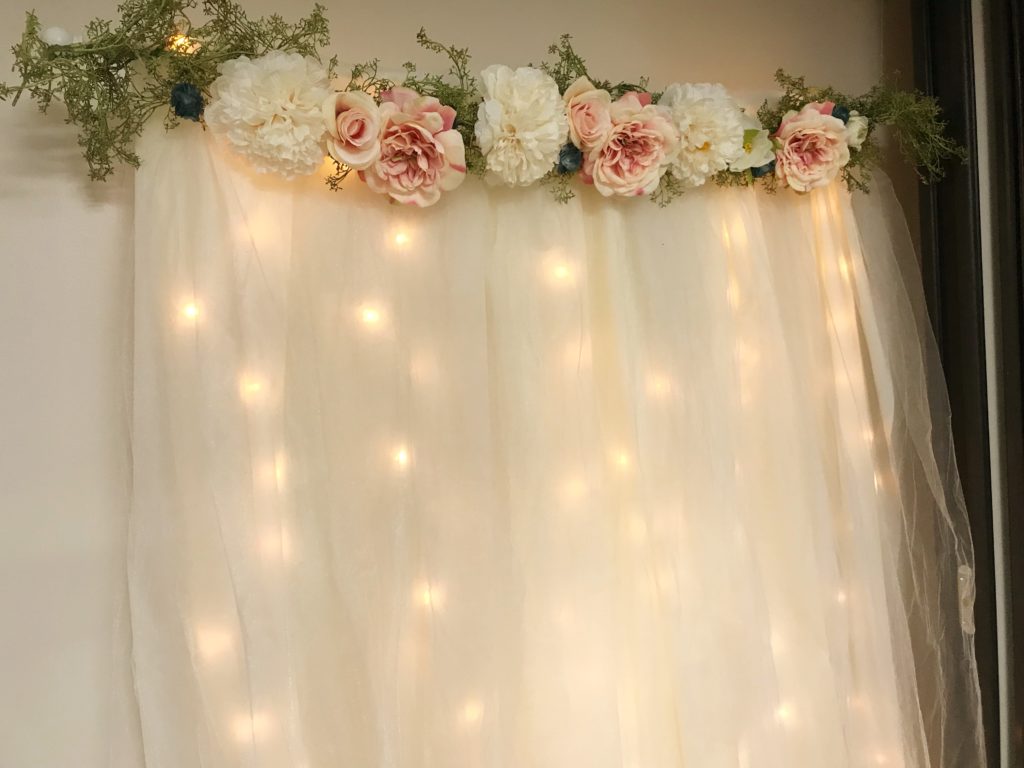
Learn how to make your own DIY tulle wedding backdrop to use as wedding or shower decoration. This simple tutorial will teach you how to create a stunning backdrop with a gorgeous floral top and shimmering lights!!
This budget friendly, gorgeous DIY Backdrop will bring your shower or wedding decor to another level of beautiful.
This backdrop could be used in several different ways… bridal shower (how about these fun printable photo props?!), baby shower, photo backdrop, birthday party (HERE are tons of printable props)…. you name it! Nice thing is, it is fairly budget friendly and easy enough for a beginner crafter. Learn how to make a wedding backdrop!
Steps to Making your own Wedding Backdrop
Step 1: Gather your supplies.
- rod (it can be a curtain rod, a shower rod, a dowel rod… any type of rod that is as wide as you want your finished backdrop to be!)
As an Amazon Associate I earn from qualifying purchases. Thanks! / Affiliate links / Images from Amazon Product Advertising API
- tulle (you’ll need a lot of this! I used about 4 layers of it across my 5 foot wide rod)
As an Amazon Associate I earn from qualifying purchases. Thanks! / Affiliate links / Images from Amazon Product Advertising API
- plastic white tablecloth
As an Amazon Associate I earn from qualifying purchases. Thanks! / Affiliate links / Images from Amazon Product Advertising API
- mini string lights
As an Amazon Associate I earn from qualifying purchases. Thanks! / Affiliate links / Images from Amazon Product Advertising API
- floral (any large flowers and greenery, Hobby Lobby is my favorite place for these)
- zip ties (to hold it all together)
- fishing line
- hot glue gun and sticks

Step 2: Hang your rod.
This can be a bit tricky depending on what type of ceiling you are dealing with. The room I was decorating has drop tile ceilings, so I simply hung the rod evenly from the metal tile dividers with fishing line and dropped the tiles back down into place. I used an inexpensive white curtain rod from Walmart, that was pretty lightweight, so it was very easy to hang.
I’ve also done this same type of backdrop using hooks installed in the ceiling, then using heavy duty fishing line to attach the rod to the hooks. This method worked just as well and held a pretty heavy rod, plus curtains and lights. It all stayed right in place perfectly. Just be sure to use heavy duty fishing line and attach in 2-4 places. Don’t risk it! Tug on the rod a few times to make sure it is very secure before continuing! The last thing you want is for it all to come falling down.
Step 3: Drape the lights.
I strung strings of mini lights over the curtain rod, using scotch tape to secure the lights in place along the rod. I found they wanted to clump together and taping them helped keep the ‘strings’ evenly spaced out along the rod. I made sure the lights reached the floor, just as I will do with the tulle.
Check out some similar lights HERE. Use as many or as few as you like. You’ll find that once you layer the tablecloth and tulle, the lights will become very muted and soft looking. Really just stunning.

Step 4: Drape the plastic tablecloth.
Next step was to drape cheap plastic table cloth over the lights. I used a cream color from Party City, where you can find it in rolls. I think that roll style is no longer available, check out this type of tablecloth HERE. The plastic over the bulbs gives a beautiful softness to the lights. You will need to overlap some, but just be sure to check the length in the front, that it is ending where you want it to. For a pretty look, you can leave a foot or more of extra length and pool it along the floor at the bottom of the backdrop.

Step 5: Drape the tulle.
Now drape several layers of tulle over the tablecloth. I had about 4 layers of tulle total.
Honestly, as long as the front looks great, you don’t need to worry so much about the back, it doesn’t even have to reach all the way to the bottom. Just be sure enough is hanging over the rod to the back so that it doesn’t slip forward and fall off the front. So pretty!
In this picture, you can see if you pull the front away… you’ll see your lights hanging… with the plastic and tulle over top of it. Pretty simple process!

Step 6: Add the floral.
To finish off the backdrop, I added the flowers across the top. These flowers were purchased at Hobby Lobby. You can find the prettiest flowers there! Did you know that all the flower stems are 50% off, every other week? So, if you need flowers and they are not on sale… just wait till the next week for some amazing savings!
I started with a garland of greenery and simply hot glued my different flowers to it. It was then all one piece, so I used zip ties and attached it to the curtain rod. So easy and stayed in place perfectly!


Storing your wedding backdrop:
Considering that this is made of tulle, you will need to be careful of how you store it until the big day! If you make it ahead of time, which obviously would be the most logical!, your best option is to find somewhere you can lightly drape it until the time. I draped this over a large rocking chair in a room that was not being used and it did not wrinkle. I packed it ((stuffed tight in a box)), and got it out to use again and it was very very wrinkled, but still completely usable. You can lightly steam it out or mist it with water while it is hanging to help rid it of wrinkles.
Now that you know how to make you own wedding backdrop, why not make some of these floral hoop centerpieces to go with it?!? How pretty would that be with matching florals??


пин ап казино зеркало: https://pinupkz.life/
пин ап – пин ап
пин ап казино – пин ап казино зеркало
пин ап вход – пин ап вход
Generic 100mg Easy [url=https://generic100mgeasy.shop/#]Generic100mgEasy[/url] Generic 100mg Easy
pinup 2025 – пин ап зеркало
пинап казино – пин ап казино зеркало
пинап казино – пин ап вход
пин ап вход – пин ап
buy generic 100mg viagra online: Generic100mgEasy – Generic100mgEasy
https://tadalafileasybuy.com/# Tadalafil Easy Buy
kamagra kopen nederland: kamagra 100mg kopen – kamagra kopen nederland
Generic100mgEasy [url=http://generic100mgeasy.com/#]buy generic 100mg viagra online[/url] Viagra generic over the counter
http://generic100mgeasy.com/# Generic 100mg Easy
п»їcialis generic: cialis without a doctor prescription – TadalafilEasyBuy.com
https://tadalafileasybuy.com/# Tadalafil Easy Buy
http://tadalafileasybuy.com/# cialis without a doctor prescription
Kamagra: kamagra pillen kopen – Kamagra Kopen
Cheap generic Viagra: Viagra online price – buy Viagra over the counter
https://generic100mgeasy.shop/# Viagra online price
cialis without a doctor prescription [url=https://tadalafileasybuy.shop/#]Tadalafil Easy Buy[/url] cheapest cialis
http://tadalafileasybuy.com/# cialis for sale
Kamagra: kamagra 100mg kopen – Kamagra
buy generic 100mg viagra online: buy generic 100mg viagra online – buy generic 100mg viagra online
https://kamagrakopen.pro/# Officiele Kamagra van Nederland
https://kamagrakopen.pro/# Kamagra
Viagra without a doctor prescription Canada [url=https://generic100mgeasy.shop/#]Generic 100mg Easy[/url] Viagra tablet online
KamagraKopen.pro: kamagra kopen nederland – Kamagra
https://kamagrakopen.pro/# kamagra pillen kopen
kamagra kopen nederland: kamagra 100mg kopen – kamagra 100mg kopen
https://generic100mgeasy.com/# Generic100mgEasy
https://generic100mgeasy.shop/# Generic100mgEasy
TadalafilEasyBuy.com: TadalafilEasyBuy.com – Tadalafil Easy Buy
https://kamagrakopen.pro/# kamagra jelly kopen
Generic 100mg Easy [url=https://generic100mgeasy.com/#]Generic100mgEasy[/url] buy generic 100mg viagra online
kamagra jelly kopen: kamagra kopen nederland – Kamagra Kopen Online
Kamagra Kopen: Kamagra Kopen Online – KamagraKopen.pro
https://tadalafileasybuy.shop/# TadalafilEasyBuy.com
Officiele Kamagra van Nederland: kamagra jelly kopen – Officiele Kamagra van Nederland
https://kamagrakopen.pro/# Kamagra Kopen Online
cialis without a doctor prescription: cialis without a doctor prescription – Tadalafil Easy Buy
Generic100mgEasy [url=https://generic100mgeasy.shop/#]buy generic 100mg viagra online[/url] Sildenafil Citrate Tablets 100mg
https://generic100mgeasy.shop/# buy generic 100mg viagra online
Generic Cialis without a doctor prescription: Tadalafil Easy Buy – Tadalafil Easy Buy
https://generic100mgeasy.shop/# Buy generic 100mg Viagra online
KamagraKopen.pro: kamagra jelly kopen – kamagra jelly kopen
https://generic100mgeasy.com/# Viagra Tablet price
TadalafilEasyBuy.com [url=https://tadalafileasybuy.shop/#]Tadalafil Tablet[/url] Cialis 20mg price in USA
https://tadalafileasybuy.com/# cialis without a doctor prescription
Officiele Kamagra van Nederland: kamagra pillen kopen – Officiele Kamagra van Nederland
cialis without a doctor prescription: cialis for sale – cialis without a doctor prescription
http://tadalafileasybuy.com/# cialis without a doctor prescription
https://generic100mgeasy.shop/# Generic 100mg Easy
Kamagra: Kamagra Kopen Online – Kamagra Kopen
http://generic100mgeasy.com/# Cheap generic Viagra online
Generic 100mg Easy: buy generic 100mg viagra online – Generic100mgEasy
mexican pharmacy online store [url=https://mexicanpharminter.shop/#]buying from online mexican pharmacy[/url] mexican pharmacy online store
canada cloud pharmacy: most reliable canadian online pharmacies – onlinecanadianpharmacy
https://interpharmonline.shop/# buying drugs from canada
canadian pharmacy oxycodone
MexicanPharmInter: Mexican Pharm Inter – mexican pharmacy online store
canadian 24 hour pharmacy: canada pharmacy no prescription – buying drugs from canada
http://interpharmonline.com/# best mail order pharmacy canada
the canadian drugstore
https://interpharmonline.shop/# pharmacy canadian superstore
mexican pharmacy online order [url=http://mexicanpharminter.com/#]mexican pharmacy online order[/url] mexican pharmacy online store
https://mexicanpharminter.shop/# mexican pharmacy online
canadian family pharmacy
reliable mexican pharmacies: Mexican Pharm International – reliable mexican pharmacies
canadian pharmacy king: InterPharmOnline – pharmacy com canada
https://mexicanpharminter.com/# MexicanPharmInter
reputable canadian online pharmacy
mexican drug stores online [url=https://mexicanpharminter.shop/#]mexican pharmacy online[/url] MexicanPharmInter
https://indiamedfast.shop/# online pharmacy india
http://indiamedfast.com/# india online pharmacy store
canadian pharmacy in canada
mexican drug stores online: Mexican Pharm International – Mexican Pharm Inter
https://mexicanpharminter.com/# MexicanPharmInter
buying from online mexican pharmacy [url=https://mexicanpharminter.com/#]MexicanPharmInter[/url] mexican pharmacy online
https://indiamedfast.com/# IndiaMedFast.com
safe reliable canadian pharmacy
recommended canadian pharmacies: most trusted canadian pharmacies online – buying drugs from canada
Mexican Pharm International: mexican drug stores online – mexican pharmacy online order
https://interpharmonline.shop/# canadian pharmacies compare
https://mexicanpharminter.shop/# Mexican Pharm International
canada drugs
MexicanPharmInter: mexican pharmacy online – mexican drug stores online
Mexican Pharm International [url=https://mexicanpharminter.shop/#]Mexican Pharm International[/url] buying from online mexican pharmacy
https://indiamedfast.com/# online medicine shopping in india
my canadian pharmacy review
cheapest online pharmacy india: order medicines online india – online medicine shopping in india
789alo: alo789 – alo 789 dang nh?p
На этом ресурсе вы найдете учреждение психологического здоровья, которая обеспечивает профессиональную помощь для людей, страдающих от тревоги и других психических расстройств. Эта комплексное лечение для восстановления психического здоровья. Наши опытные психологи готовы помочь вам преодолеть психологические барьеры и вернуться к сбалансированной жизни. Профессионализм наших специалистов подтверждена множеством положительных отзывов. Обратитесь с нами уже сегодня, чтобы начать путь к лучшей жизни.
http://jemjewelry.net/__media__/js/netsoltrademark.php?d=empathycenter.ru%2Fpreparations%2Fl%2Flamotridzhin%2F
Your article is fascinating. We learned a lot from it. Thank you for sharing your knowledge and experiences.
Pingback: 20 Creative Diy Birthday Decoration Ideas
How much tulle did you need to buy? Did you get it on a roll?
What is the answer to Elizabeth question?
I have the same question.
Thank you for your time and the helpful
DIY.
Yes, I had equal amounts hanging on both sides of the curtain rod.
Hope this helps!!
How exactly did you drape the tablecloths and tulle? Did you have lengths long enough to where there was an equal amount hanging on both sides of the curtain rod, or did you secure them somehow to where it wouldn’t slide off the front side?
Yes, I had equal amounts hanging on both sides of the curtain rod.
Hope this helps!!
What kind of hooks did you use to hang the curtain rod?
I just used fishing line, (no hooks!), since the tile ceiling in the room had metal dividers that I could tie the fishing line to.