

Beautiful Salt Dough Ornaments
A Guide to Making Beautiful Salt Dough Ornaments
Salt dough ornaments are a beautiful, budget-friendly way to create lasting memories this holiday season! Whether you’re looking for a fun activity to do with kids or want to craft unique, personalized decorations, salt dough ornaments offer endless possibilities.
The process is simple, the ingredients are likely already in your pantry, and the results can be as varied and creative as your imagination allows.

In this post, I’ll guide you through the step-by-step process of making these charming ornaments, share some tips for success, and offer ideas for decorating them to suit any occasion.
(We love making homemade Christmas ornaments — check out our 10-Minute Star Ornaments or this collection of Easy Homemade Ornaments to Make with Your Kids!)
Why Salt Dough?
Before diving into the recipe, let’s talk about why salt dough is such a fantastic medium for crafting.
The mixture of flour, salt, and water creates a pliable dough that’s easy to shape, mold, and bake into solid, durable ornaments. The high salt content acts as a preservative, ensuring that your creations can last for years if stored properly.
Additionally, salt dough is non-toxic, making it a safe option for crafting with children. The best part? It’s incredibly versatile—you can make everything from simple shapes to intricate designs, and the ornaments can be painted, glittered, or left in their natural state.

The Basic Salt Dough Recipe
Here’s a foolproof recipe for making the dough:
Ingredients:
- 2 cups all-purpose flour
- 1 cup salt
- 1 cup warm water

Instructions:
- Mix the Dry Ingredients: In a large mixing bowl, combine the flour and salt. Stir them together until they are well-blended. The salt not only adds texture to the dough but also helps it dry out thoroughly during baking.
- Add Water: Slowly pour the warm water into the flour and salt mixture, stirring as you go. You can use a wooden spoon or your hands for this step. The dough will start to come together and form a ball. (HACK: add a tiny dot of purple food coloring to your dough – just a little on the tip of a toothpick – to counter the ‘yellow’ of the dough and get a more pure white.)
- Knead the Dough: Once the mixture forms a dough, transfer it to a floured surface and knead it for about 5-10 minutes. This helps to ensure that the ingredients are fully combined and the dough is smooth and elastic. If the dough is too sticky, add a little more flour; if it’s too dry, add a tiny bit more water.
- Roll Out the Dough: Once the dough is well-kneaded, roll it out to about 1/4-inch thickness using a rolling pin. If you want thicker ornaments, you can roll it out to 1/2-inch thickness, but keep in mind that thicker ornaments will take longer to bake.
- Cut Out Shapes: Use cookie cutters to cut out your desired shapes. You can stick with classic holiday shapes like stars, trees, and snowflakes, or get creative with different designs. Don’t forget to use a straw or skewer to poke a hole at the top of each ornament so you can hang them later. If you’re using a cookie stamp, now is the time to do that!
- Bake the Ornaments: Place the cut-out shapes on a baking sheet lined with parchment paper. Bake in a preheated oven at 225°F for 2-3 hours. The key is to bake them slowly at a low temperature to ensure they dry out completely without browning. An oven that’s too hot will cause your ornaments to slightly rise or bubble, so don’t turn the oven up to speed things up. The ornaments are done when they feel hard to the touch.
- Cool and Decorate: Allow the ornaments to cool completely before decorating. Once cool, you can paint them with acrylic paints, add glitter, or even use markers to personalize them. I found that nail polish was a great option for detailing my ornaments!
- Seal them with a clear varnish or a coat of Mod Podge to protect the surface and give them a nice finish.

A fun way to emboss your salt dough ornaments is with a personalized Christmas cookie stamp, like THESE. This is great for if you choose to tie an ornament onto a gift!

Tips for Success
While making salt dough ornaments is a straightforward process, here are a few tips to ensure your creations turn out perfectly every time:
- Keeping the Dough Pliable: You’ll find that as you put flour down, roll, cut out, and re-roll your dough, that it starts to air dry – just put a little water on your hands and knead your dough for a minute until it’s like fresh playdough again! Do this as many times as needed.
- Even Thickness: Roll out the dough to an even thickness to prevent some ornaments from being undercooked while others are overcooked. An even thickness also ensures that all the ornaments bake at the same rate.
- Smooth Surface: If you want a smooth surface for decorating, be sure to knead the dough well and smooth out any cracks or creases before baking. A well-kneaded dough will also be easier to roll out.
- Drying Time: If you don’t want to use an oven, or if you have thicker ornaments that need extra drying time, you can air-dry the ornaments. This process can take several days depending on the thickness of the dough and the humidity level in your home.
- Storage: Store finished ornaments in a cool, dry place. If properly sealed and stored, salt dough ornaments can last for years.
- Adding Color: If you prefer not to paint the ornaments, you can add color directly to the dough. Simply mix in food coloring during the kneading process to create a colored dough. (Wear gloves!)
How I added texture to my salt dough Christmas ornaments
Take a look around your kitchen to find things to add texture to your ornaments! If you don’t have a cookie stamp, get creative with what you do have! Here’s what I came up with. ⬇️

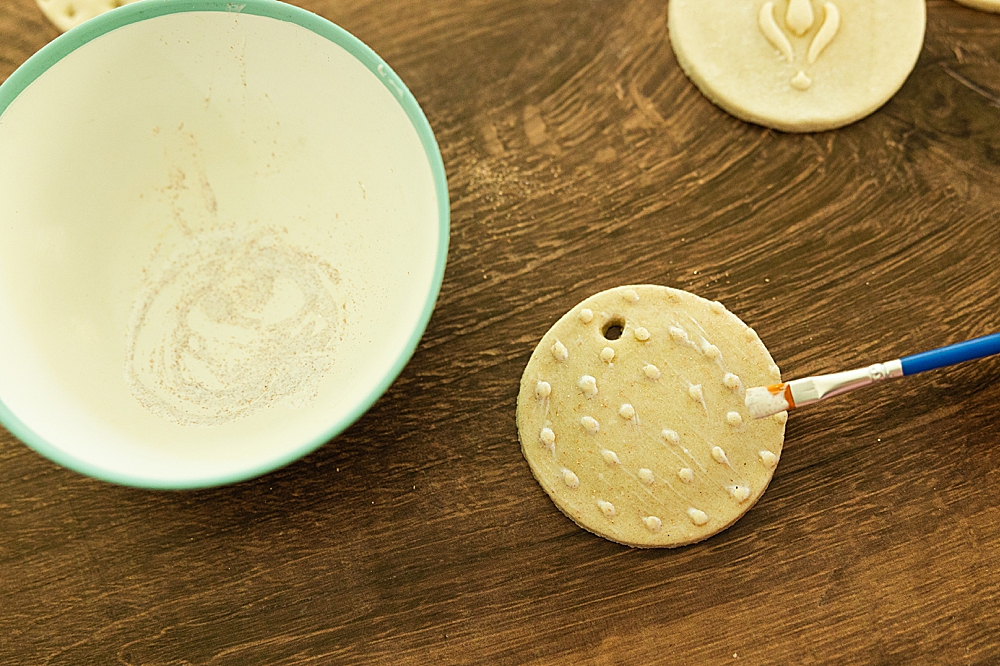
This strainer worked perfectly for making dots! I carefully pressed it on and then cut it out with a cookie cutter. I really love this texture!

How about this serving spatula design? How pretty is that on an ornament?! Again, I pressed the design on *before* cutting. It’s easier to line the cookie cutter up over a ready pattern.


Cooling racks give a nice criss-cross texture! ⬇️😆

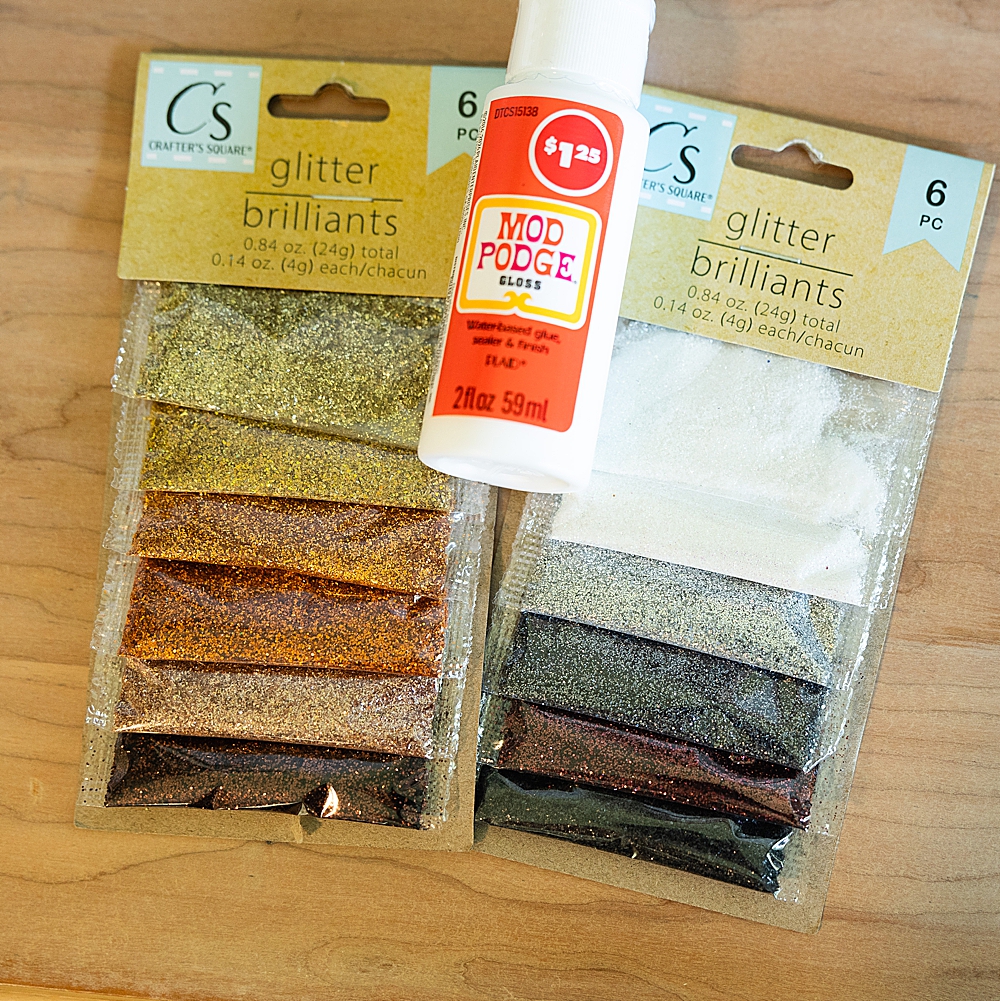
Here’s how I added ✨sparkle✨ to my ornaments: Dollar Tree glitter (the colors right now are gorgeous!) and Mod Podge – mix a little of both together and paint it on your baked, dried salt dough ornaments.

For the gold on the ornaments below, I brushed sparkly gold nail polish on! How easy is that?!

⬇️ :: PIN FOR LATER :: ⬇️

Decorating Ideas
Decorating your salt dough ornaments is where the fun really begins. Here are some ideas to get you started:
- Classic Christmas Ornaments: Paint the ornaments in traditional holiday colors like red, green, gold, and silver. Add glitter for a touch of sparkle. Personalize them with names, dates, or holiday messages to create keepsakes that can be cherished for years.
- Rustic Charm: For a rustic, farmhouse look, leave the ornaments unpainted or use muted, natural colors. Use twine or jute to hang them, and consider adding accents like small pinecones, cinnamon sticks, or dried orange slices.
- Handprint Keepsakes: For a special touch, create handprint or footprint ornaments. These are especially popular for capturing the tiny hands and feet of babies and toddlers. Roll out the dough, press the hand or foot into the dough, and then cut around the imprint with a round cutter.
- Personalized Gift Tags: Instead of traditional gift tags, make small salt dough ornaments and personalize them with the recipient’s name. Attach them to gifts for a unique and thoughtful touch.
- Ornaments with Texture: Before baking, add texture to your ornaments by pressing lace, leaves, or textured fabrics into the dough. The impression will create a beautiful pattern that can be highlighted with a wash of paint after baking.
- Essential Oil Diffusers: Add a few drops of essential oil to the dough before baking, or to the finished ornament. Hang these in your car, closet, or anywhere you want a pleasant scent. Cinnamon, pine, and peppermint are great choices for the holiday season.

Making It a Tradition
One of the best things about salt dough ornaments is that they’re more than just decorations—they’re memories in the making. Consider setting aside a day each year to create new ornaments, either by yourself or with family and friends. Over time, you’ll build a collection that tells a story, with each ornament representing a different year or stage in life. These ornaments make wonderful gifts, too—handmade, thoughtful, and personal.

Beautiful Salt Dough Ornaments
Ingredients
- 2 cups all-purpose white flour (not self-rising)
- 1 cup table salt
- 1 cup warm water
Instructions
- In a large mixing bowl, combine the flour and salt.
- Slowly pour the warm water into the flour and salt mixture, stirring as you go. You can use a wooden spoon or your hands for this step. The dough will start to come together and form a ball.
- Once the mixture forms a dough, transfer it to a floured surface and knead it for about 5 minutes. If the dough is too sticky, add a little more flour; if it’s too dry, add a tiny bit more water.
- Once the dough is well-kneaded, roll it out to about 1/4-inch thickness using a rolling pin. If you want thicker ornaments, you can roll it out to 1/2-inch thickness, but keep in mind that thicker ornaments will take longer to bake.
- Use cookie cutters to cut out your desired shapes. Don’t forget to use a straw or skewer to poke a hole at the top of each ornament so you can hang them later. If you're using a cookie stamp, now is the time to do that!
- Place the cut-out shapes on a baking sheet lined with parchment paper. Bake in a preheated oven at 225°F for 2-3 hours, until dry but not brown. The ornaments are done when they feel hard to the touch.
- Allow the ornaments to cool completely before decorating. Once cool, you can paint them with acrylic paints, add glitter, or even use markers to personalize them. Seal them with a clear varnish or a coat of Mod Podge to protect the surface and give them a nice finish.
Notes

Salt dough ornaments are a timeless, simple craft that anyone can enjoy. They’re easy to make, highly customizable, and perfect for creating lasting holiday memories. Whether you’re crafting with kids, creating personalized gifts, or simply enjoying a quiet afternoon of creativity, these ornaments are sure to bring joy to your home. So gather your ingredients, roll up your sleeves, and start crafting your own set of salt dough ornaments today. Happy crafting!
Another family-favorite Christmas ornament that we make every year are these Molasses Cookie Ornaments that my grandma used to always have on her tree! It’s a nostalgic (& yummy) tradition!


elektrolytter drikke apotek: Rask Apotek – Rask Apotek
http://efarmaciait.com/# EFarmaciaIt
https://efarmaciait.shop/# EFarmaciaIt
http://efarmaciait.com/# EFarmaciaIt
casenlax comprar online: diprogenta para hongos – nutriben empleo
Svenska Pharma [url=http://svenskapharma.com/#]Svenska Pharma[/url] apotej
https://papafarma.com/# opiniones mg
Svenska Pharma: Svenska Pharma – rosenrot bГ¤st i test
EFarmaciaIt [url=https://efarmaciait.com/#]codice sconto dr max[/url] EFarmaciaIt
http://efarmaciait.com/# EFarmaciaIt
http://svenskapharma.com/# Svenska Pharma
Rask Apotek: Rask Apotek – apotek Гёrevoks
vitaminer for hГҐr og negler apotek [url=http://raskapotek.com/#]Rask Apotek[/url] glidelaken apotek
https://papafarma.com/# farmacias cercanas a mi ubicación
dolmen pastillas: Papa Farma – Papa Farma
https://papafarma.shop/# Papa Farma
Svenska Pharma [url=http://svenskapharma.com/#]apotek express[/url] receptbelagd nässpray bihåleinflammation
https://papafarma.com/# Papa Farma
Svenska Pharma: ibuprofen flytande barn – apotek outlet
https://svenskapharma.shop/# Svenska Pharma
Papa Farma [url=https://papafarma.com/#]Papa Farma[/url] Papa Farma
Rask Apotek: Rask Apotek – Rask Apotek
https://raskapotek.shop/# Rask Apotek
https://papafarma.shop/# Papa Farma
EFarmaciaIt: amica farmacia telefono – EFarmaciaIt
http://efarmaciait.com/# EFarmaciaIt
apotek app [url=https://svenskapharma.shop/#]Svenska Pharma[/url] coronatest apotek
Rask Apotek: Rask Apotek – kjГёpe hurtigtest covid apotek
http://svenskapharma.com/# Svenska Pharma
https://papafarma.shop/# Papa Farma
apotek online snabb leverans: bГ¤sta Г¶gondroppar mot torra Г¶gon – ombud apotek
https://indiapharmglobal.shop/# India Pharm Global
canadian drugs [url=https://canadapharmglobal.com/#]medication canadian pharmacy[/url] ordering drugs from canada
Meds From Mexico: Meds From Mexico – medication from mexico pharmacy
https://indiapharmglobal.com/# india pharmacy mail order
https://canadapharmglobal.com/# canadian pharmacy king reviews
Meds From Mexico [url=http://medsfrommexico.com/#]best online pharmacies in mexico[/url] mexican pharmaceuticals online
buying from online mexican pharmacy: medicine in mexico pharmacies – mexican drugstore online
http://indiapharmglobal.com/# India Pharm Global
mexico drug stores pharmacies [url=https://medsfrommexico.com/#]Meds From Mexico[/url] buying prescription drugs in mexico online
Meds From Mexico: Meds From Mexico – mexico pharmacies prescription drugs
https://medsfrommexico.shop/# medication from mexico pharmacy
https://canadapharmglobal.shop/# canadian pharmacy price checker
India Pharm Global: Online medicine order – India Pharm Global
https://indiapharmglobal.shop/# buy prescription drugs from india
buying prescription drugs in mexico online: mexican mail order pharmacies – medication from mexico pharmacy
https://canadapharmglobal.com/# northern pharmacy canada
India Pharm Global [url=http://indiapharmglobal.com/#]buy medicines online in india[/url] top online pharmacy india
https://medsfrommexico.com/# best online pharmacies in mexico
best online pharmacies in mexico: Meds From Mexico – mexican online pharmacies prescription drugs
http://indiapharmglobal.com/# reputable indian pharmacies
Meds From Mexico [url=https://medsfrommexico.shop/#]best online pharmacies in mexico[/url] medicine in mexico pharmacies
india pharmacy mail order: India Pharm Global – India Pharm Global
https://medsfrommexico.com/# Meds From Mexico
https://indiapharmglobal.shop/# cheapest online pharmacy india
Meds From Mexico: Meds From Mexico – Meds From Mexico
https://indiapharmglobal.shop/# India Pharm Global
India Pharm Global [url=http://indiapharmglobal.com/#]mail order pharmacy india[/url] India Pharm Global
canada rx pharmacy world: online canadian pharmacy review – best canadian online pharmacy
https://medsfrommexico.shop/# buying from online mexican pharmacy
http://crestorpharm.com/# CrestorPharm
https://semaglupharm.com/# Semaglu Pharm
lipitor and coq10: Lipi Pharm – Affordable Lipitor alternatives USA
http://semaglupharm.com/# FDA-approved Rybelsus alternative
SemagluPharm: SemagluPharm – Semaglutide tablets without prescription
https://semaglupharm.com/# januvia and rybelsus
https://semaglupharm.shop/# Semaglu Pharm
CrestorPharm: plavix and crestor at the same time – Crestor Pharm
https://semaglupharm.com/# SemagluPharm
prednisone without a prescription [url=http://prednipharm.com/#]Predni Pharm[/url] prednisone price
Generic Crestor for high cholesterol: CrestorPharm – CrestorPharm
http://semaglupharm.com/# Semaglu Pharm
atorvastatin and colchicine [url=https://lipipharm.shop/#]atorvastatin and weight loss[/url] Lipi Pharm
http://semaglupharm.com/# can you buy rybelsus over the counter
where to buy prednisone 20mg no prescription: india buy prednisone online – Predni Pharm
https://semaglupharm.shop/# semaglutide en español
SemagluPharm: Semaglu Pharm – Semaglu Pharm
https://semaglupharm.shop/# SemagluPharm
where can you buy prednisone: prednisone prescription online – Predni Pharm
https://semaglupharm.shop/# Semaglu Pharm
https://prednipharm.com/# Predni Pharm
SemagluPharm [url=https://semaglupharm.com/#]Where to buy Semaglutide legally[/url] side effect of rybelsus
CrestorPharm: CrestorPharm – Crestor Pharm
prednisone 40 mg tablet [url=http://prednipharm.com/#]prednisone 2.5 tablet[/url] PredniPharm
prednisone over the counter south africa: Predni Pharm – generic prednisone cost
http://semaglupharm.com/# Semaglutide tablets without prescription
https://lipipharm.shop/# Lipi Pharm
https://semaglupharm.com/# rybelsus moa
LipiPharm: LipiPharm – difference between atorvastatin and rosuvastatin
rosuvastatin and thc [url=http://crestorpharm.com/#]Safe online pharmacy for Crestor[/url] Over-the-counter Crestor USA
http://semaglupharm.com/# Semaglu Pharm
where can you buy prednisone: prednisone coupon – PredniPharm
https://semaglupharm.com/# Semaglu Pharm
PredniPharm: how to buy prednisone – PredniPharm
Semaglu Pharm: Semaglu Pharm – Semaglu Pharm
PredniPharm: Predni Pharm – Predni Pharm
prednisone 20 mg pill [url=https://prednipharm.com/#]buy prednisone 10 mg[/url] prednisone 20mg nz
Semaglutide tablets without prescription: semaglutide dosage for weight loss – semaglutide to tirzepatide conversion chart
40 mg prednisone pill: prednisone 5 50mg tablet price – prednisone 10mg buy online
http://semaglupharm.com/# zepbound vs semaglutide
PredniPharm: PredniPharm – 54 prednisone
Affordable Rybelsus price: can you take semaglutide a day early – Online pharmacy Rybelsus
Affordable cholesterol-lowering pills [url=https://crestorpharm.shop/#]price of crestor 20 mg[/url] Crestor Pharm
crestor for high cholesterol: Crestor Pharm – Crestor Pharm
Semaglutide tablets without prescription: Semaglu Pharm – rybelsus 3mg tab
SemagluPharm [url=https://semaglupharm.shop/#]can you lose weight on rybelsus[/url] SemagluPharm
https://prednipharm.shop/# PredniPharm
prednisone in india: Predni Pharm – PredniPharm
Crestor Pharm: Crestor Pharm – CrestorPharm
lipitor statin: Lipi Pharm – Lipi Pharm
Predni Pharm [url=https://prednipharm.com/#]Predni Pharm[/url] PredniPharm
SemagluPharm: Semaglu Pharm – FDA-approved Rybelsus alternative
Predni Pharm: prednisone 60 mg daily – buy prednisone online from canada
LipiPharm: does atorvastatin raise blood sugar – Lipi Pharm
http://semaglupharm.com/# Where to buy Semaglutide legally
Safe delivery in the US: SemagluPharm – Rybelsus online pharmacy reviews
SemagluPharm: semaglutide peptide – semaglutide vs zepbound
Predni Pharm [url=http://prednipharm.com/#]PredniPharm[/url] prednisone 5 mg tablet price
SemagluPharm: Semaglu Pharm – SemagluPharm
Safe online pharmacy for Crestor: CrestorPharm – CrestorPharm
LipiPharm: Lipi Pharm – Lipi Pharm
https://lipipharm.shop/# LipiPharm
semaglutide sublingual dose: can semaglutide make you tired – Where to buy Semaglutide legally
SemagluPharm: No prescription diabetes meds online – Affordable Rybelsus price
Lipi Pharm [url=http://lipipharm.com/#]Safe atorvastatin purchase without RX[/url] atorvastatin liver damage
PredniPharm: PredniPharm – can you buy prednisone over the counter uk
Buy statins online discreet shipping: CrestorPharm – CrestorPharm
Semaglu Pharm: what is a semaglutide injection – Semaglu Pharm
10 mg prednisone [url=https://prednipharm.shop/#]PredniPharm[/url] prednisone 5 mg tablet cost
http://lipipharm.com/# USA-based pharmacy Lipitor delivery
Semaglu Pharm: how to get semaglutide with insurance – SemagluPharm
Crestor 10mg / 20mg / 40mg online: CrestorPharm – Crestor mail order USA
Crestor home delivery USA [url=https://crestorpharm.com/#]Crestor Pharm[/url] Buy statins online discreet shipping
Rybelsus 3mg 7mg 14mg: SemagluPharm – ozempic o rybelsus para adelgazar
prednisone online pharmacy: PredniPharm – prednisone otc uk
PredniPharm: buy 40 mg prednisone – PredniPharm
http://semaglupharm.com/# Semaglu Pharm
Crestor Pharm [url=http://crestorpharm.com/#]crestor 10 mg nedir[/url] CrestorPharm
Semaglu Pharm: Rybelsus side effects and dosage – Rybelsus 3mg 7mg 14mg
LipiPharm: Online statin drugs no doctor visit – lipitor and muscle pain
Crestor Pharm: Over-the-counter Crestor USA – CrestorPharm
buy viagra online in south africa: cheap genuine viagra – where to buy viagra pills
where can i purchase viagra online: VGR Sources – viagra online prescription canada
sildenafil 2 mg cost: harga viagra termurah – can i buy sildenafil online
https://vgrsources.com/# price for sildenafil 100 mg
brand viagra online canadian pharmacy: VGR Sources – where can i buy sildenafil tablets
viagra 150 mg price [url=https://vgrsources.com/#]best sildenafil brand[/url] where can i buy viagra in usa
cost viagra canada: 200 mg viagra india – can you buy viagra online without a prescription
viagra pills uk: can i buy generic viagra in canada – viagra prescription online
prescription viagra online usa [url=https://vgrsources.com/#]where to buy sildenafil citrate online[/url] price of sildenafil 100mg
sildenafil 12.5 mg: viagra price singapore – sildenafil 1.5
https://vgrsources.com/# purchase viagra no prescription
viagra 2019: sildenafil 10mg tablets – sildenafil tablets 100mg online
buy sildenafil generic online: where to buy female viagra in australia – over the counter viagra online
viagra 200mg price in india [url=https://vgrsources.com/#]how much is female viagra[/url] how can you get viagra over the counter
price of viagra 50mg in india: sildenafil 100mg price in india – 007 viagra
viagra for women pills: sildenafil 100mg price canada – how to get real viagra
buy viagra online no script: VGR Sources – generic viagra buy online india
price viagra 100mg [url=https://vgrsources.com/#]VGR Sources[/url] buy cheap viagra
best generic viagra brand: VGR Sources – generic viagra online pharmacy india
sildenafil tablets where to buy: VGR Sources – buy sildenafil australia
where can i buy real viagra online: where to buy viagra otc – viagra 2019
low price viagra: VGR Sources – buy viagra online canada with mastercard
007 viagra [url=https://vgrsources.com/#]buy viagra online india 100mg[/url] order sildenafil canada
viagra from canada prices: VGR Sources – 25mg viagra
order viagra online pharmacy: over the counter viagra 2017 – generic viagra india price
https://vgrsources.com/# where can i buy sildenafil
1 viagra pill: VGR Sources – generic viagra over the counter canada
sildenafil 20 mg online pharmacy [url=https://vgrsources.com/#]VGR Sources[/url] viagra gel for sale
2 sildenafil: VGR Sources – where can i get sildenafil without prescription
viagra 100mg tablet online: generic viagra best prices – canada pharmacy online viagra prescription
where to buy women viagra: VGR Sources – cheapest sildenafil 100mg uk
viagra brand canada: generic viagra online europe – female viagra online pharmacy
viagra 100mg tablet price: VGR Sources – generic viagra online united states
viagra over the counter price: where to get viagra in canada – can i buy sildenafil citrate
where can i buy cheap viagra in australia: viagra online cheap india – buy sildenafil without a prescription
female viagra mexico: VGR Sources – buy viagra 25 mg online india
viagra super active plus: india viagra tablets – sildenafil capsules in india
sildenafil 20 mg over the counter: 20 mg sildenafil 689 – buy cheap sildenafil online
price viagra uk: VGR Sources – sildenafil citrate tablets vs viagra
https://vgrsources.com/# where can i buy sildenafil 20mg
best viagra tablets india: sildenafil 50 price – how to buy viagra in usa
canadian pharmacy brand viagra: female viagra pharmacy australia – sildenafil buy without prescription
cheapest sildenafil australia: generic sildenafil 50 mg – buying viagra over the counter in usa
generic viagra lowest prices: VGR Sources – buy female viagra canada
order viagra 100mg online: VGR Sources – viagra tablets for sale
sildenafil prices in canada: VGR Sources – 100mg sildenafil no rx
https://vgrsources.com/# where can i buy viagra online safely
how much does viagra cost: VGR Sources – viagra buy usa
sildenafil women: cheap real viagra canada – viagra in india online
where can i get sildenafil: VGR Sources – how to get viagra united states
average cost of viagra 50mg: generic viagra sales – viagra pill cost canada
methylphenidate online pharmacy: Pharm Express 24 – warfarin continuing education pharmacy
ozempic india pharmacy [url=http://inpharm24.com/#]medplus pharmacy india[/url] india online pharmacy international shipping
klonopin mexico: can you order prescriptions online – online pharmacy store
best online pharmacy in india: india online pharmacy – buy medicines online
mexican pharmacy los algodones: buying meds in mexico – onlinedrugstore.com reviews
http://pharmmex.com/# buying adderall in mexico
mexican pharmacy sign [url=https://pharmmex.shop/#]Pharm Mex[/url] online pharmacy prices
registration in pharmacy council of india: InPharm24 – best online pharmacy india
mexican vet pharmacy [url=https://pharmmex.com/#]Pharm Mex[/url] methylprednisolone in mexico
most trusted canadian online pharmacy: sudafed in mexico – tijuana pharmacy ozempic
target pharmacy azithromycin: internet pharmacy manitoba – good neighbor pharmacy ibuprofen
online pharmacy india [url=http://inpharm24.com/#]buy medicine from india[/url] pharmacy india online
https://pharmexpress24.com/# clobetasol cream online pharmacy
online pharmacies in mexico: online drug store – can you buy adderrall from.a mexican pharmacy?
india online medicine: india online pharmacy market – india pharmacy cialis
online pharmacy no prescription zoloft: ddavp online pharmacy – indian pharmacy cialis
e pharmacy india [url=https://inpharm24.com/#]medicine delivery in vadodara[/url] online medicine order
drug online store: ez pharmacy tijuana – best canadian pharmacy for us citizens
mexican pharmacy vyvanse: sudafed in mexico – drug online store
can you buy viagra in pharmacy [url=https://pharmexpress24.com/#]Atacand[/url] global rx pharmacy irvine
z-pack online pharmacy: cheapest pharmacy to buy cialis – med rx online pharmacy
pharmacy online levitra [url=https://pharmexpress24.shop/#]lidocaine cream pharmacy[/url] legitimate online pharmacy viagra
https://inpharm24.shop/# indian pharmacy
pharmacy direct viagra: pharmacy certificate programs online – abilify pharmacy coupon
b pharmacy salary in india: india online pharmacy – career after b pharmacy in india
farmacia mexicana [url=https://pharmmex.shop/#]mexican pharmacy methylphenidate[/url] mexican pharmacy ivermectin
best online pharmacy: InPharm24 – all day pharmacy india
medicine online shopping [url=http://inpharm24.com/#]cheap online pharmacy india[/url] india pharmacy no prescription
buy viagra online in india: buy medication from india – pharmacy website in india
drug pharmacy online: mail order pharmacy mounjaro – order ozempic from mexico
india pharmacy online: medical store online – pharmacy name ideas in india
is mexican rx pharmacy legit [url=https://pharmmex.com/#]Pharm Mex[/url] mexican tramadol cost
shoppers drug mart pharmacy: Pharm Express 24 – Albenza
https://pharmexpress24.com/# online pharmacy vardenafil
clomiphene medication uk can you buy cheap clomiphene pills cheap clomid for sale where to buy cheap clomiphene cheap clomid online generic clomid pill can you buy clomiphene without insurance
ricetta elettronica: clody 200 acquisto online – clexane 6.000 prezzo
zibenak 25.000 prezzo [url=https://farmaciasubito.shop/#]argotone neonato 1 mese[/url] voltaren compresse 75 mg
surmenalit farmacia online: comprar ozempic farmacia online – compra online farmacia central oeste
farmacia online farmacosmo: farmacia online-italia – comprar valium sin receta
viagra gГ©nГ©rique sans ordonnance en pharmacie [url=https://pharmacieexpress.shop/#]mouche bebe poire[/url] pharmacie mГ©dicaments sans ordonnance
https://confiapharma.shop/# misoprostol se puede comprar sin receta
se puede comprar clonazepam sin receta: comprar joyas sin receta – comprar diclofenaco sin receta
pantorc 40 prezzo: clensia e mutuabile – fertifol 400 prezzo
5 gocce di ansiolin [url=https://farmaciasubito.shop/#]brufecod 400 a cosa serve[/url] tobral pomata prezzo
farmacia pet online: mejor farmacia online madrid – diprogenta farmacia online
peut on avoir du spasfon sans ordonnance [url=https://pharmacieexpress.shop/#]Pharmacie Express[/url] ordonnance mГ©decin gГ©nГ©raliste
http://confiapharma.com/# farmacia bebe online
comprar pleinvue precio sin receta: comprar tranxilium 50 sin receta – penicilina se puede comprar sin receta
angine pharmacie sans ordonnance [url=http://pharmacieexpress.com/#]peut on se faire vacciner en pharmacie sans ordonnance[/url] acheter du viagra en ligne
se puede comprar lidocaina sin receta: tadalafil farmacia online – farmacia online toledo opiniones
viagra homme acheter: Pharmacie Express – peut on acheter du viagra en pharmacie sans ordonnance au quebec
spedra prix [url=https://pharmacieexpress.shop/#]serum filorga[/url] medicament pour faire l’amour plusieur fois pharmacie sans ordonnance
comprar amoxicilina online sin receta [url=https://confiapharma.com/#]se puede comprar clenbuterol sin receta[/url] farmacia online xl descuento
farmacia granero sanmartin online: farmacia online cagliari – rubifen comprar sin receta
farmacia online senza spese di spedizione [url=https://farmaciasubito.shop/#]decoderm crema[/url] dibase prezzo
medicament avec ordonnance: du zinc picolinate en pharmacie sans ordonnance – cialis sans ordonnance pas cher
https://confiapharma.shop/# donde comprar viagra en andorra sin receta
ordonnance tadalafil [url=https://pharmacieexpress.com/#]Pharmacie Express[/url] dГ©livrance fosfomycine sans ordonnance
mascarillas ffp2 con valvula farmacia online: Confia Pharma – farmacia online con ricetta medica
antidГ©presseur sans ordonnance pharmacie: peut on aller voir un rhumatologue sans ordonnance – ovule sans ordonnance pharmacie
http://pharmacieexpress.com/# pharmacie monuril sans ordonnance
la naltrexona se puede comprar sin receta [url=https://confiapharma.com/#]Confia Pharma[/url] algidol precio sin receta comprar
a derma rheacalm: pharmacie monuril sans ordonnance – tramadol sans ordonnance pharmacie
se puede comprar viagra sin receta en una farmacia: ¿qué óvulos se pueden comprar sin receta? – test online tecnico de farmacia
cystite remede sans ordonnance: Pharmacie Express – zona traitement pharmacie sans ordonnance
xatral 10 mg prezzo [url=https://farmaciasubito.com/#]artrotec 75[/url] farmacia tedesca online
farmacia online xenical: comprar pastilla ellaone sin receta – se puede comprar dexametasona sin receta
zhekort spray prezzo: Farmacia Subito – mascherine chirurgiche monouso farmacia online
amoxina sciroppo prezzo: ozempic price in italy – metformina 500 prezzo
comprar sumial farmacia online: donde comprar galotam sin receta – comprar on line rohipnol 2mg sin receta medica
kestine antistaminico prezzo: farmacia micale – flubason bustine e mutuabile prezzo
https://pharmacieexpress.com/# cardiologue faut il une ordonnance
epitheliale ah duo: m̩dicament en soute sans ordonnance Рpharmacie ordonnance sans carte vitale
brosse Г dent gum: aller chez l’orl sans ordonnance – traitement cystite sans ordonnance
donde comprar wegovy sin receta en espaГ±a [url=https://confiapharma.shop/#]comprar dogmatil sin receta[/url] farmacia en online
cialis generique 20mg: Pharmacie Express – spedra 100 mg
pharmacie en ligne sans ordonnance canada: coquelusedal adulte sans ordonnance Рsomnif̬res sans ordonnance en pharmacie
https://confiapharma.shop/# farmacia meritxell tienda online
cГіmo comprar viagra sin receta: Confia Pharma – farmacia online loreto
augmentin antibiotico prezzo: Farmacia Subito – quanto costa il bentelan
somnifГЁre sans ordonnance en pharmacie [url=http://pharmacieexpress.com/#]cialis prix 5mg[/url] mГ©dicament pour la prostate en pharmacie sans ordonnance
farmacia online l vazquez: se puede comprar tranxilium sin receta medica – farmacia farmacia online
Bonus ₹30 – Teen Patti Sweet is a free-to-play game app that takes its inspiration from the well-loved Indian version of poker — Teen Patti. This virtual card game, developed by GreenyCloudet limit, is originally played by three or more players and requires a standard 52-card deck. Min. Withdrawal ₹500 – Decide whether you want to play Teen Patti for fun or if you’re interested in real-money gaming. There are numerous online platforms and mobile apps that offer Teen Patti games. SignUp Bonus ₹39 – 3. Teen Patti – Friends, Teen Patti is such a game in which 5 players can sit together and play, whoever has the biggest slot in the slot given for the dealer is the winner. If you’re looking for a teen patti game that lets you play with others online, then Teen Patti Diamond: 3 Patti is a good option to consider. It’s straightforward and you can start playing right away after installing it. Just make sure you have a decent internet connection for a smooth gameplay experience.
https://togoro.co.tz/payment-options-for-canadian-aviator-casinos-a-comprehensive-review/
There are five living species of Rhinoceros. The two African species: the white rhinoceros and the black rhinoceros, and the three Asian species: the Indian rhinoceros, the Javan rhinoceros and the Sumatran rhinoceros. RummyBonusApp is well acknowledged as a game that needs a high level of intellect and mental prowess. Globally, statisticians, economists, and chess grandmasters acknowledge that poker requires a high degree of skill. E xcept for Andhra Pradesh, Sikkim, Nagaland, Assam, Arunachal Pradesh, Tamil Nadu, Odisha, and Telangana, all Indian states exempt “games of skill” or “games of mere skill” from the concept of gambling. Dragon Tiger Slots – Up Down reinvents the classic card game format by intertwining the thrill of slot machine gameplay. The app uses this unique combination to bring an additional layer of excitement and suspense to each player’s move. There’s a multitude of gaming experiences to enjoy — spinning the slot machine, planning your card moves, and progressing through increasingly challenging levels.
prix bas Viagra generique [url=http://viasansordonnance.com/#]prix bas Viagra generique[/url] Meilleur Viagra sans ordonnance 24h
commander sans consultation medicale: pharmacie en ligne pas cher – pharmacie en ligne sans ordonnance
acheter Cialis sans ordonnance: commander Cialis en ligne sans prescription – pharmacie en ligne france livraison belgique
Viagra generique en pharmacie [url=https://viasansordonnance.shop/#]Meilleur Viagra sans ordonnance 24h[/url] viagra sans ordonnance
Achat mГ©dicament en ligne fiable: Acheter Cialis 20 mg pas cher – cialis prix
http://viasansordonnance.com/# Meilleur Viagra sans ordonnance 24h
pharmacie internet fiable France [url=https://pharmsansordonnance.com/#]acheter medicaments sans ordonnance[/url] pharmacie en ligne sans ordonnance
Meilleur Viagra sans ordonnance 24h: viagra sans ordonnance – Acheter du Viagra sans ordonnance
Viagra sans ordonnance 24h: Acheter viagra en ligne livraison 24h – Viagra sans ordonnance 24h
kamagra oral jelly [url=https://kampascher.shop/#]kamagra gel[/url] pharmacie en ligne sans ordonnance
Medicaments en ligne livres en 24h: pharmacie en ligne sans prescription – Achat mГ©dicament en ligne fiable
acheter Kamagra sans ordonnance [url=https://kampascher.shop/#]kamagra en ligne[/url] kamagra pas cher
https://kampascher.com/# kamagra en ligne
commander sans consultation medicale: acheter medicaments sans ordonnance – pharmacie en ligne france livraison belgique
kamagra pas cher: kamagra 100mg prix – commander Kamagra en ligne
Meilleur Viagra sans ordonnance 24h [url=https://viasansordonnance.com/#]SildГ©nafil 100 mg sans ordonnance[/url] Viagra generique en pharmacie
Medicaments en ligne livres en 24h: Medicaments en ligne livres en 24h – pharmacie en ligne france pas cher
commander sans consultation medicale [url=http://pharmsansordonnance.com/#]commander sans consultation medicale[/url] pharmacie en ligne
achat kamagra: kamagra livraison 24h – commander Kamagra en ligne
pharmacie en ligne: cialis sans ordonnance – Acheter Cialis
Acheter Cialis [url=http://ciasansordonnance.com/#]traitement ED discret en ligne[/url] Cialis pas cher livraison rapide
Kamagra oral jelly pas cher: achat kamagra – achat kamagra
https://viasansordonnance.com/# Viagra generique en pharmacie
Pharmacies en ligne certifiees [url=http://pharmsansordonnance.com/#]pharmacie en ligne pas cher[/url] Achat mГ©dicament en ligne fiable
pharmacie en ligne sans ordonnance: vente de mГ©dicament en ligne – vente de mГ©dicament en ligne
https://pharmsansordonnance.shop/# pharmacie en ligne sans ordonnance
acheter Viagra sans ordonnance [url=https://viasansordonnance.com/#]Viagra generique en pharmacie[/url] Meilleur Viagra sans ordonnance 24h
pharmacie en ligne avec ordonnance: Pharmacies en ligne certifiees – vente de mГ©dicament en ligne
kamagra oral jelly: commander Kamagra en ligne – kamagra livraison 24h
https://viasansordonnance.shop/# Viagra generique en pharmacie
Acheter Cialis: Acheter Cialis – Cialis pas cher livraison rapide
acheter Viagra sans ordonnance: Viagra generique en pharmacie – viagra en ligne
https://ciasansordonnance.shop/# cialis generique
pharmacie en ligne avec ordonnance: pharmacie internet fiable France – Pharmacie en ligne livraison Europe
http://viasansordonnance.com/# Viagra generique en pharmacie
kamagra en ligne: Kamagra oral jelly pas cher – kamagra pas cher
pharmacie en ligne sans ordonnance: achat kamagra – kamagra oral jelly
https://kampascher.com/# livraison discrete Kamagra
viagra sans ordonnance: Viagra generique en pharmacie – Acheter du Viagra sans ordonnance
livraison rapide Viagra en France: viagra sans ordonnance – Viagra generique en pharmacie
pharmacie en ligne sans prescription: pharmacie en ligne – pharmacie en ligne france pas cher
pharmacie en ligne sans prescription: pharmacie en ligne sans prescription – pharmacie en ligne pas cher
https://pharmau24.com/# Online drugstore Australia
over the counter antibiotics: Biot Pharm – antibiotic without presription
buy antibiotics from canada: buy antibiotics online uk – get antibiotics without seeing a doctor
online pharmacy australia [url=https://pharmau24.shop/#]Medications online Australia[/url] pharmacy online australia
https://eropharmfast.shop/# Ero Pharm Fast
Ero Pharm Fast: Ero Pharm Fast – Ero Pharm Fast
Ero Pharm Fast: ed online treatment – cheap ed medicine
https://eropharmfast.com/# ed pills
Pharm Au24: PharmAu24 – online pharmacy australia
Online medication store Australia: Licensed online pharmacy AU – Licensed online pharmacy AU
Ero Pharm Fast: Ero Pharm Fast – online ed drugs
https://pharmau24.shop/# Pharm Au24
Online drugstore Australia: Buy medicine online Australia – Online medication store Australia
https://pharmau24.com/# Buy medicine online Australia
Online medication store Australia: PharmAu24 – PharmAu24
Medications online Australia: pharmacy online australia – Online drugstore Australia
Ero Pharm Fast [url=https://eropharmfast.com/#]buy erectile dysfunction pills[/url] buy ed meds
cheapest antibiotics: buy antibiotics online uk – over the counter antibiotics
online ed prescription: Ero Pharm Fast – Ero Pharm Fast
get antibiotics without seeing a doctor: buy antibiotics online – get antibiotics without seeing a doctor
ed online prescription: online prescription for ed – Ero Pharm Fast
https://biotpharm.com/# Over the counter antibiotics for infection
Unless, under section 321 of the Companies Act 1993, written objection to removal of any of the above companies is delivered to the Registrar by 19 March 2024, being not less than 20 working days from the date of this notice, the Registrar is required to remove the companies from the Register. I looked for my last post as a Detroit Public School teacher in 1996. The building stands on the northwestern corner of Mack and Mount Elliott. The parking lot didn\u2019t have parked cars. The lighted sign frame didn\u2019t have a sign on it. Someone had painted a strange set of numbers on the brick exterior. The number format reminded me of bible verses, such as John 3:16. But the numbers were too high: 17: 63 and 19:87 and more. I need to visit and write the numbers down. If a phone is your camera of choice, make sure you have enough free memory to handle all your vacation images. And don’t forget your charging cable! Good natural light always helps a phone image look better, so try and snag a window seat. A multitude of apps help make phones powerful storytelling tools. You can capture video, stills, and create time-lapses. Just remember to focus lock on your subject. (Google it for your type of phone.) Photo-retouching apps like Snapseed are affordable and offer a lot of customization options. Social media powers like Instagram allow you to share your adventure in real time. And they provide some pretty fun tools – boomerangs anyone? – to help you get creative as you capture your journey.
https://snelvembterdia1983.tearosediner.net/more-hints
These apps, like Game Guardian, are preferred by gamers who are looking for quick and effective ways to hack bombinha game on their cell phones. With Mines Hack v3 online casino gaming becomes more easy and convenient. Now you fully control the Mine’s outcome with our app. Simply make yourself register and get Mines hack game APK for Android phone. Game Speed Hack Ads Free Are you ready to put your skills to the test? DownloadMines Gametoday and embark on your journey through the mines! With its mix of strategy, logic, and fun, you’ll find yourself coming back for more. Experience the thrill of discovery and the satisfaction of victory as you sweep the mines and conquer each level! One-click to install XAPK APK files on Android! Thanks for your rating and feedback! Before diving into the details, it’s important to note that the Mines Bet hack comes with considerable risks, both legal and in-game. If you’re curious about how this Mines hack works, read on to find out more.
ed meds cheap: where to buy ed pills – online ed treatments
Ero Pharm Fast: buy ed meds – Ero Pharm Fast
get antibiotics without seeing a doctor: Biot Pharm – buy antibiotics from india
http://pharmau24.com/# Online drugstore Australia
Online medication store Australia [url=https://pharmau24.shop/#]Pharm Au 24[/url] Medications online Australia
antibiotic without presription: buy antibiotics online – buy antibiotics from india
Pharm Au24: Buy medicine online Australia – Online medication store Australia
antibiotic without presription: Biot Pharm – over the counter antibiotics
get antibiotics quickly [url=https://biotpharm.shop/#]buy antibiotics over the counter[/url] buy antibiotics over the counter
get antibiotics without seeing a doctor: get antibiotics without seeing a doctor – buy antibiotics from canada
Ero Pharm Fast: Ero Pharm Fast – Ero Pharm Fast
buy antibiotics from canada: BiotPharm – Over the counter antibiotics pills
pharmacy online australia [url=https://pharmau24.com/#]Buy medicine online Australia[/url] pharmacy online australia
Ero Pharm Fast: ed online prescription – Ero Pharm Fast
buy antibiotics from canada: get antibiotics quickly – get antibiotics quickly
how much does cialis cost per pill: erectile dysfunction tadalafil – best price cialis supper active
https://tadalaccess.com/# tadalafil 20mg (generic equivalent to cialis)
cialis vs flomax for bph: cialis 20 mg price costco – cialis genetic
cialis and poppers: Tadal Access – cialis generic timeline 2018
cialis generic over the counter [url=https://tadalaccess.com/#]cialis package insert[/url] generic tadalafil tablet or pill photo or shape
cialis dosis: Tadal Access – cialis for performance anxiety
cialis pills for sale: over the counter drug that works like cialis – how to buy tadalafil online
https://tadalaccess.com/# tadalafil tablets 20 mg side effects
cialis efectos secundarios [url=https://tadalaccess.com/#]TadalAccess[/url] cialis and poppers
cialis generic release date: TadalAccess – cialis for daily use cost
https://tadalaccess.com/# sildenafil vs cialis
when will cialis become generic: compounded tadalafil troche life span – cialis side effects forum
maximpeptide tadalafil review: Tadal Access – san antonio cialis doctor
cost of cialis for daily use [url=https://tadalaccess.com/#]TadalAccess[/url] when to take cialis 20mg
https://tadalaccess.com/# too much cialis
cialis 20 mg coupon: does cialis raise blood pressure – cialis and poppers
cialis online without prescription [url=https://tadalaccess.com/#]brand cialis[/url] buy cialis without prescription
buy cialis generic online 10 mg [url=https://tadalaccess.com/#]cialis black review[/url] is there a generic equivalent for cialis
cialis slogan: Tadal Access – tadalafil hong kong
how to buy tadalafil: TadalAccess – canadian cialis 5mg
https://tadalaccess.com/# does tadalafil lower blood pressure
cialis black review: Tadal Access – cheap cialis pills uk
tadalafil oral jelly: Tadal Access – cialis interactions
https://tadalaccess.com/# cialis sample request form
mail order cialis [url=https://tadalaccess.com/#]buy generic cialis 5mg[/url] cialis discount card
nebenwirkungen tadalafil: TadalAccess – cialis 30 mg dose
tadalafil and ambrisentan newjm 2015: buy tadalafil online paypal – pharmacy 365 cialis
best price on generic tadalafil: cialis dosage 20mg – cialis san diego
cialis recommended dosage: generic tadalafil in us – buying cialis internet
cialis mexico [url=https://tadalaccess.com/#]whats cialis[/url] nebenwirkungen tadalafil
https://tadalaccess.com/# u.s. pharmacy prices for cialis
tadalafil softsules tuf 20: buy cialis from canada – vardenafil tadalafil sildenafil
tadalafil troche reviews: TadalAccess – purchase cialis online
vardenafil tadalafil sildenafil: Tadal Access – can you purchase tadalafil in the us
cialis 40 mg reviews: canadian cialis 5mg – cialis side effects
cialis black 800 to buy in the uk one pill [url=https://tadalaccess.com/#]stockists of cialis[/url] cialis shipped from usa
https://tadalaccess.com/# cheap cialis with dapoxetine
is tadalafil the same as cialis: Tadal Access – does tadalafil lower blood pressure
cialis free trial offer: Tadal Access – cialis what is it
cialis 30 mg dose [url=https://tadalaccess.com/#]Tadal Access[/url] cialis with out a prescription
how to take cialis: cialis where to buy in las vegas nv – non prescription cialis
https://tadalaccess.com/# cialis online without perscription
cialis 5mg best price: buy cialis online from canada – tadalafil (tadalis-ajanta)
buy cialis without a prescription: canadian pharmacy online cialis – how long does it take for cialis to take effect
cialis canadian purchase: TadalAccess – does cialis raise blood pressure
cialis before and after pictures [url=https://tadalaccess.com/#]cialis from canada[/url] usa peptides tadalafil
mail order cialis: Tadal Access – buy liquid cialis online
cialis same as tadalafil: cialis advertisement – buying cialis without a prescription
https://tadalaccess.com/# tadalafil cheapest price
cialis tablet: buy generic cialis – cialis where to buy in las vegas nv
cialis discount card [url=https://tadalaccess.com/#]Tadal Access[/url] over the counter cialis walgreens
cialis free samples: TadalAccess – is tadalafil from india safe
combitic global caplet pvt ltd tadalafil: Tadal Access – cialis by mail
https://tadalaccess.com/# mantra 10 tadalafil tablets
buy tadalafil cheap online: TadalAccess – when should you take cialis
is tadalafil and cialis the same thing? [url=https://tadalaccess.com/#]what does generic cialis look like[/url] cialis 20 mg price walmart
cialis canada pharmacy no prescription required: cialis and poppers – tadalafil generic headache nausea
https://tadalaccess.com/# buy cialis online without prescription
comprar tadalafil 40 mg en walmart sin receta houston texas: cialis next day delivery – cialis manufacturer coupon
buy cialis overnight shipping [url=https://tadalaccess.com/#]TadalAccess[/url] cialis cost at cvs
what is cialis pill [url=https://tadalaccess.com/#]Tadal Access[/url] does tadalafil lower blood pressure
https://tadalaccess.com/# tadalafil how long to take effect
cialis sublingual: Tadal Access – cialis bodybuilding
cialis side effects forum [url=https://tadalaccess.com/#]TadalAccess[/url] is tadalafil as effective as cialis
vardenafil vs tadalafil: cialis pricing – cialis daily vs regular cialis
cialis usa: Tadal Access – cialis soft tabs
https://tadalaccess.com/# cheap cialis dapoxitine cheap online
where to buy cialis: cialis otc 2016 – cialis in las vegas
what is cialis: generic tadalafil 40 mg – buy cialis usa
where can i buy cialis online in canada [url=https://tadalaccess.com/#]TadalAccess[/url] cialis samples for physicians
https://tadalaccess.com/# pastillas cialis
cheap cialis for sale: cialis for bph insurance coverage – cialis review
prescription for cialis: tadalafil 40 mg india – tadalafil vs cialis
overnight cialis: prices of cialis – cialis super active plus reviews
buying cialis [url=https://tadalaccess.com/#]Tadal Access[/url] cialis 20 mg price walgreens
https://tadalaccess.com/# cialis reviews
cialis a domicilio new jersey: cialis cheapest prices – cialis 20 mg how long does it take to work
cialis purchase canada: TadalAccess – tadalafil (tadalis-ajanta) reviews
cialis com free sample: tadalafil hong kong – buy cialis united states
cialis vs flomax [url=https://tadalaccess.com/#]best price on generic tadalafil[/url] tadalafil citrate
https://tadalaccess.com/# cialis online no prior prescription
brand cialis with prescription: TadalAccess – tadalafil eli lilly
buy cialis united states: Tadal Access – cialis and nitrates
no prescription female cialis: cialis how long – cialis brand no prescription 365
https://tadalaccess.com/# 20 mg tadalafil best price
best price on cialis [url=https://tadalaccess.com/#]tadalafil and voice problems[/url] cialis dosis
cialis commercial bathtub: TadalAccess – cialis for performance anxiety
sildenafil vs tadalafil vs vardenafil: Tadal Access – cialis going generic
cialis no perscription overnight delivery: cialis uses – cialis doesnt work
https://tadalaccess.com/# cialis canada price
tadalafil versus cialis [url=https://tadalaccess.com/#]cheapest cialis online[/url] cialis 5mg price cvs
price of cialis at walmart: cialis 800 black canada – cialis 800 black canada
stockists of cialis: TadalAccess – cialis doesnt work
https://tadalaccess.com/# cialis coupon rite aid
generic tadalafil prices [url=https://tadalaccess.com/#]TadalAccess[/url] order cialis online
side effects of cialis daily: tadalafil cheapest online – how long i have to wait to take tadalafil after antifugal
cialis tubs: cialis generic best price that accepts mastercard – cialis 20mg
mint pharmaceuticals tadalafil: cialis 30 mg dose – tadalafil generic usa
https://tadalaccess.com/# truth behind generic cialis
purchase cialis on line [url=https://tadalaccess.com/#]TadalAccess[/url] cialis prostate
cialis trial pack: TadalAccess – cialis softabs online
cheap cialis 5mg: TadalAccess – buy tadalafil online canada
cialis superactive: what is cialis taken for – cialis doesnt work for me
https://tadalaccess.com/# what is cialis good for
cialis dosis [url=https://tadalaccess.com/#]when does tadalafil go generic[/url] where to buy cialis online
cialis professional 20 lowest price: tadalafil and ambrisentan newjm 2015 – cialis none prescription
cialis coupon rite aid: Tadal Access – cialis for daily use reviews
buy cialis on line: TadalAccess – cialis experience reddit
https://tadalaccess.com/# when to take cialis 20mg
cialis prices [url=https://tadalaccess.com/#]TadalAccess[/url] cialis for sale brand
cialis back pain: cialis a domicilio new jersey – is tadalafil and cialis the same thing?
https://tadalaccess.com/# cialis online reviews
cialis precio: what happens if a woman takes cialis – cialis generic over the counter
buy cheapest cialis: TadalAccess – tadalafil (tadalis-ajanta)
cialis for enlarged prostate [url=https://tadalaccess.com/#]generic tadalafil canada[/url] buy cheap tadalafil online
https://tadalaccess.com/# cialis dosage for bph
what is the difference between cialis and tadalafil: when will cialis be generic – reliable source cialis
what to do when cialis stops working: Tadal Access – cialis 5 mg price
purchasing cialis online: cialis canada pharmacy no prescription required – generic tadalafil canada
https://tadalaccess.com/# canadian cialis
buy generic cialiss: cialis 20 mg best price – cialis sample
side effects of cialis tadalafil: ordering cialis online – cialis how to use
online cialis australia: buying cialis in canada – cialis super active real online store
cialis buy online canada [url=https://tadalaccess.com/#]Tadal Access[/url] cialis dosage side effects
cialis slogan: uses for cialis – cialis price per pill
cialis super active reviews: TadalAccess – buy cialis overnight shipping
when will cialis be over the counter [url=https://tadalaccess.com/#]TadalAccess[/url] tadalafil dapoxetine tablets india
buy cialis without doctor prescription: TadalAccess – purchase cialis online
sildalis sildenafil tadalafil: Tadal Access – cialis brand no prescription 365
https://tadalaccess.com/# best price on cialis
prices of cialis 20 mg [url=https://tadalaccess.com/#]cialis black in australia[/url] cialis pills pictures
how long before sex should i take cialis: cialis tadalafil cheapest online – maximpeptide tadalafil review
cheapest cialis: cialis experience reddit – letairis and tadalafil
tadalafil citrate powder: Tadal Access – how to buy tadalafil online
https://tadalaccess.com/# can you drink wine or liquor if you took in tadalafil
tadalafil soft tabs [url=https://tadalaccess.com/#]cialis reddit[/url] cheap generic cialis
cialis manufacturer coupon lilly: Tadal Access – cialis side effects with alcohol
cialis overdose: is tadalafil available at cvs – free samples of cialis
https://tadalaccess.com/# tadalafil review forum
cialis on sale [url=https://tadalaccess.com/#]buy cialis canada paypal[/url] cialis trial
canadian pharmacy tadalafil 20mg: TadalAccess – best time to take cialis 20mg
when is the best time to take cialis: TadalAccess – canadian pharmacy generic cialis
cialis for performance anxiety: TadalAccess – cialis canada free sample
https://tadalaccess.com/# cialis 20 mg price walgreens
how much does cialis cost per pill: TadalAccess – cheap cialis canada
is tadalafil as effective as cialis: Tadal Access – buying cialis without a prescription
cialis recreational use [url=https://tadalaccess.com/#]Tadal Access[/url] cialis tadalafil 20 mg
difference between sildenafil and tadalafil: TadalAccess – cheapest 10mg cialis
https://tadalaccess.com/# over the counter drug that works like cialis
when is generic cialis available: cialis online canada ripoff – when does the cialis patent expire
cialis prostate [url=https://tadalaccess.com/#]Tadal Access[/url] what happens when you mix cialis with grapefruit?
when to take cialis 20mg: TadalAccess – best place to buy liquid tadalafil
https://tadalaccess.com/# vigra vs cialis
cialis 50mg: Tadal Access – generic tadalafil in us
buying cialis in canada: Tadal Access – cialis by mail
cialis side effect: Tadal Access – can tadalafil cure erectile dysfunction
https://tadalaccess.com/# is generic tadalafil as good as cialis
cialis max dose: cialis mit paypal bezahlen – cialis not working first time
e-cialis hellocig e-liquid: prescription for cialis – does cialis make you harder
cialis images [url=https://tadalaccess.com/#]Tadal Access[/url] cialis generic cvs
https://tadalaccess.com/# liquid tadalafil research chemical
cialis patent expiration 2016: TadalAccess – cialis discount coupons
generic cialis 20 mg from india: cialis dapoxetine europe – where to buy cialis in canada
where to buy generic cialis ?: TadalAccess – printable cialis coupon
buy cialis no prescription overnight [url=https://tadalaccess.com/#]TadalAccess[/url] what is cialis used to treat
https://tadalaccess.com/# cialis sublingual
evolution peptides tadalafil: whats cialis – shelf life of liquid tadalafil
cheap cialis pills: TadalAccess – cialis doesnt work for me
what is cialis used for: TadalAccess – cialis premature ejaculation
https://tadalaccess.com/# no presciption cialis
cialis 5mg daily [url=https://tadalaccess.com/#]where to buy tadalafil in singapore[/url] cialis 5 mg tablet
cialis manufacturer: what cialis – cialis review
how to take liquid tadalafil: cialis black 800 to buy in the uk one pill – cialis 20 mg price walmart
cialis tadalafil & dapoxetine: tadalafil medication – difference between sildenafil and tadalafil
https://tadalaccess.com/# cialis generic 20 mg 30 pills
cialis tadalafil 5mg once a day: Tadal Access – whats cialis
tadalafil online paypal [url=https://tadalaccess.com/#]cialis pill canada[/url] canada drug cialis
when should i take cialis: Tadal Access – when does the cialis patent expire
cialis patent: tamsulosin vs. tadalafil – pictures of cialis pills
https://tadalaccess.com/# buy cialis toronto
cialis high blood pressure: Tadal Access – buy cialis with dapoxetine in canada
cialis generics: Tadal Access – cialis sample
tadalafil cialis [url=https://tadalaccess.com/#]TadalAccess[/url] tadalafil (tadalis-ajanta)
cialis pill canada: Tadal Access – how long for cialis to take effect
http://clomhealth.com/# get generic clomid without rx
cheap clomid [url=https://clomhealth.com/#]can i order generic clomid online[/url] cost of generic clomid price
where can i get amoxicillin: rexall pharmacy amoxicillin 500mg – amoxicillin 500mg capsules uk
cost clomid tablets: Clom Health – where to buy cheap clomid no prescription
get generic clomid pills: buying cheap clomid without insurance – order clomid no prescription
https://amohealthcare.store/# Amo Health Care
clomid [url=https://clomhealth.shop/#]generic clomid tablets[/url] where to get clomid pills
buying generic clomid no prescription: Clom Health – can i purchase clomid tablets
10mg prednisone daily: PredniHealth – prednisone 5 mg cheapest
prednisone 5 mg tablet without a prescription: PredniHealth – PredniHealth
https://clomhealth.com/# can you get cheap clomid prices
amoxicillin 500mg over the counter [url=https://amohealthcare.store/#]Amo Health Care[/url] cost of amoxicillin prescription
cost of generic clomid: clomid otc – generic clomid prices
clomid for sale: cost clomid – how to get cheap clomid prices
order prednisone: PredniHealth – online order prednisone 10mg
https://clomhealth.shop/# where buy clomid no prescription
generic prednisone online: canadian online pharmacy prednisone – prednisone buy canada
amoxicillin 500 mg online [url=https://amohealthcare.store/#]amoxicillin online without prescription[/url] Amo Health Care
where buy cheap clomid: order clomid prices – how to buy cheap clomid without prescription
Amo Health Care: Amo Health Care – buy amoxicillin online with paypal
where buy clomid without a prescription: Clom Health – clomid generics
https://prednihealth.shop/# PredniHealth
Amo Health Care: amoxicillin 500mg capsule buy online – Amo Health Care
where buy clomid price: can i order clomid for sale – can i purchase generic clomid online
Amo Health Care: Amo Health Care – amoxicillin 500 mg tablet price
buying cheap clomid without dr prescription [url=https://clomhealth.com/#]Clom Health[/url] clomid buy
Amo Health Care: order amoxicillin uk – Amo Health Care
https://clomhealth.shop/# how to buy cheap clomid online
buying clomid pills: Clom Health – can i get generic clomid pill
buy amoxicillin 500mg: Amo Health Care – Amo Health Care
where can i get clomid tablets: cost cheap clomid – can i buy cheap clomid online
Amo Health Care [url=https://amohealthcare.store/#]amoxicillin generic brand[/url] Amo Health Care
prednisone: prednisone cream brand name – PredniHealth
http://clomhealth.com/# can i order clomid pills
PredniHealth: can i buy prednisone online without a prescription – prednisone 60 mg daily
Amo Health Care: Amo Health Care – Amo Health Care
prednisone 20mg for sale: PredniHealth – prednisone 80 mg daily
PredniHealth [url=https://prednihealth.com/#]PredniHealth[/url] compare prednisone prices
amoxicillin 250 mg capsule: where to buy amoxicillin over the counter – generic amoxicillin online
https://amohealthcare.store/# Amo Health Care
where to buy clomid without a prescription: Clom Health – buying generic clomid without prescription
PredniHealth: buy prednisone 40 mg – PredniHealth
online Cialis pharmacy: discreet shipping ED pills – Cialis without prescription
fast Viagra delivery [url=http://maxviagramd.com/#]best price for Viagra[/url] no doctor visit required
buy modafinil online: legal Modafinil purchase – buy modafinil online
same-day Viagra shipping: secure checkout Viagra – trusted Viagra suppliers
legit Viagra online: buy generic Viagra online – safe online pharmacy
trusted Viagra suppliers: discreet shipping – legit Viagra online
Viagra without prescription: cheap Viagra online – fast Viagra delivery
cheap Viagra online [url=http://maxviagramd.com/#]cheap Viagra online[/url] secure checkout Viagra
safe modafinil purchase: safe modafinil purchase – doctor-reviewed advice
Cialis without prescription: cheap Cialis online – cheap Cialis online
https://maxviagramd.shop/# no doctor visit required
buy generic Viagra online: best price for Viagra – trusted Viagra suppliers
trusted Viagra suppliers: fast Viagra delivery – legit Viagra online
generic tadalafil: Cialis without prescription – reliable online pharmacy Cialis
secure checkout ED drugs [url=http://zipgenericmd.com/#]discreet shipping ED pills[/url] affordable ED medication
http://modafinilmd.store/# Modafinil for sale
order Viagra discreetly: same-day Viagra shipping – legit Viagra online
buy generic Viagra online: discreet shipping – no doctor visit required
modafinil legality: Modafinil for sale – buy modafinil online
cheap Viagra online: cheap Viagra online – trusted Viagra suppliers
Cialis without prescription [url=https://zipgenericmd.shop/#]order Cialis online no prescription[/url] order Cialis online no prescription
buy modafinil online: modafinil pharmacy – modafinil 2025
https://maxviagramd.shop/# order Viagra discreetly
online Cialis pharmacy: cheap Cialis online – secure checkout ED drugs
same-day Viagra shipping: Viagra without prescription – discreet shipping
safe online pharmacy: legit Viagra online – generic sildenafil 100mg
reliable online pharmacy Cialis: generic tadalafil – cheap Cialis online
modafinil legality [url=http://modafinilmd.store/#]safe modafinil purchase[/url] modafinil 2025
doctor-reviewed advice: buy modafinil online – modafinil 2025
best price Cialis tablets: order Cialis online no prescription – order Cialis online no prescription
same-day Viagra shipping: same-day Viagra shipping – Viagra without prescription
Cialis without prescription: secure checkout ED drugs – online Cialis pharmacy
reliable online pharmacy Cialis [url=https://zipgenericmd.shop/#]affordable ED medication[/url] generic tadalafil
purchase Modafinil without prescription: doctor-reviewed advice – modafinil 2025
http://modafinilmd.store/# safe modafinil purchase
same-day Viagra shipping: safe online pharmacy – legit Viagra online
Cialis without prescription: FDA approved generic Cialis – generic tadalafil
modafinil 2025: Modafinil for sale – doctor-reviewed advice
doctor-reviewed advice: buy modafinil online – safe modafinil purchase
best price for Viagra [url=https://maxviagramd.shop/#]legit Viagra online[/url] secure checkout Viagra
https://zipgenericmd.com/# discreet shipping ED pills
buy modafinil online: doctor-reviewed advice – purchase Modafinil without prescription
secure checkout ED drugs: generic tadalafil – FDA approved generic Cialis
legal Modafinil purchase: legal Modafinil purchase – verified Modafinil vendors
affordable ED medication: cheap Cialis online – buy generic Cialis online
affordable ED medication [url=https://zipgenericmd.shop/#]secure checkout ED drugs[/url] order Cialis online no prescription
purchase Modafinil without prescription: modafinil pharmacy – verified Modafinil vendors
https://modafinilmd.store/# doctor-reviewed advice
safe online pharmacy: same-day Viagra shipping – generic sildenafil 100mg
modafinil pharmacy [url=https://modafinilmd.store/#]doctor-reviewed advice[/url] modafinil 2025
modafinil 2025: buy modafinil online – buy modafinil online
order Cialis online no prescription: generic tadalafil – best price Cialis tablets
verified Modafinil vendors: Modafinil for sale – doctor-reviewed advice
buy generic Viagra online: fast Viagra delivery – discreet shipping
order Cialis online no prescription [url=https://zipgenericmd.com/#]FDA approved generic Cialis[/url] order Cialis online no prescription
generic tadalafil: reliable online pharmacy Cialis – secure checkout ED drugs
cheap Cialis online: buy generic Cialis online – order Cialis online no prescription
Modafinil for sale: doctor-reviewed advice – modafinil 2025
fast Viagra delivery: secure checkout Viagra – no doctor visit required
affordable ED medication [url=https://zipgenericmd.com/#]buy generic Cialis online[/url] affordable ED medication
Modafinil for sale: purchase Modafinil without prescription – modafinil legality
verified Modafinil vendors: buy modafinil online – legal Modafinil purchase
best price for Viagra: generic sildenafil 100mg – fast Viagra delivery
generic tadalafil: affordable ED medication – reliable online pharmacy Cialis
FDA approved generic Cialis: order Cialis online no prescription – FDA approved generic Cialis
order Cialis online no prescription [url=https://zipgenericmd.shop/#]discreet shipping ED pills[/url] FDA approved generic Cialis
secure checkout ED drugs: order Cialis online no prescription – reliable online pharmacy Cialis
pin up az: pin up az – pin up azerbaycan
вавада зеркало [url=https://vavadavhod.tech/#]vavada вход[/url] вавада официальный сайт
пин ап казино [url=https://pinuprus.pro/#]pin up вход[/url] пин ап казино
vavada: vavada casino – vavada casino
pin up вход: пин ап казино официальный сайт – пинап казино
pin-up [url=https://pinupaz.top/#]pin up az[/url] pin up azerbaycan
pin up: pin up – pin up casino
вавада официальный сайт: вавада – вавада
pin up az: pin up az – pin up az
пин ап зеркало: пин ап казино официальный сайт – пин ап казино
vavada вход [url=https://vavadavhod.tech/#]вавада официальный сайт[/url] vavada вход
пин ап казино: пин ап зеркало – пин ап зеркало
pin-up: pin up – pin up
вавада зеркало: вавада официальный сайт – vavada вход
пин ап зеркало [url=http://pinuprus.pro/#]пинап казино[/url] пинап казино
пин ап зеркало: пин ап казино официальный сайт – пин ап вход
пинап казино: пин ап казино – пинап казино
вавада официальный сайт [url=https://vavadavhod.tech/#]vavada вход[/url] vavada casino
pin up casino: pin up casino – pinup az
пин ап казино: пин ап вход – pin up вход
пин ап зеркало [url=https://pinuprus.pro/#]пин ап казино[/url] pin up вход
пинап казино: пин ап казино официальный сайт – pin up вход
pin-up: pinup az – pinup az
pin up casino [url=https://pinupaz.top/#]pin up azerbaycan[/url] pin up az
pin up вход: пин ап казино официальный сайт – пин ап казино официальный сайт
pin up: pin up az – pin-up
http://vavadavhod.tech/# vavada вход
pin up вход: пинап казино – пинап казино
vavada: вавада зеркало – вавада
http://vavadavhod.tech/# вавада казино
вавада [url=http://vavadavhod.tech/#]вавада[/url] vavada
вавада зеркало: вавада зеркало – vavada вход
пин ап казино [url=http://pinuprus.pro/#]пин ап казино официальный сайт[/url] пин ап вход
http://pinupaz.top/# pinup az
pin-up casino giris [url=https://pinupaz.top/#]pin up casino[/url] pin up casino
pin-up casino giris: pin up az – pin up casino
vavada: vavada casino – vavada вход
пин ап зеркало: pin up вход – пинап казино
pinup az: pin up – pin up casino
pin-up casino giris [url=https://pinupaz.top/#]pin up azerbaycan[/url] pin-up
pin up az: pin up casino – pin-up
vavada вход: вавада зеркало – вавада
пин ап вход: пин ап зеркало – пин ап зеркало
вавада казино: vavada вход – вавада
vavada [url=https://vavadavhod.tech/#]вавада официальный сайт[/url] вавада казино
vavada вход: вавада зеркало – вавада
вавада официальный сайт: вавада зеркало – вавада официальный сайт
вавада зеркало [url=https://vavadavhod.tech/#]вавада официальный сайт[/url] вавада официальный сайт
pin up вход: пинап казино – пин ап вход
pin-up: pinup az – pinup az
pin up az [url=https://pinupaz.top/#]pin up az[/url] pinup az
вавада казино: vavada casino – vavada casino
пин ап казино официальный сайт: пинап казино – пин ап вход
pinup az [url=http://pinupaz.top/#]pin up casino[/url] pin up casino
пин ап казино официальный сайт: pin up вход – пин ап казино
pin-up casino giris: pin up casino – pinup az
пин ап вход [url=https://pinuprus.pro/#]пин ап зеркало[/url] пин ап казино официальный сайт
пин ап вход: пин ап казино – pin up вход
вавада казино: vavada вход – вавада
vavada casino [url=http://vavadavhod.tech/#]вавада[/url] вавада зеркало
pin-up casino giris: pin up casino – pin-up casino giris
pin-up casino giris [url=https://pinupaz.top/#]pin up casino[/url] pin up az
пинап казино: пинап казино – pin up вход
vavada casino: вавада – vavada вход
pin-up: pin up – pinup az
вавада [url=http://vavadavhod.tech/#]вавада зеркало[/url] vavada вход
пин ап вход: пин ап вход – пин ап вход
пин ап зеркало: пин ап зеркало – пин ап казино официальный сайт
pin-up casino giris [url=https://pinupaz.top/#]pin up[/url] pin-up
пин ап зеркало: пин ап казино официальный сайт – пинап казино
pin up: pin-up casino giris – pin up azerbaycan
vavada вход: vavada casino – вавада
pin up az: pin up casino – pinup az
pinup az [url=http://pinupaz.top/#]pin up azerbaycan[/url] pin up casino
vavada: вавада казино – vavada casino
http://pinuprus.pro/# pin up вход
пинап казино [url=https://pinuprus.pro/#]pin up вход[/url] пин ап вход
pin up azerbaycan: pinup az – pin up
https://vavadavhod.tech/# вавада
pin up casino [url=http://pinupaz.top/#]pinup az[/url] pin-up
пин ап казино: пин ап казино официальный сайт – пин ап зеркало
пин ап казино официальный сайт: пин ап вход – пин ап вход
vavada: вавада официальный сайт – vavada casino
http://pinuprus.pro/# пинап казино
pin-up [url=https://pinupaz.top/#]pinup az[/url] pinup az
пин ап вход: пин ап казино официальный сайт – pin up вход
pin up az: pin-up casino giris – pin up
вавада казино: вавада – vavada casino
pinup az [url=https://pinupaz.top/#]pinup az[/url] pinup az
пин ап казино: pin up вход – pin up вход
пинап казино [url=http://pinuprus.pro/#]пин ап казино официальный сайт[/url] пин ап казино официальный сайт
vavada: вавада казино – вавада казино
pin up: pin up azerbaycan – pin up
pin-up casino giris [url=http://pinupaz.top/#]pin up azerbaycan[/url] pin up casino
пин ап зеркало: пин ап вход – pin up вход
вавада зеркало [url=https://vavadavhod.tech/#]vavada[/url] vavada вход
вавада: vavada – vavada вход
https://pinupaz.top/# pin up azerbaycan
пинап казино: пин ап зеркало – пин ап казино
pin up: pin up az – pin up azerbaycan
pin-up casino giris [url=https://pinupaz.top/#]pin up az[/url] pinup az
Rx Express Mexico: mexico pharmacy order online – mexican online pharmacy
Medicine From India: п»їlegitimate online pharmacies india – indian pharmacy online
indian pharmacy online shopping [url=http://medicinefromindia.com/#]indian pharmacy online shopping[/url] india pharmacy
rate canadian pharmacies: canada cloud pharmacy – canadian neighbor pharmacy
mexican online pharmacies prescription drugs: mexican online pharmacy – mexican rx online
mexican rx online [url=https://rxexpressmexico.shop/#]Rx Express Mexico[/url] RxExpressMexico
indian pharmacy online shopping: Medicine From India – indian pharmacy online
canadian pharmacy near me: Express Rx Canada – canadian pharmacy scam
indian pharmacy online: MedicineFromIndia – Medicine From India
canadian pharmacy [url=https://expressrxcanada.com/#]Canadian pharmacy shipping to USA[/url] best online canadian pharmacy
MedicineFromIndia: Medicine From India – india pharmacy mail order
https://rxexpressmexico.shop/# mexican online pharmacy
MedicineFromIndia: Medicine From India – indian pharmacy
mexico drug stores pharmacies: Rx Express Mexico – mexico drug stores pharmacies
vipps approved canadian online pharmacy: Canadian pharmacy shipping to USA – best rated canadian pharmacy
canadian drug: Generic drugs from Canada – legitimate canadian pharmacy
Rx Express Mexico [url=http://rxexpressmexico.com/#]mexico pharmacies prescription drugs[/url] mexican online pharmacy
medicine courier from India to USA: indian pharmacy – indian pharmacy online shopping
indian pharmacy: india pharmacy – Medicine From India
best canadian pharmacy to order from: Express Rx Canada – prescription drugs canada buy online
Medicine From India [url=http://medicinefromindia.com/#]indian pharmacy online shopping[/url] indian pharmacy online shopping
Rx Express Mexico: mexican online pharmacy – mexico drug stores pharmacies
buying prescription drugs in mexico: mexico drug stores pharmacies – Rx Express Mexico
mexican rx online [url=https://rxexpressmexico.com/#]mexican online pharmacy[/url] mexico drug stores pharmacies
reliable canadian pharmacy reviews: Express Rx Canada – canadian pharmacy sarasota
pharmacie en ligne sans ordonnance: Medicaments en ligne livres en 24h – Pharmacie en ligne livraison Europe pharmafst.com
kamagra 100mg prix: Kamagra pharmacie en ligne – kamagra pas cher
kamagra livraison 24h [url=https://kamagraprix.shop/#]kamagra oral jelly[/url] kamagra 100mg prix
pharmacie en ligne fiable: pharmacie en ligne – pharmacie en ligne pas cher pharmafst.com
kamagra pas cher: achat kamagra – achat kamagra
https://kamagraprix.shop/# acheter kamagra site fiable
cialis prix: cialis prix – Cialis en ligne tadalmed.shop
achat kamagra: achat kamagra – kamagra livraison 24h
pharmacie en ligne pas cher: pharmacie en ligne sans ordonnance – pharmacie en ligne pas cher pharmafst.com
Kamagra Commander maintenant: kamagra en ligne – Kamagra Commander maintenant
pharmacie en ligne france pas cher [url=https://pharmafst.shop/#]pharmacies en ligne certifiГ©es[/url] п»їpharmacie en ligne france pharmafst.shop
cialis sans ordonnance: cialis generique – Cialis generique prix tadalmed.shop
cialis prix: Cialis generique prix – Tadalafil 20 mg prix sans ordonnance tadalmed.shop
achat kamagra [url=https://kamagraprix.com/#]kamagra oral jelly[/url] Kamagra Commander maintenant
Cialis sans ordonnance 24h: Cialis sans ordonnance 24h – Pharmacie en ligne Cialis sans ordonnance tadalmed.shop
pharmacie en ligne france pas cher: Pharmacies en ligne certifiees – pharmacie en ligne livraison europe pharmafst.com
vente de mГ©dicament en ligne: pharmacie en ligne pas cher – pharmacie en ligne avec ordonnance pharmafst.com
kamagra en ligne [url=https://kamagraprix.com/#]Kamagra pharmacie en ligne[/url] acheter kamagra site fiable
Achat mГ©dicament en ligne fiable: Medicaments en ligne livres en 24h – pharmacie en ligne pas cher pharmafst.com
kamagra pas cher: kamagra gel – kamagra livraison 24h
Cialis generique prix [url=https://tadalmed.shop/#]Achat Cialis en ligne fiable[/url] Cialis sans ordonnance 24h tadalmed.com
kamagra gel: Acheter Kamagra site fiable – Achetez vos kamagra medicaments
pharmacie en ligne avec ordonnance: pharmacie en ligne – pharmacie en ligne pharmafst.com
Achat Cialis en ligne fiable: cialis prix – Pharmacie en ligne Cialis sans ordonnance tadalmed.shop
Kamagra Oral Jelly pas cher: Kamagra pharmacie en ligne – Kamagra pharmacie en ligne
pharmacie en ligne france pas cher: Pharmacie en ligne France – vente de mГ©dicament en ligne pharmafst.com
Kamagra Commander maintenant: kamagra 100mg prix – kamagra 100mg prix
Cialis sans ordonnance 24h: cialis prix – Cialis en ligne tadalmed.shop
Achat Cialis en ligne fiable [url=https://tadalmed.shop/#]Acheter Viagra Cialis sans ordonnance[/url] Cialis sans ordonnance 24h tadalmed.com
pharmacie en ligne fiable: Medicaments en ligne livres en 24h – pharmacie en ligne france pas cher pharmafst.com
kamagra 100mg prix: kamagra gel – Acheter Kamagra site fiable
acheter mГ©dicament en ligne sans ordonnance [url=https://pharmafst.com/#]Pharmacie en ligne France[/url] Pharmacie en ligne livraison Europe pharmafst.shop
cialis sans ordonnance: Cialis sans ordonnance 24h – cialis sans ordonnance tadalmed.shop
Achetez vos kamagra medicaments: kamagra oral jelly – acheter kamagra site fiable
http://tadalmed.com/# Tadalafil 20 mg prix sans ordonnance
kamagra livraison 24h: kamagra en ligne – kamagra livraison 24h
Kamagra Commander maintenant: Kamagra Oral Jelly pas cher – Acheter Kamagra site fiable
Achat Cialis en ligne fiable [url=http://tadalmed.com/#]Cialis sans ordonnance 24h[/url] Tadalafil sans ordonnance en ligne tadalmed.com
achat kamagra: kamagra en ligne – kamagra oral jelly
cialis generique [url=http://tadalmed.com/#]Acheter Viagra Cialis sans ordonnance[/url] Achat Cialis en ligne fiable tadalmed.com
http://tadalmed.com/# Tadalafil sans ordonnance en ligne
Kamagra pharmacie en ligne: kamagra pas cher – kamagra 100mg prix
Achat mГ©dicament en ligne fiable [url=https://pharmafst.com/#]vente de mГ©dicament en ligne[/url] Pharmacie sans ordonnance pharmafst.shop
pharmacie en ligne france fiable [url=http://pharmafst.com/#]pharmacie en ligne[/url] pharmacie en ligne pharmafst.shop
Acheter Cialis: Cialis sans ordonnance 24h – cialis sans ordonnance tadalmed.shop
kamagra gel [url=https://kamagraprix.com/#]kamagra oral jelly[/url] acheter kamagra site fiable
kamagra gel: kamagra oral jelly – acheter kamagra site fiable
cialis prix [url=https://tadalmed.com/#]Acheter Cialis 20 mg pas cher[/url] Cialis en ligne tadalmed.com
acheter kamagra site fiable: kamagra 100mg prix – Kamagra Commander maintenant
pharmacie en ligne sans ordonnance [url=https://pharmafst.com/#]Medicaments en ligne livres en 24h[/url] pharmacie en ligne pas cher pharmafst.shop
kamagra gel: kamagra gel – kamagra oral jelly
kamagra gel: Kamagra Commander maintenant – Achetez vos kamagra medicaments
pharmacie en ligne pas cher [url=http://pharmafst.com/#]Pharmacie en ligne France[/url] pharmacie en ligne fiable pharmafst.shop
pharmacie en ligne: pharmacie en ligne pas cher – pharmacie en ligne fiable pharmafst.com
casino olympe: olympe casino avis – casino olympe
olympe casino: olympe casino cresus – olympe casino cresus
olympe casino cresus: olympe casino en ligne – olympe casino avis
olympe casino en ligne: olympe casino en ligne – olympe casino cresus
[url=https://olympecasino.pro/#]olympe casino avis[/url] olympe
olympe casino avis: olympe casino en ligne – olympe casino avis
olympe casino avis: casino olympe – olympe casino
[url=https://olympecasino.pro/#]casino olympe[/url] olympe
[url=https://olympecasino.pro/#]olympe casino avis[/url] casino olympe
casino olympe: olympe casino en ligne – casino olympe
casino olympe: olympe – olympe casino cresus
[url=https://olympecasino.pro/#]olympe casino en ligne[/url] olympe casino avis
olympe: olympe casino avis – casino olympe
olympe casino: olympe casino cresus – olympe casino cresus
https://olympecasino.pro/# casino olympe
olympe casino: olympe casino en ligne – olympe casino cresus
olympe casino: olympe casino en ligne – olympe casino
olympe casino cresus: casino olympe – olympe casino
[url=https://olympecasino.pro/#]olympe casino[/url] olympe
olympe casino avis: olympe casino – olympe
olympe casino en ligne: olympe casino avis – olympe
[url=https://olympecasino.pro/#]olympe casino cresus[/url] olympe casino
olympe casino cresus: olympe casino cresus – olympe casino cresus
olympe casino en ligne: olympe – olympe
olympe casino avis: casino olympe – casino olympe
olympe casino: olympe casino en ligne – olympe
olympe casino: olympe casino – casino olympe
olympe casino en ligne: olympe casino avis – olympe
https://usacanadapharm.shop/# reputable canadian pharmacy
usa canada pharm: USACanadaPharm – usa canada pharm
pharmacy in canada [url=http://usacanadapharm.com/#]canadian pharmacy no scripts[/url] canadian pharmacy world reviews
reliable canadian pharmacy: best canadian pharmacy online – USACanadaPharm
my canadian pharmacy reviews: legit canadian online pharmacy – canadianpharmacyworld
https://usacanadapharm.com/# canadian drugs
usa canada pharm: USACanadaPharm – usa canada pharm
prescription drugs canada buy online: buying from canadian pharmacies – USACanadaPharm
https://usacanadapharm.shop/# USACanadaPharm
USACanadaPharm [url=https://usacanadapharm.com/#]reddit canadian pharmacy[/url] canadianpharmacyworld com
pharmacy wholesalers canada https://usacanadapharm.com/# usa canada pharm
legit canadian pharmacy
legitimate canadian online pharmacies: canadapharmacyonline – canadian drugs pharmacy
http://usacanadapharm.com/# USACanadaPharm
best canadian online pharmacy: usa canada pharm – usa canada pharm
https://usacanadapharm.com/# usa canada pharm
canadian pharmacy store [url=http://usacanadapharm.com/#]canadian valley pharmacy[/url] canadian online drugs
precription drugs from canada: usa canada pharm – legit canadian pharmacy
https://usacanadapharm.com/# usa canada pharm
usa canada pharm: usa canada pharm – usa canada pharm
best canadian online pharmacy [url=https://usacanadapharm.shop/#]best canadian online pharmacy[/url] online pharmacy canada
legitimate canadian online pharmacies: canadian pharmacy meds review – my canadian pharmacy reviews
https://usacanadapharm.com/# canadian pharmacy
adderall canadian pharmacy: USACanadaPharm – USACanadaPharm
canadian pharmacy ltd: canadian drug pharmacy – USACanadaPharm
USACanadaPharm: USACanadaPharm – usa canada pharm
https://usacanadapharm.shop/# canadian family pharmacy
usa canada pharm: canadian pharmacy prices – usa canada pharm
USACanadaPharm [url=https://usacanadapharm.com/#]canadian pharmacy meds reviews[/url] USACanadaPharm
canadian pharmacy: canadian pharmacy cheap – USACanadaPharm
http://usacanadapharm.com/# USACanadaPharm
best rated canadian pharmacy: usa canada pharm – global pharmacy canada
reputable canadian pharmacy: best canadian pharmacy online – canadian pharmacy ed medications
USACanadaPharm: my canadian pharmacy rx – usa canada pharm
https://usacanadapharm.shop/# canadian online drugs
usa canada pharm [url=https://usacanadapharm.com/#]usa canada pharm[/url] reputable canadian online pharmacies
canadian pharmacy prices: online canadian pharmacy – canadian pharmacy 1 internet online drugstore
https://usacanadapharm.com/# canadian pharmacy online store
UsaIndiaPharm: indian pharmacy paypal – UsaIndiaPharm
USA India Pharm [url=http://usaindiapharm.com/#]USA India Pharm[/url] USA India Pharm
mail order pharmacy india: UsaIndiaPharm – india online pharmacy
UsaIndiaPharm: USA India Pharm – world pharmacy india
https://usaindiapharm.shop/# top 10 online pharmacy in india
buy medicines online in india: india pharmacy mail order – USA India Pharm
indianpharmacy com: UsaIndiaPharm – USA India Pharm
UsaIndiaPharm: UsaIndiaPharm – indian pharmacy online
buy medicines online in india: Online medicine home delivery – USA India Pharm
http://usaindiapharm.com/# indian pharmacies safe
cheapest online pharmacy india: USA India Pharm – reputable indian online pharmacy
indianpharmacy com: reputable indian online pharmacy – USA India Pharm
online pharmacy india: USA India Pharm – UsaIndiaPharm
https://usaindiapharm.shop/# indian pharmacies safe
india pharmacy mail order: USA India Pharm – UsaIndiaPharm
USA India Pharm: world pharmacy india – indian pharmacies safe
USA India Pharm [url=https://usaindiapharm.com/#]UsaIndiaPharm[/url] USA India Pharm
п»їlegitimate online pharmacies india: indian pharmacy – online shopping pharmacy india
https://usaindiapharm.shop/# indian pharmacies safe
USA India Pharm: UsaIndiaPharm – cheapest online pharmacy india
UsaIndiaPharm: USA India Pharm – UsaIndiaPharm
https://usaindiapharm.shop/# USA India Pharm
top 10 online pharmacy in india: world pharmacy india – USA India Pharm
UsaIndiaPharm: UsaIndiaPharm – reputable indian online pharmacy
top 10 pharmacies in india: UsaIndiaPharm – online pharmacy india
USA India Pharm: UsaIndiaPharm – USA India Pharm
indian pharmacies safe: buy prescription drugs from india – top 10 pharmacies in india
world pharmacy india: USA India Pharm – indian pharmacies safe
best india pharmacy: online shopping pharmacy india – USA India Pharm
USA India Pharm [url=https://usaindiapharm.com/#]UsaIndiaPharm[/url] USA India Pharm
world pharmacy india: USA India Pharm – indianpharmacy com
world pharmacy india: USA India Pharm – buy prescription drugs from india
UsaIndiaPharm: Online medicine home delivery – india online pharmacy
https://usaindiapharm.shop/# UsaIndiaPharm
USA India Pharm: USA India Pharm – UsaIndiaPharm
buy prescription drugs from india [url=http://usaindiapharm.com/#]best india pharmacy[/url] UsaIndiaPharm
india pharmacy mail order: indianpharmacy com – india pharmacy mail order
UsaIndiaPharm: cheapest online pharmacy india – indian pharmacy
indian pharmacies safe: USA India Pharm – pharmacy website india
https://usaindiapharm.shop/# USA India Pharm
USA India Pharm: buy medicines online in india – best india pharmacy
USA India Pharm: best online pharmacy india – USA India Pharm
top online pharmacy india: world pharmacy india – п»їlegitimate online pharmacies india
http://usaindiapharm.com/# USA India Pharm
indian pharmacy online [url=https://usaindiapharm.com/#]UsaIndiaPharm[/url] indian pharmacy online
best online pharmacy india: mail order pharmacy india – indianpharmacy com
cheapest online pharmacy india: Online medicine order – USA India Pharm
USA India Pharm: reputable indian online pharmacy – USA India Pharm
https://usaindiapharm.com/# UsaIndiaPharm
USMexPharm: certified Mexican pharmacy – UsMex Pharm
Mexican pharmacy ship to USA: certified Mexican pharmacy – reputable mexican pharmacies online
USMexPharm: medication from mexico pharmacy – Us Mex Pharm
https://usmexpharm.shop/# usa mexico pharmacy
Mexican pharmacy ship to USA: usa mexico pharmacy – UsMex Pharm
usa mexico pharmacy: buying prescription drugs in mexico online – UsMex Pharm
http://usmexpharm.com/# certified Mexican pharmacy
certified Mexican pharmacy: UsMex Pharm – certified Mexican pharmacy
mexican pharmacy [url=https://usmexpharm.com/#]Us Mex Pharm[/url] Us Mex Pharm
mexican pharmacy: USMexPharm – Mexican pharmacy ship to USA
UsMex Pharm: buying prescription drugs in mexico – purple pharmacy mexico price list
https://usmexpharm.com/# UsMex Pharm
Us Mex Pharm: usa mexico pharmacy – usa mexico pharmacy
certified Mexican pharmacy: usa mexico pharmacy – usa mexico pharmacy
http://usmexpharm.com/# Us Mex Pharm
usa mexico pharmacy [url=https://usmexpharm.com/#]mexican pharmacy[/url] certified Mexican pharmacy
USMexPharm: certified Mexican pharmacy – mexican pharmacy
Mexican pharmacy ship to USA: UsMex Pharm – Mexican pharmacy ship to USA
USMexPharm: Us Mex Pharm – mexican pharmacy
https://usmexpharm.com/# UsMex Pharm
USMexPharm: Us Mex Pharm – mexican pharmacy
Mexican pharmacy ship to USA: UsMex Pharm – certified Mexican pharmacy
mexican pharmacy: usa mexico pharmacy – UsMex Pharm
usa mexico pharmacy [url=https://usmexpharm.com/#]Mexican pharmacy ship to USA[/url] Us Mex Pharm
certified Mexican pharmacy: UsMex Pharm – certified Mexican pharmacy
http://usmexpharm.com/# mexican pharmacy
usa mexico pharmacy: mexico drug stores pharmacies – Mexican pharmacy ship to USA
mexican pharmacy: Mexican pharmacy ship to USA – mexican pharmacy
buying prescription drugs in mexico: Us Mex Pharm – usa mexico pharmacy
http://usmexpharm.com/# usa mexico pharmacy
Us Mex Pharm: UsMex Pharm – reputable mexican pharmacies online
usa mexico pharmacy [url=https://usmexpharm.shop/#]Mexican pharmacy ship to USA[/url] mexican pharmacy
deneme bonusu veren siteler: slot casino siteleri – deneme bonusu veren siteler casinositeleri1st.com
https://casibom1st.shop/# saДџlam bahis siteleri 2025
sweet bonanza 1st: sweet bonanza – sweet bonanza oyna sweetbonanza1st.shop
gГјvenilir oyun siteleri: casibom mobil giris – en az para yatД±rД±lan bahis siteleri casibom1st.com
sweet bonanza slot [url=http://sweetbonanza1st.com/#]sweet bonanza siteleri[/url] sweet bonanza yorumlar sweetbonanza1st.com
sweet bonanza oyna: sweet bonanza giris – sweet bonanza slot sweetbonanza1st.shop
casinox: casibom guncel adres – internet kumar siteleri casibom1st.com
slot casino siteleri: casino siteleri – deneme bonusu veren siteler casinositeleri1st.com
https://casinositeleri1st.com/# dede kumar sitesi
18siteler: casibom – yasal casino siteleri casibom1st.com
lisansl? casino siteleri: guvenilir casino siteleri – casino siteleri 2025 casinositeleri1st.com
sweet bonanza slot [url=https://sweetbonanza1st.shop/#]sweet bonanza siteleri[/url] sweet bonanza slot sweetbonanza1st.com
canli oyun: casibom giris adresi – gГјvenilir kripto para siteleri casibom1st.com
pacanele online: casibom guncel adres – en saДџlam bahis siteleri casibom1st.com
lisansl? casino siteleri: slot casino siteleri – guvenilir casino siteleri casinositeleri1st.com
deneme bonusu veren siteler: casino siteleri – deneme bonusu veren siteler casinositeleri1st.com
sweet bonanza: sweet bonanza oyna – sweet bonanza oyna sweetbonanza1st.shop
slot casino siteleri: deneme bonusu veren siteler – guvenilir casino siteleri casinositeleri1st.com
sweet bonanza [url=http://sweetbonanza1st.com/#]sweet bonanza oyna[/url] sweet bonanza slot sweetbonanza1st.com
sweet bonanza yorumlar: sweet bonanza giris – sweet bonanza demo sweetbonanza1st.shop
sweet bonanza: sweet bonanza demo – sweet bonanza 1st sweetbonanza1st.shop
yabancД± mekan isimleri: casibom giris – bet oyun siteleri casibom1st.com
casino siteleri 2025: casino siteleri 2025 – casino siteleri 2025 casinositeleri1st.com
sweet bonanza oyna [url=https://sweetbonanza1st.com/#]sweet bonanza yorumlar[/url] sweet bonanza 1st sweetbonanza1st.com
jav siteleri: casibom giris – yabancД± Еџans oyunlarД± siteleri casibom1st.com
deneme bonusu veren bГјtГјn siteler: casibom giris – yasal kumar siteleri casibom1st.com
sweet bonanza giris: sweet bonanza oyna – sweet bonanza oyna sweetbonanza1st.shop
https://casibom1st.com/# canlД± bahis oyunlarД±
casino Еџans oyunlarД±: casibom guncel giris – canli oyun casibom1st.com
en yeni kaГ§ak bahis siteleri: casibom – +18 canli yayin siteleri casibom1st.com
slot casino siteleri [url=https://casinositeleri1st.com/#]deneme bonusu veren siteler[/url] casino siteleri casinositeleri1st.shop
tГјrkiye casino siteleri: casibom resmi – en gГјvenilir yatД±rД±m siteleri casibom1st.com
casino kumar oyunlarД±: casibom 1st – en kaliteli bahis siteleri casibom1st.com
sweet bonanza oyna: sweet bonanza oyna – sweet bonanza giris sweetbonanza1st.shop
sweet bonanza yorumlar: sweet bonanza yorumlar – sweet bonanza 1st sweetbonanza1st.shop
deneme bonusu veren siteler: deneme bonusu veren siteler – kumar siteleri casinositeleri1st.com
bet oyun siteleri: slot casino siteleri – lisansl? casino siteleri casinositeleri1st.com
deneme bonusu veren siteler [url=https://casinositeleri1st.com/#]casino siteleri 2025[/url] casino siteleri casinositeleri1st.shop
http://casibom1st.com/# deneme bonusu veren siteler casino
tГјrk partner siteleri: casibom guncel adres – tГјm casino siteleri casibom1st.com
casino maxi: casibom giris – gГјvenli siteler casibom1st.com
Clom Fast Pharm: where can i get clomid without prescription – Clom Fast Pharm
ZithPharmOnline: zithromax 500 price – zithromax pill
https://predpharmnet.shop/# 50 mg prednisone tablet
can i purchase amoxicillin online: AmOnlinePharm – amoxicillin 500 mg tablets
AmOnlinePharm [url=https://amonlinepharm.shop/#]amoxicillin 500mg cost[/url] AmOnlinePharm
Clom Fast Pharm: can you get clomid pills – Clom Fast Pharm
Clom Fast Pharm: where buy generic clomid without a prescription – clomid
http://predpharmnet.com/# 100 mg prednisone daily
Lisin Express: Lisin Express – zestril coupon
https://clomfastpharm.com/# can i order cheap clomid no prescription
Lisin Express: Lisin Express – cost of generic lisinopril
Lisin Express: Lisin Express – Lisin Express
Lisin Express [url=https://lisinexpress.shop/#]lisinopril 2.5 pill[/url] Lisin Express
Lisin Express: zestril 5mg – Lisin Express
amoxicillin 500 mg purchase without prescription: buying amoxicillin in mexico – AmOnlinePharm
AmOnlinePharm: amoxicillin 800 mg price – buy amoxicillin online mexico
Pred Pharm Net: Pred Pharm Net – how to get prednisone tablets
amoxicillin 500 mg where to buy [url=https://amonlinepharm.com/#]AmOnlinePharm[/url] AmOnlinePharm
https://clomfastpharm.shop/# Clom Fast Pharm
prednisone nz: Pred Pharm Net – Pred Pharm Net
get clomid without rx: Clom Fast Pharm – Clom Fast Pharm
https://clomfastpharm.com/# can i purchase generic clomid pills
buy prednisone online without a script: how can i get prednisone – prednisone 2 mg daily
Lisin Express: lisinopril 10mg online – Lisin Express
AmOnlinePharm: AmOnlinePharm – AmOnlinePharm
Lisin Express [url=http://lisinexpress.com/#]lisinopril 419[/url] Lisin Express
prinivil 20 mg tablet: zestril pill – Lisin Express
https://clomfastpharm.shop/# Clom Fast Pharm
zestril cost: online pharmacy lisinopril – lisinopril buy without prescription
lisinopril 20 25 mg: Lisin Express – Lisin Express
can you buy zithromax over the counter in australia: zithromax for sale online – can i buy zithromax over the counter in canada
https://amonlinepharm.com/# AmOnlinePharm
AmOnlinePharm [url=https://amonlinepharm.shop/#]AmOnlinePharm[/url] AmOnlinePharm
AmOnlinePharm: price of amoxicillin without insurance – AmOnlinePharm
zithromax canadian pharmacy: can you buy zithromax over the counter in australia – ZithPharmOnline
http://lisinexpress.com/# Lisin Express
ZithPharmOnline: ZithPharmOnline – zithromax cost canada
AmOnlinePharm: amoxicillin without prescription – azithromycin amoxicillin
Clom Fast Pharm: buy generic clomid pill – Clom Fast Pharm
zithromax 500mg [url=http://zithpharmonline.com/#]ZithPharmOnline[/url] ZithPharmOnline
http://amonlinepharm.com/# AmOnlinePharm
AmOnlinePharm: AmOnlinePharm – AmOnlinePharm
ZithPharmOnline: ZithPharmOnline – ZithPharmOnline
Pred Pharm Net: prednisone drug costs – Pred Pharm Net
http://agbmexicopharm.com/# mexican pharmaceuticals online
cheapest pharmacy canada: go canada pharm – canadian pharmacy in canada
www india pharm [url=http://wwwindiapharm.com/#]www india pharm[/url] top 10 online pharmacy in india
www india pharm: best online pharmacy india – www india pharm
buying prescription drugs in mexico online: п»їbest mexican online pharmacies – Agb Mexico Pharm
world pharmacy india: www india pharm – www india pharm
http://gocanadapharm.com/# legit canadian online pharmacy
canadian pharmacy phone number: best canadian online pharmacy reviews – canadian pharmacy
pet meds without vet prescription canada: canadian pharmacy review – reliable canadian pharmacy
canadian drug prices: GoCanadaPharm – reputable canadian pharmacy
reputable indian online pharmacy [url=http://wwwindiapharm.com/#]www india pharm[/url] www india pharm
Agb Mexico Pharm: Agb Mexico Pharm – mexico drug stores pharmacies
https://wwwindiapharm.shop/# reputable indian pharmacies
Agb Mexico Pharm: Agb Mexico Pharm – best online pharmacies in mexico
the canadian drugstore: GoCanadaPharm – adderall canadian pharmacy
https://gocanadapharm.shop/# canada cloud pharmacy
online shopping pharmacy india [url=https://wwwindiapharm.com/#]www india pharm[/url] indian pharmacy
indian pharmacy online: Online medicine home delivery – www india pharm
http://gocanadapharm.com/# canadian pharmacy no scripts
www india pharm: www india pharm – top 10 pharmacies in india
Agb Mexico Pharm: mexican drugstore online – Agb Mexico Pharm
mexican mail order pharmacies [url=https://agbmexicopharm.shop/#]Agb Mexico Pharm[/url] Agb Mexico Pharm
http://gocanadapharm.com/# rate canadian pharmacies
legitimate canadian pharmacies: GoCanadaPharm – canadian pharmacy oxycodone
mexican online pharmacies prescription drugs: Agb Mexico Pharm – mexico drug stores pharmacies
www india pharm: www india pharm – india online pharmacy
medication from mexico pharmacy: Agb Mexico Pharm – mexican border pharmacies shipping to usa
https://agbmexicopharm.shop/# buying prescription drugs in mexico
canadian pharmacy india [url=https://gocanadapharm.com/#]go canada pharm[/url] canada cloud pharmacy
canadian king pharmacy: go canada pharm – reliable canadian pharmacy reviews
indian pharmacy: www india pharm – www india pharm
www india pharm: www india pharm – www india pharm
https://gocanadapharm.shop/# legit canadian online pharmacy
mexico drug stores pharmacies: buying prescription drugs in mexico online – buying prescription drugs in mexico
Agb Mexico Pharm: best online pharmacies in mexico – Agb Mexico Pharm
Agb Mexico Pharm: mexican drugstore online – Agb Mexico Pharm
best canadian online pharmacy reviews [url=http://gocanadapharm.com/#]legit canadian online pharmacy[/url] reliable canadian pharmacy
http://wwwindiapharm.com/# www india pharm
www india pharm: online shopping pharmacy india – indian pharmacies safe
canadian pharmacies online: GoCanadaPharm – real canadian pharmacy
Agb Mexico Pharm: mexico drug stores pharmacies – medication from mexico pharmacy
ApotheekMax [url=https://apotheekmax.shop/#]de online drogist kortingscode[/url] online apotheek
Kamagra Oral Jelly kaufen: kamagra – Kamagra Gel
de online drogist kortingscode: Apotheek online bestellen – online apotheek
https://apotekonlinerecept.com/# apotek online
Kamagra kaufen: kamagra – Kamagra online bestellen
https://kamagrapotenzmittel.shop/# Kamagra kaufen ohne Rezept
Apotek hemleverans recept [url=https://apotekonlinerecept.com/#]apotek pa nett[/url] Apoteket online
Apotek hemleverans recept: apotek pa nett – Apoteket online
https://kamagrapotenzmittel.com/# Kamagra kaufen ohne Rezept
de online drogist kortingscode: Betrouwbare online apotheek zonder recept – Apotheek online bestellen
https://apotheekmax.shop/# de online drogist kortingscode
Online apotheek Nederland zonder recept: Betrouwbare online apotheek zonder recept – Apotheek Max
https://apotheekmax.shop/# Online apotheek Nederland met recept
apotek online: Apotek hemleverans idag – Apotek hemleverans recept
de online drogist kortingscode: online apotheek – Beste online drogist
http://apotheekmax.com/# Apotheek Max
Kamagra kaufen ohne Rezept: Kamagra Oral Jelly – Kamagra Oral Jelly kaufen
https://apotheekmax.com/# de online drogist kortingscode
Apotheek Max: Apotheek Max – Betrouwbare online apotheek zonder recept
https://apotheekmax.com/# de online drogist kortingscode
Kamagra Oral Jelly kaufen [url=https://kamagrapotenzmittel.com/#]kamagra[/url] Kamagra kaufen
Kamagra kaufen ohne Rezept: Kamagra online bestellen – Kamagra Oral Jelly kaufen
https://kamagrapotenzmittel.com/# Kamagra Original
https://apotekonlinerecept.shop/# Apotek hemleverans recept
kamagra: kamagra – kamagra
online apotheek [url=https://apotheekmax.shop/#]Online apotheek Nederland zonder recept[/url] ApotheekMax
http://kamagrapotenzmittel.com/# Kamagra Gel
Online apotheek Nederland met recept: Apotheek Max – Online apotheek Nederland zonder recept
http://apotheekmax.com/# Online apotheek Nederland met recept
Apotheek online bestellen [url=https://apotheekmax.shop/#]online apotheek[/url] Betrouwbare online apotheek zonder recept
Apotek hemleverans idag: apotek online recept – apotek online
http://apotekonlinerecept.com/# apotek online recept
Online apotheek Nederland met recept: Beste online drogist – Betrouwbare online apotheek zonder recept
https://apotheekmax.com/# Beste online drogist
kamagra [url=http://kamagrapotenzmittel.com/#]kamagra[/url] Kamagra kaufen ohne Rezept
apotek online recept: apotek online – apotek pa nett
https://kamagrapotenzmittel.shop/# Kamagra online bestellen
Apotek hemleverans idag: Apotek hemleverans idag – apotek online recept
пин ап казино зеркало – пин ап казино зеркало
pinup 2025 – пин ап казино
Generic100mgEasy [url=https://generic100mgeasy.shop/#]Generic 100mg Easy[/url] Generic 100mg Easy
пин ап: https://pinupkz.life/
pinup 2025 – пин ап казино зеркало
viagra canada [url=http://generic100mgeasy.com/#]Generic100mgEasy[/url] Generic 100mg Easy
пинап казино – pinup 2025
pinup 2025 – пин ап
pinup 2025: https://pinupkz.life/
пин ап казино официальный сайт – пин ап
пин ап казино зеркало – пин ап вход
kamagra kopen nederland [url=https://kamagrakopen.pro/#]kamagra jelly kopen[/url] Officiele Kamagra van Nederland
пин ап – пин ап зеркало
пин ап: https://pinupkz.life/
пин ап зеркало – pinup 2025
пин ап вход – пинап казино
пин ап казино зеркало: https://pinupkz.life/
пин ап казино зеркало – пинап казино
cialis without a doctor prescription [url=https://tadalafileasybuy.com/#]TadalafilEasyBuy.com[/url] Tadalafil Tablet
пин ап зеркало – пин ап зеркало
пин ап зеркало – пин ап казино зеркало
pinup 2025 – пин ап вход
пин ап – пин ап казино
пин ап вход: https://pinupkz.life/
https://kamagrakopen.pro/# Kamagra Kopen
kamagra pillen kopen [url=https://kamagrakopen.pro/#]KamagraKopen.pro[/url] KamagraKopen.pro
Generic 100mg Easy: Generic 100mg Easy – Cheap Sildenafil 100mg
https://generic100mgeasy.com/# buy generic 100mg viagra online
Generic100mgEasy: over the counter sildenafil – Generic100mgEasy
https://generic100mgeasy.shop/# Generic 100mg Easy
buy generic 100mg viagra online: Generic100mgEasy – Generic100mgEasy
Generic 100mg Easy [url=https://generic100mgeasy.com/#]Viagra without a doctor prescription Canada[/url] Generic 100mg Easy
http://generic100mgeasy.com/# Generic 100mg Easy
Generic100mgEasy: Sildenafil Citrate Tablets 100mg – Generic 100mg Easy
https://tadalafileasybuy.shop/# Tadalafil Easy Buy
Generic100mgEasy: buy generic 100mg viagra online – Viagra without a doctor prescription Canada
https://kamagrakopen.pro/# KamagraKopen.pro
kamagra kopen nederland: Officiele Kamagra van Nederland – kamagra jelly kopen
https://tadalafileasybuy.shop/# cialis without a doctor prescription
TadalafilEasyBuy.com [url=http://tadalafileasybuy.com/#]Cialis 20mg price in USA[/url] Cialis over the counter
buy generic 100mg viagra online: Cheap Viagra 100mg – buy generic 100mg viagra online
https://kamagrakopen.pro/# kamagra gel kopen
kamagra jelly kopen: kamagra kopen nederland – kamagra pillen kopen
Officiele Kamagra van Nederland: KamagraKopen.pro – Kamagra Kopen
https://generic100mgeasy.shop/# Generic 100mg Easy
kamagra kopen nederland: kamagra kopen nederland – kamagra pillen kopen
kamagra jelly kopen [url=https://kamagrakopen.pro/#]kamagra kopen nederland[/url] Officiele Kamagra van Nederland
https://tadalafileasybuy.shop/# Tadalafil Easy Buy
Tadalafil Easy Buy: cialis without a doctor prescription – cialis without a doctor prescription
Generic100mgEasy: Generic 100mg Easy – cheap viagra
https://tadalafileasybuy.com/# Generic Cialis price
Tadalafil Easy Buy: TadalafilEasyBuy.com – TadalafilEasyBuy.com
kamagra kopen nederland: Officiele Kamagra van Nederland – kamagra gel kopen
buy generic 100mg viagra online [url=http://generic100mgeasy.com/#]Generic 100mg Easy[/url] Generic100mgEasy
kamagra jelly kopen: kamagra pillen kopen – kamagra pillen kopen
https://kamagrakopen.pro/# kamagra jelly kopen
kamagra gel kopen: kamagra jelly kopen – KamagraKopen.pro
https://kamagrakopen.pro/# kamagra pillen kopen
Tadalafil Easy Buy [url=https://tadalafileasybuy.com/#]Cialis 20mg price in USA[/url] Cialis without a doctor prescription
kamagra pillen kopen: KamagraKopen.pro – KamagraKopen.pro
https://tadalafileasybuy.shop/# cialis without a doctor prescription
Cialis over the counter: cialis without a doctor prescription – Tadalafil Easy Buy
https://kamagrakopen.pro/# kamagra 100mg kopen
https://tadalafileasybuy.com/# Tadalafil Easy Buy
Tadalafil Easy Buy: cialis without a doctor prescription – Tadalafil Easy Buy
Kamagra Kopen Online [url=https://kamagrakopen.pro/#]Officiele Kamagra van Nederland[/url] kamagra gel kopen
https://interpharmonline.shop/# canada cloud pharmacy
best rated canadian pharmacy
canadian pharmacy near me: Certified International Pharmacy Online – canadian medications
Mexican Pharm International: mexican pharmacy online order – mexican drug stores online
https://indiamedfast.shop/# online medicine shopping in india
https://mexicanpharminter.com/# mexican drug stores online
canadianpharmacy com
canadian pharmacy sarasota [url=http://interpharmonline.com/#]legitimate canadian pharmacies online[/url] onlinecanadianpharmacy
reliable canadian online pharmacy: canadian drugstore online no prescription – canadian pharmacy checker
buying from online mexican pharmacy: buying from online mexican pharmacy – Mexican Pharm Inter
http://interpharmonline.com/# canada pharmacy reviews
https://indiamedfast.com/# online medicine shopping in india
reputable canadian online pharmacy
https://mexicanpharminter.com/# mexican pharmacy online
https://indiamedfast.shop/# India Med Fast
canadian pharmacy no scripts
adderall canadian pharmacy [url=http://interpharmonline.com/#]Pharmacies in Canada that ship to the US[/url] canadianpharmacymeds
https://mexicanpharminter.com/# Mexican Pharm International
cheapest online pharmacy india: india online pharmacy store – india online pharmacy store
http://indiamedfast.com/# online pharmacy india
canadianpharmacy com
online pharmacy india: cheapest online pharmacy india – india online pharmacy store
https://indiamedfast.shop/# cheapest online pharmacy india
cheapest online pharmacy india [url=http://indiamedfast.com/#]india online pharmacy store[/url] cheapest online pharmacy india
mexican pharmacy online order: Mexican Pharm International – mexican pharmacy online order
http://interpharmonline.com/# canadian 24 hour pharmacy
canadian neighbor pharmacy
buying prescription drugs from india: buying prescription drugs from india – india pharmacy without prescription
canadian pharmacy in canada: Inter Pharm Online – northwest pharmacy canada
http://interpharmonline.com/# best canadian pharmacy online
my canadian pharmacy reviews
mexican pharmacy online [url=https://mexicanpharminter.shop/#]reliable mexican pharmacies[/url] buying from online mexican pharmacy
buying from online mexican pharmacy: mexican pharmacy online order – reliable mexican pharmacies
canada pharmacy: canadian drugstore online no prescription – global pharmacy canada
http://interpharmonline.com/# canada drugs online
canadian pharmacy checker
alo 789: alo 789 – alo789 chinh th?c
Your blog is often packed of useful information on a variety of topics. Thanks for all that you do.
Your writing creates vibrant imagery in my mind. I can visualize every detail you portray.
Pingback: How to Make a DIY Grinch Christmas Tree Ornament - Six Clever Sisters