How to make a DIY Wood Sign Christmas Tree for Christmas!
I love adding new decorations to my Christmas stash every year! There are always trends for Christmas decorations, but I think that this piece is a timeless style that will last for years to come.
And it is so easy to make. I “cheated” and used a premade wooden sign from Hobby Lobby. 🙂 They have the best selection, and the prices are not bad at all if you use the 40% coupon that is always on their website or app.
The only other supplies that I used for this project were this yarn and hot glue . . . and a small piece of twine for the bow on top of the Christmas tree.
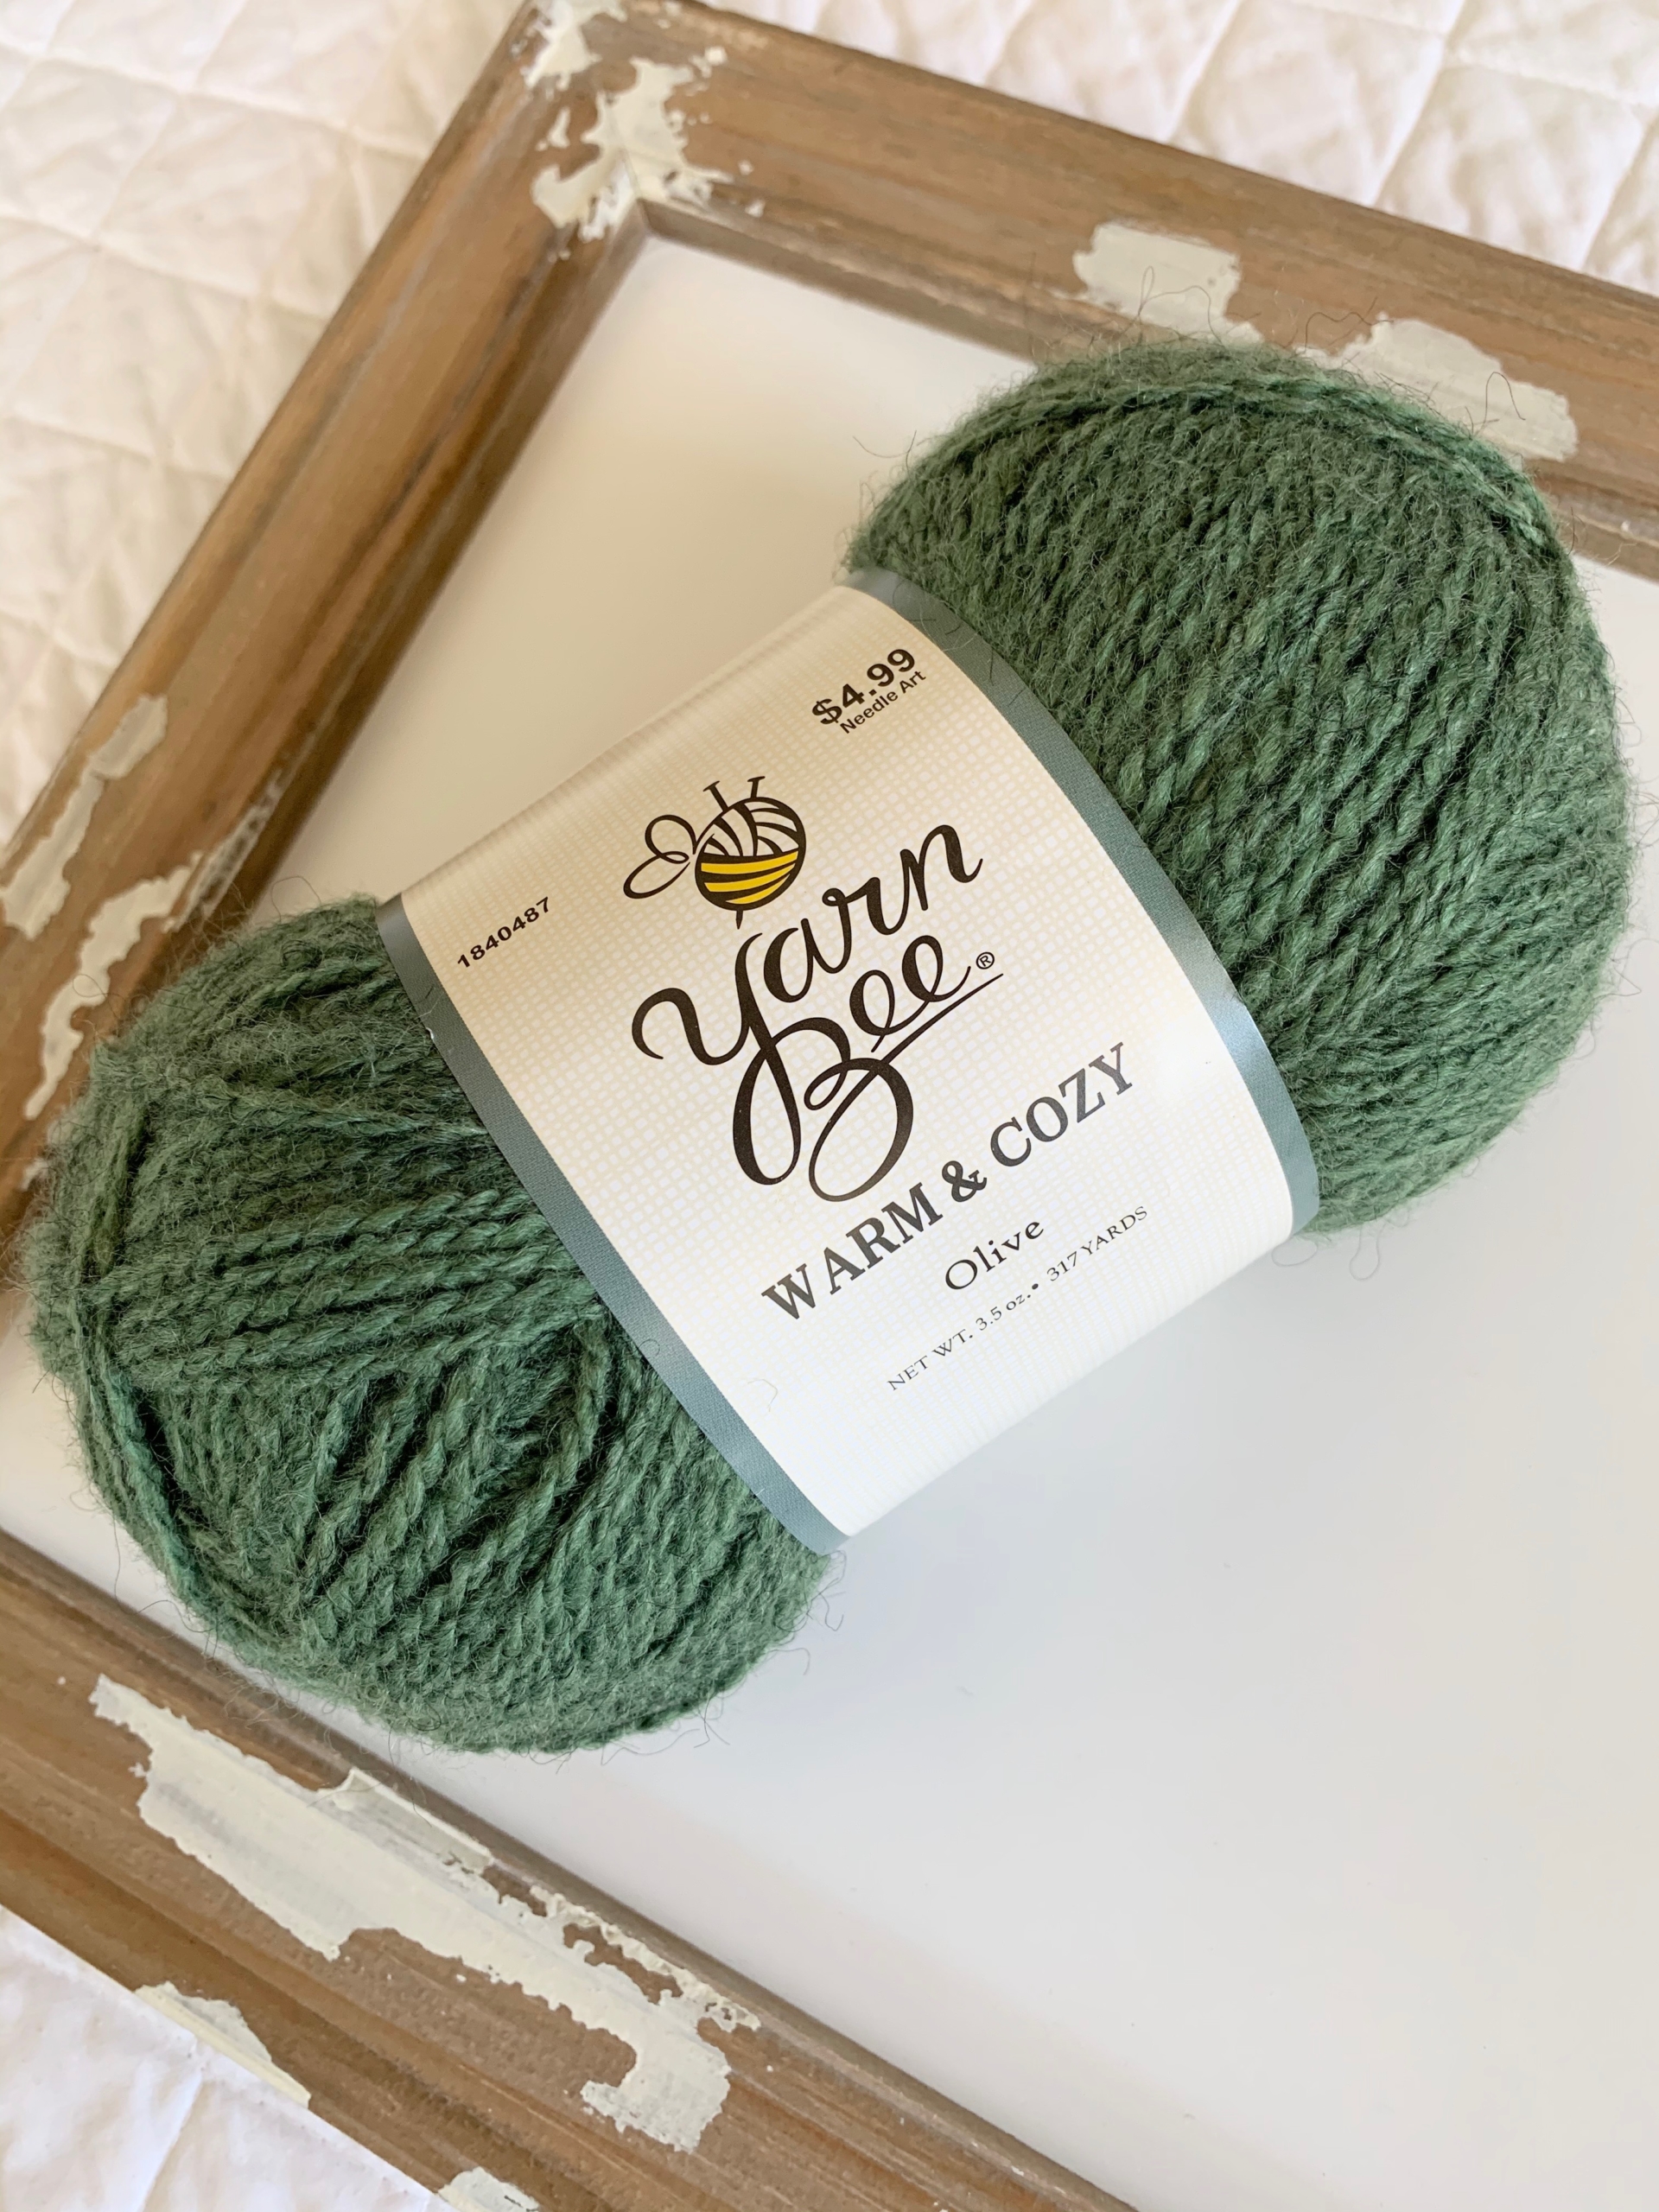
The only technique that you need to learn to make this DIY Christmas tree wooden sign is how to make a tassel.
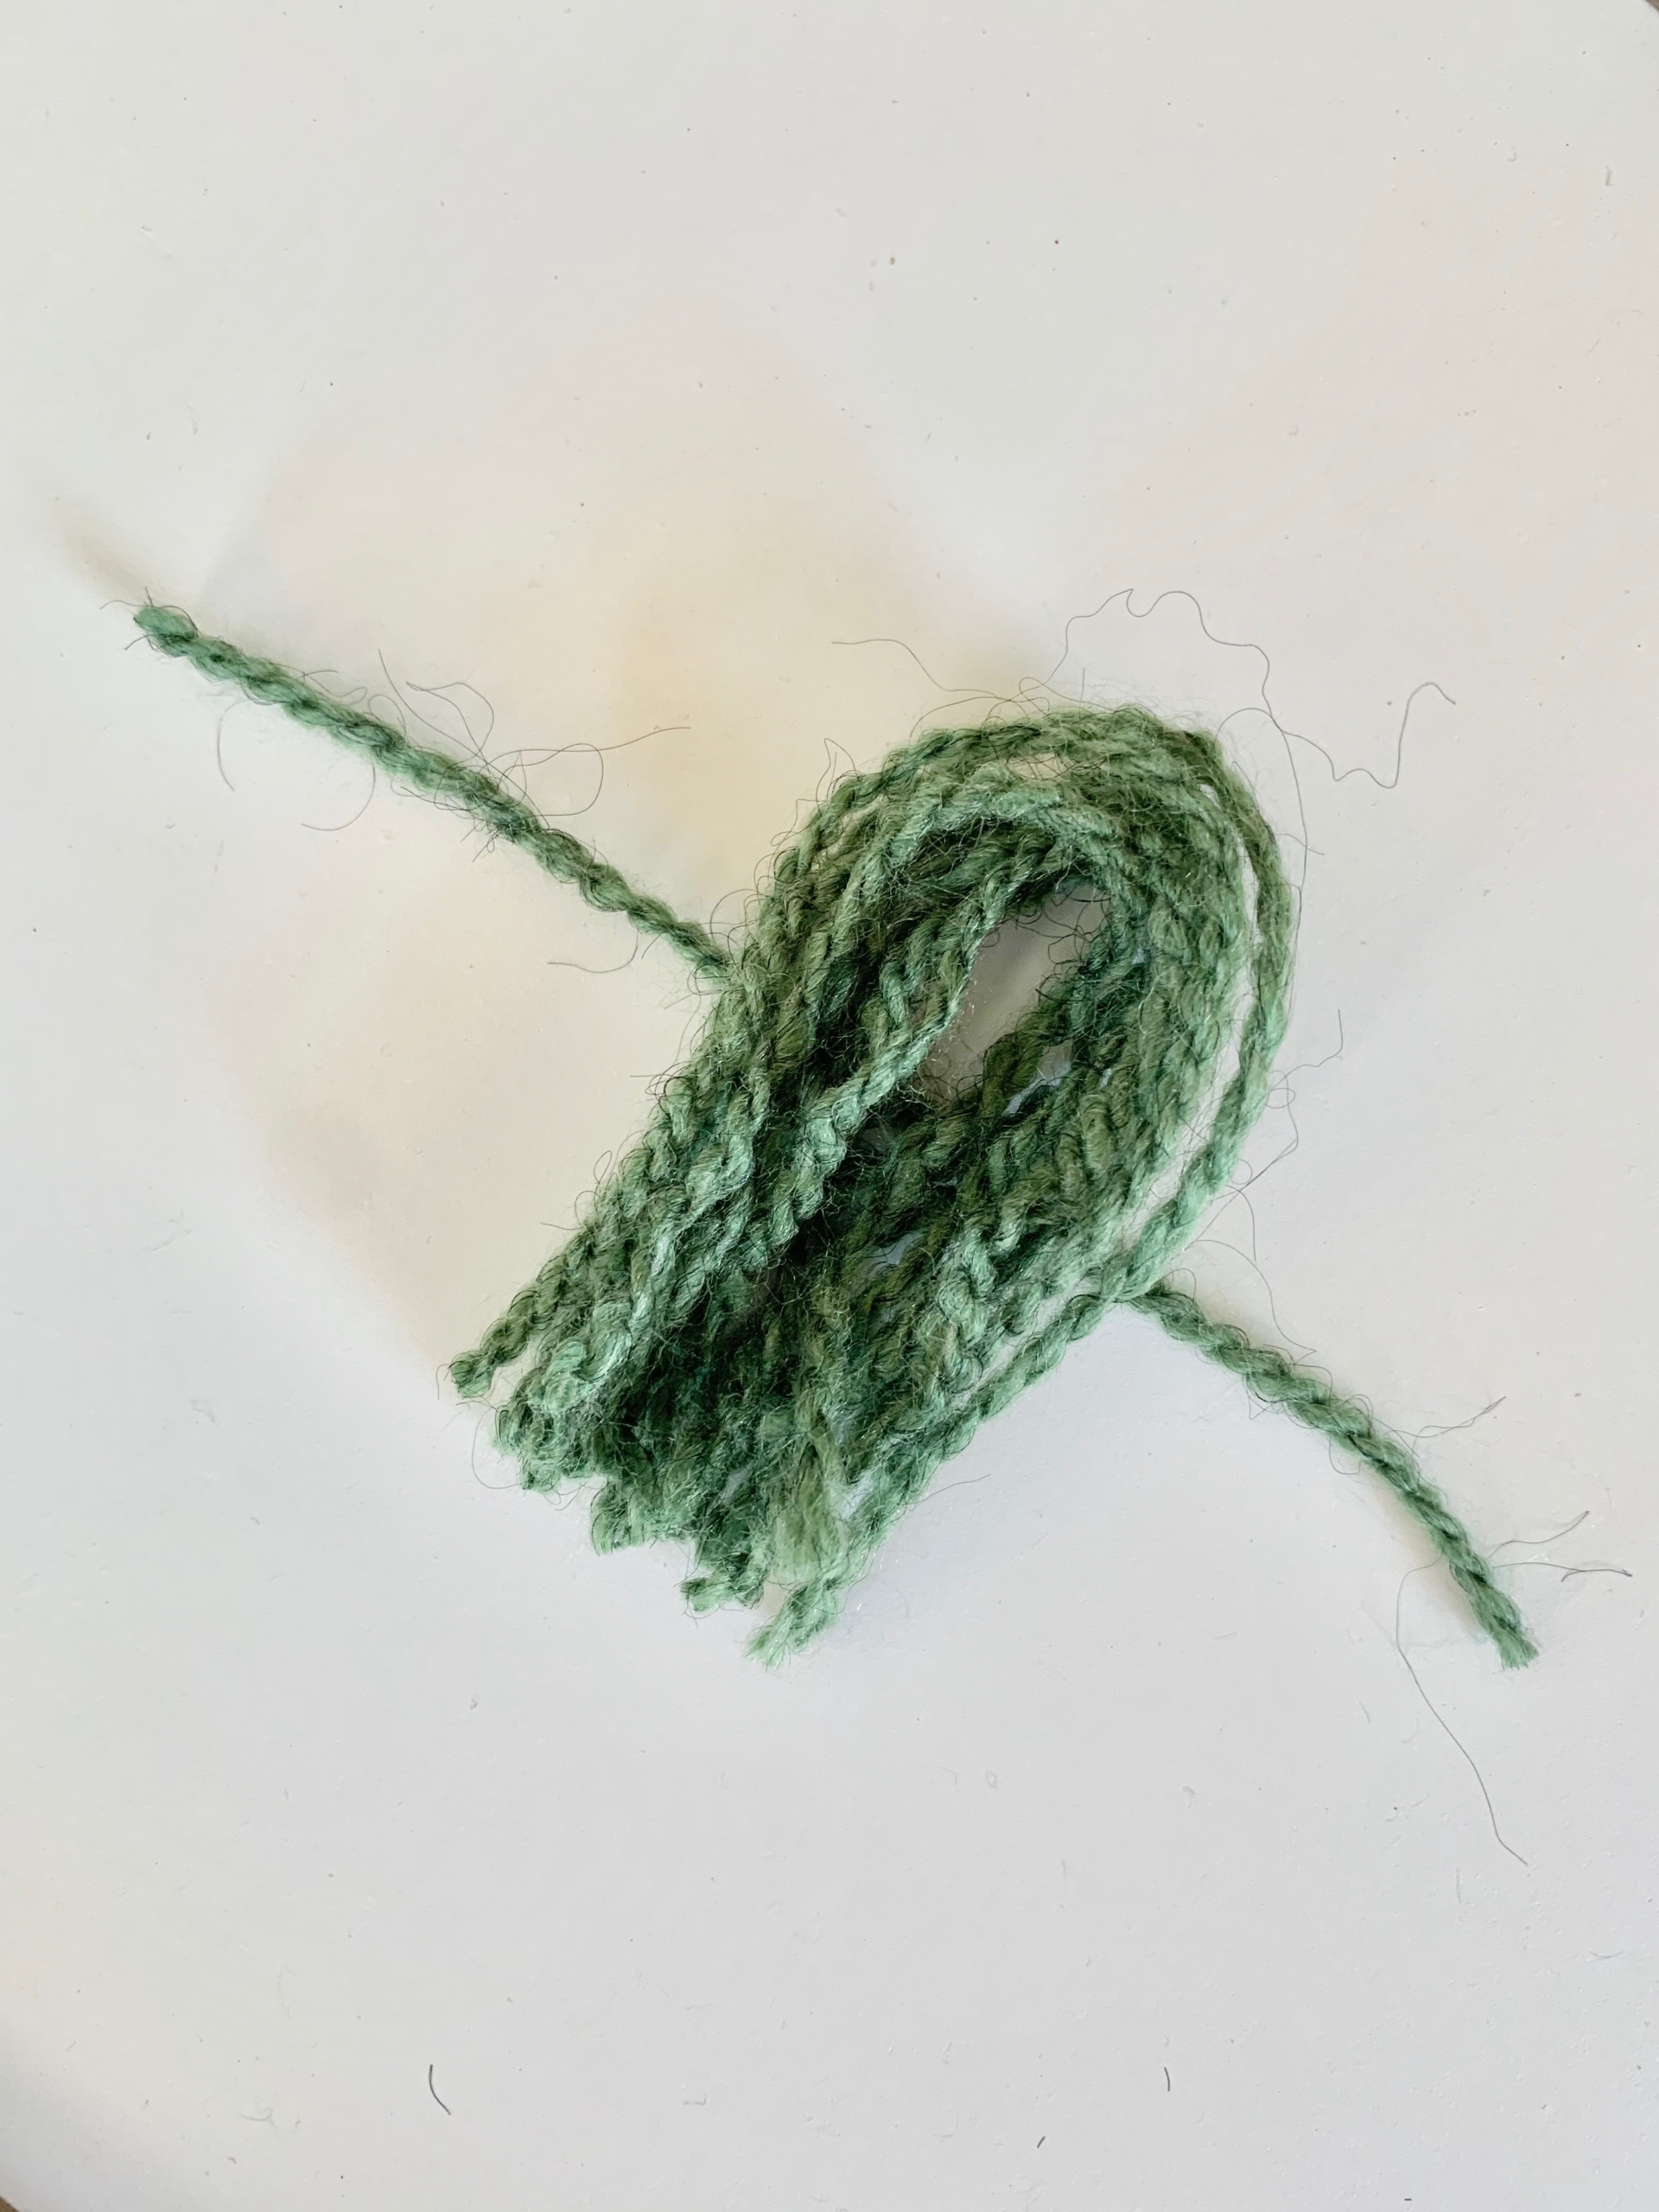
First wrap yarn around your 4 fingers.
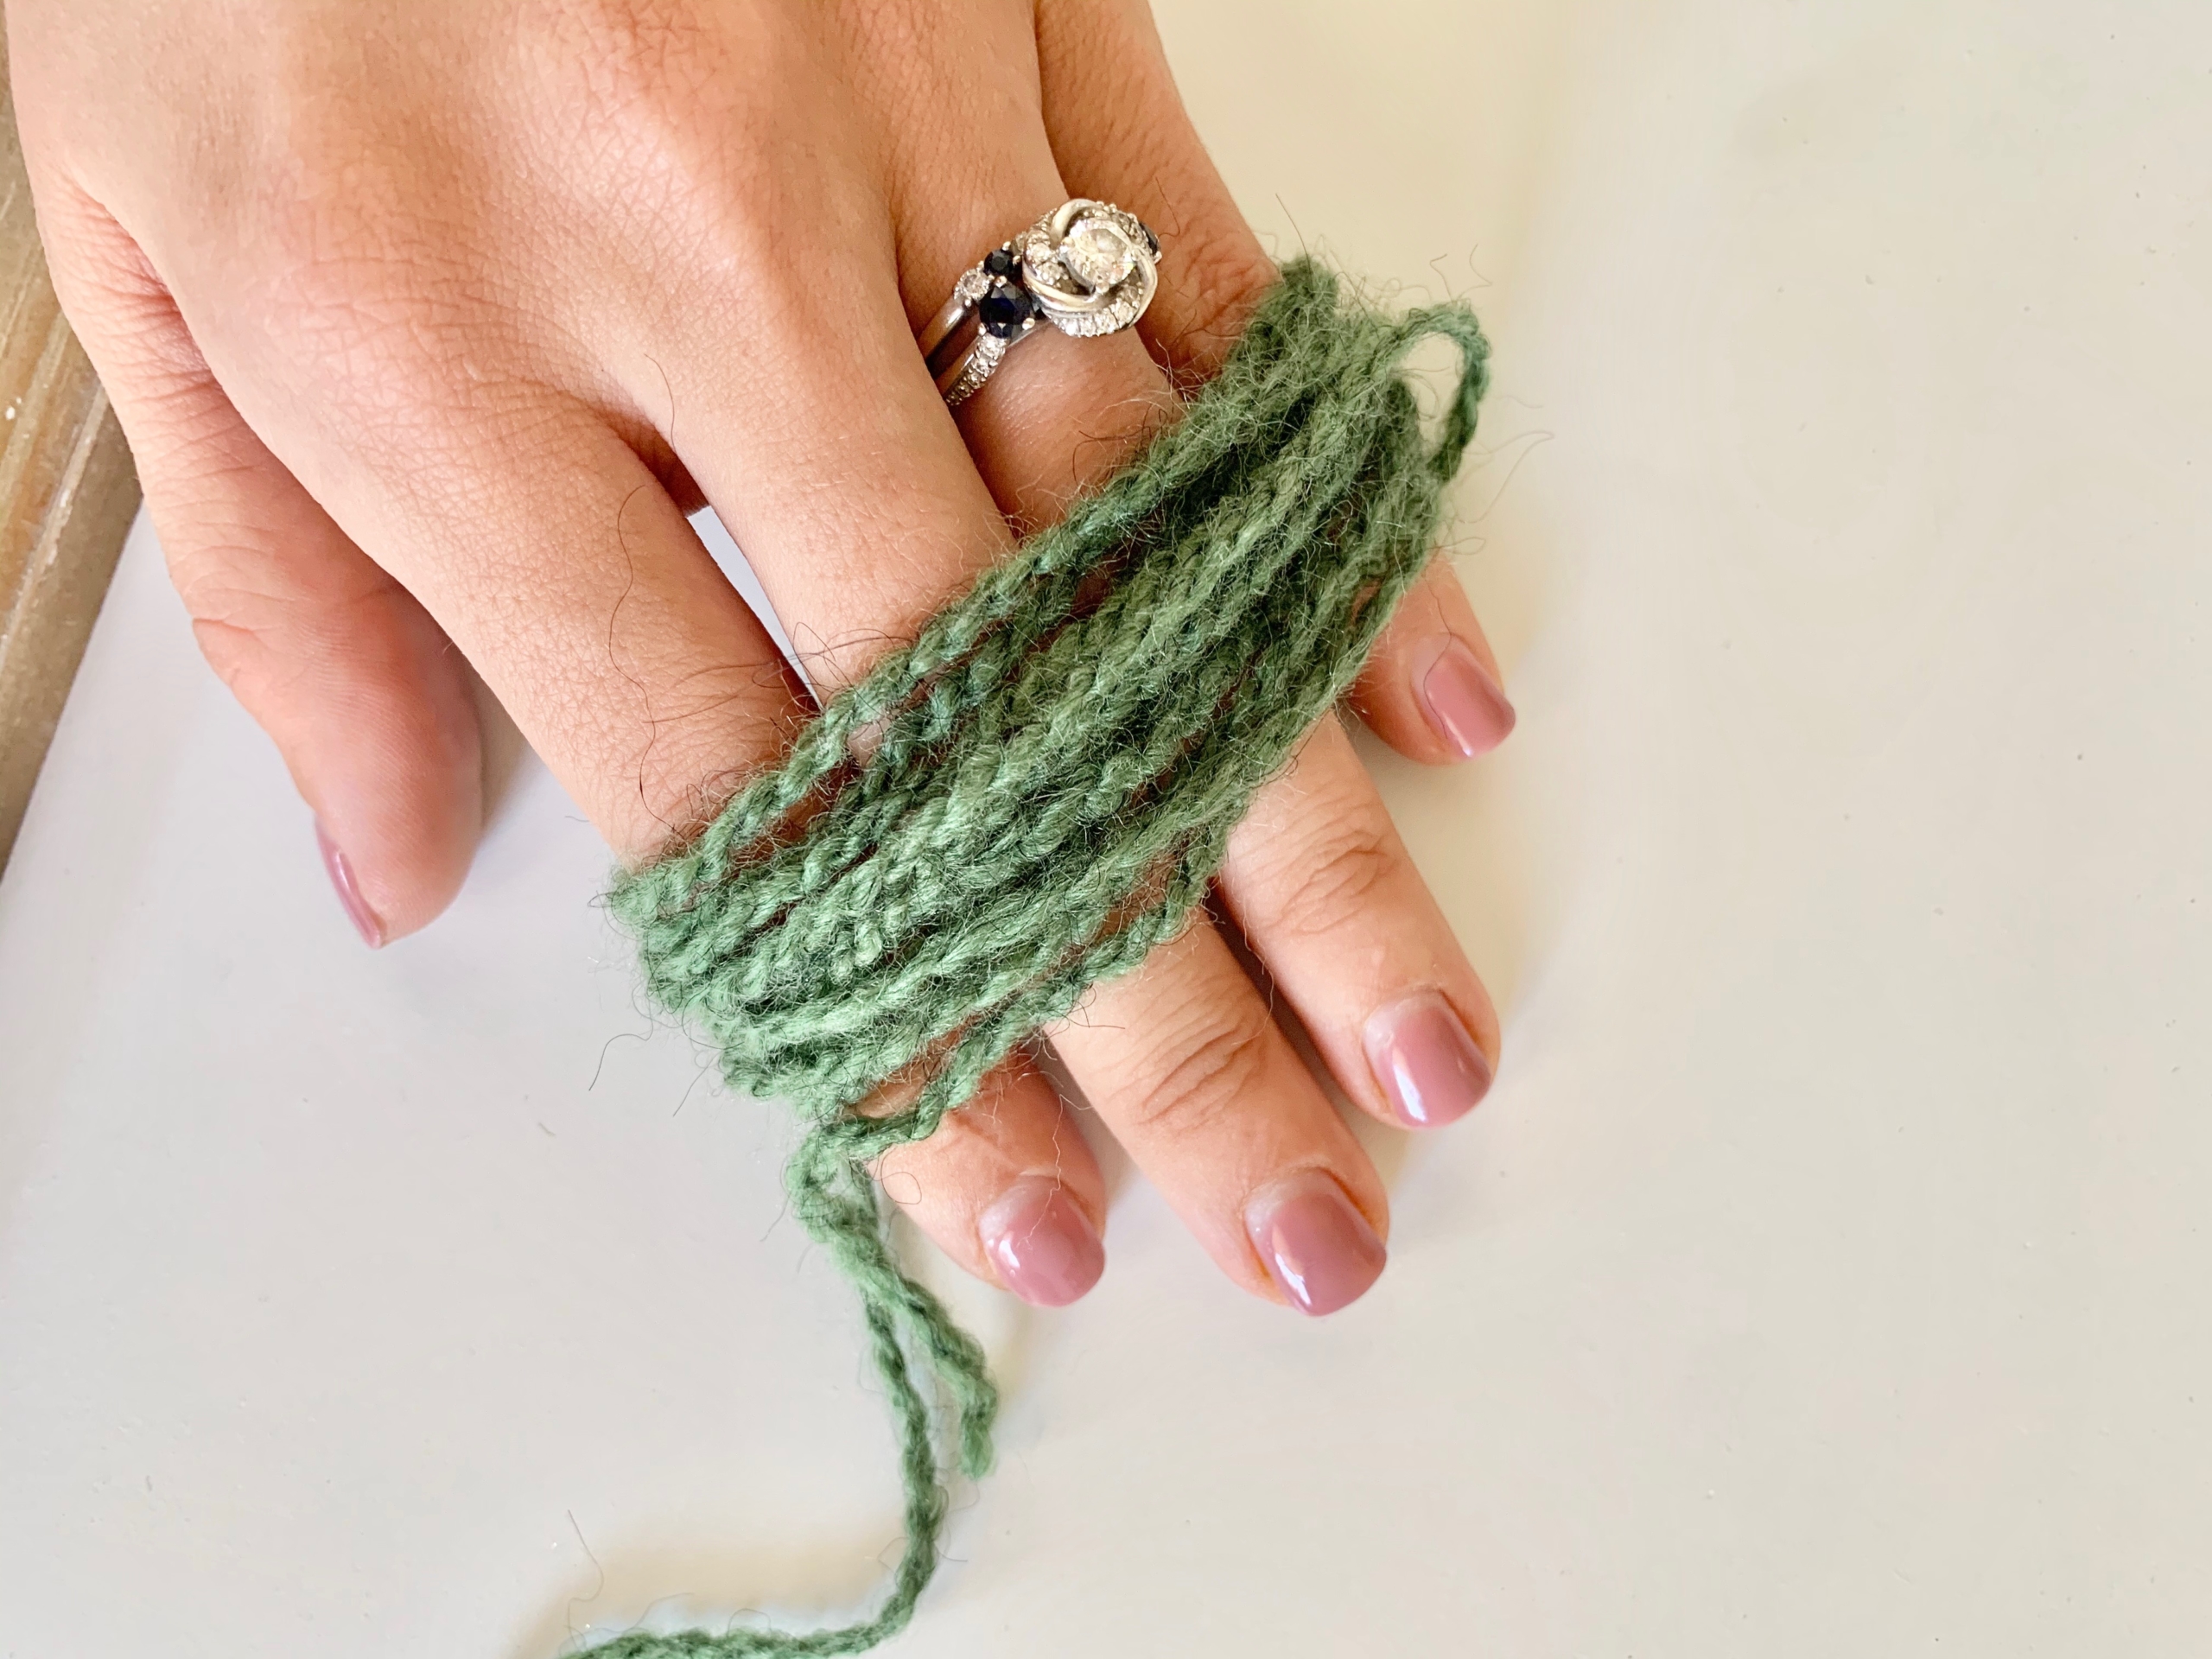
Next, slide the yarn off of your fingers . . .
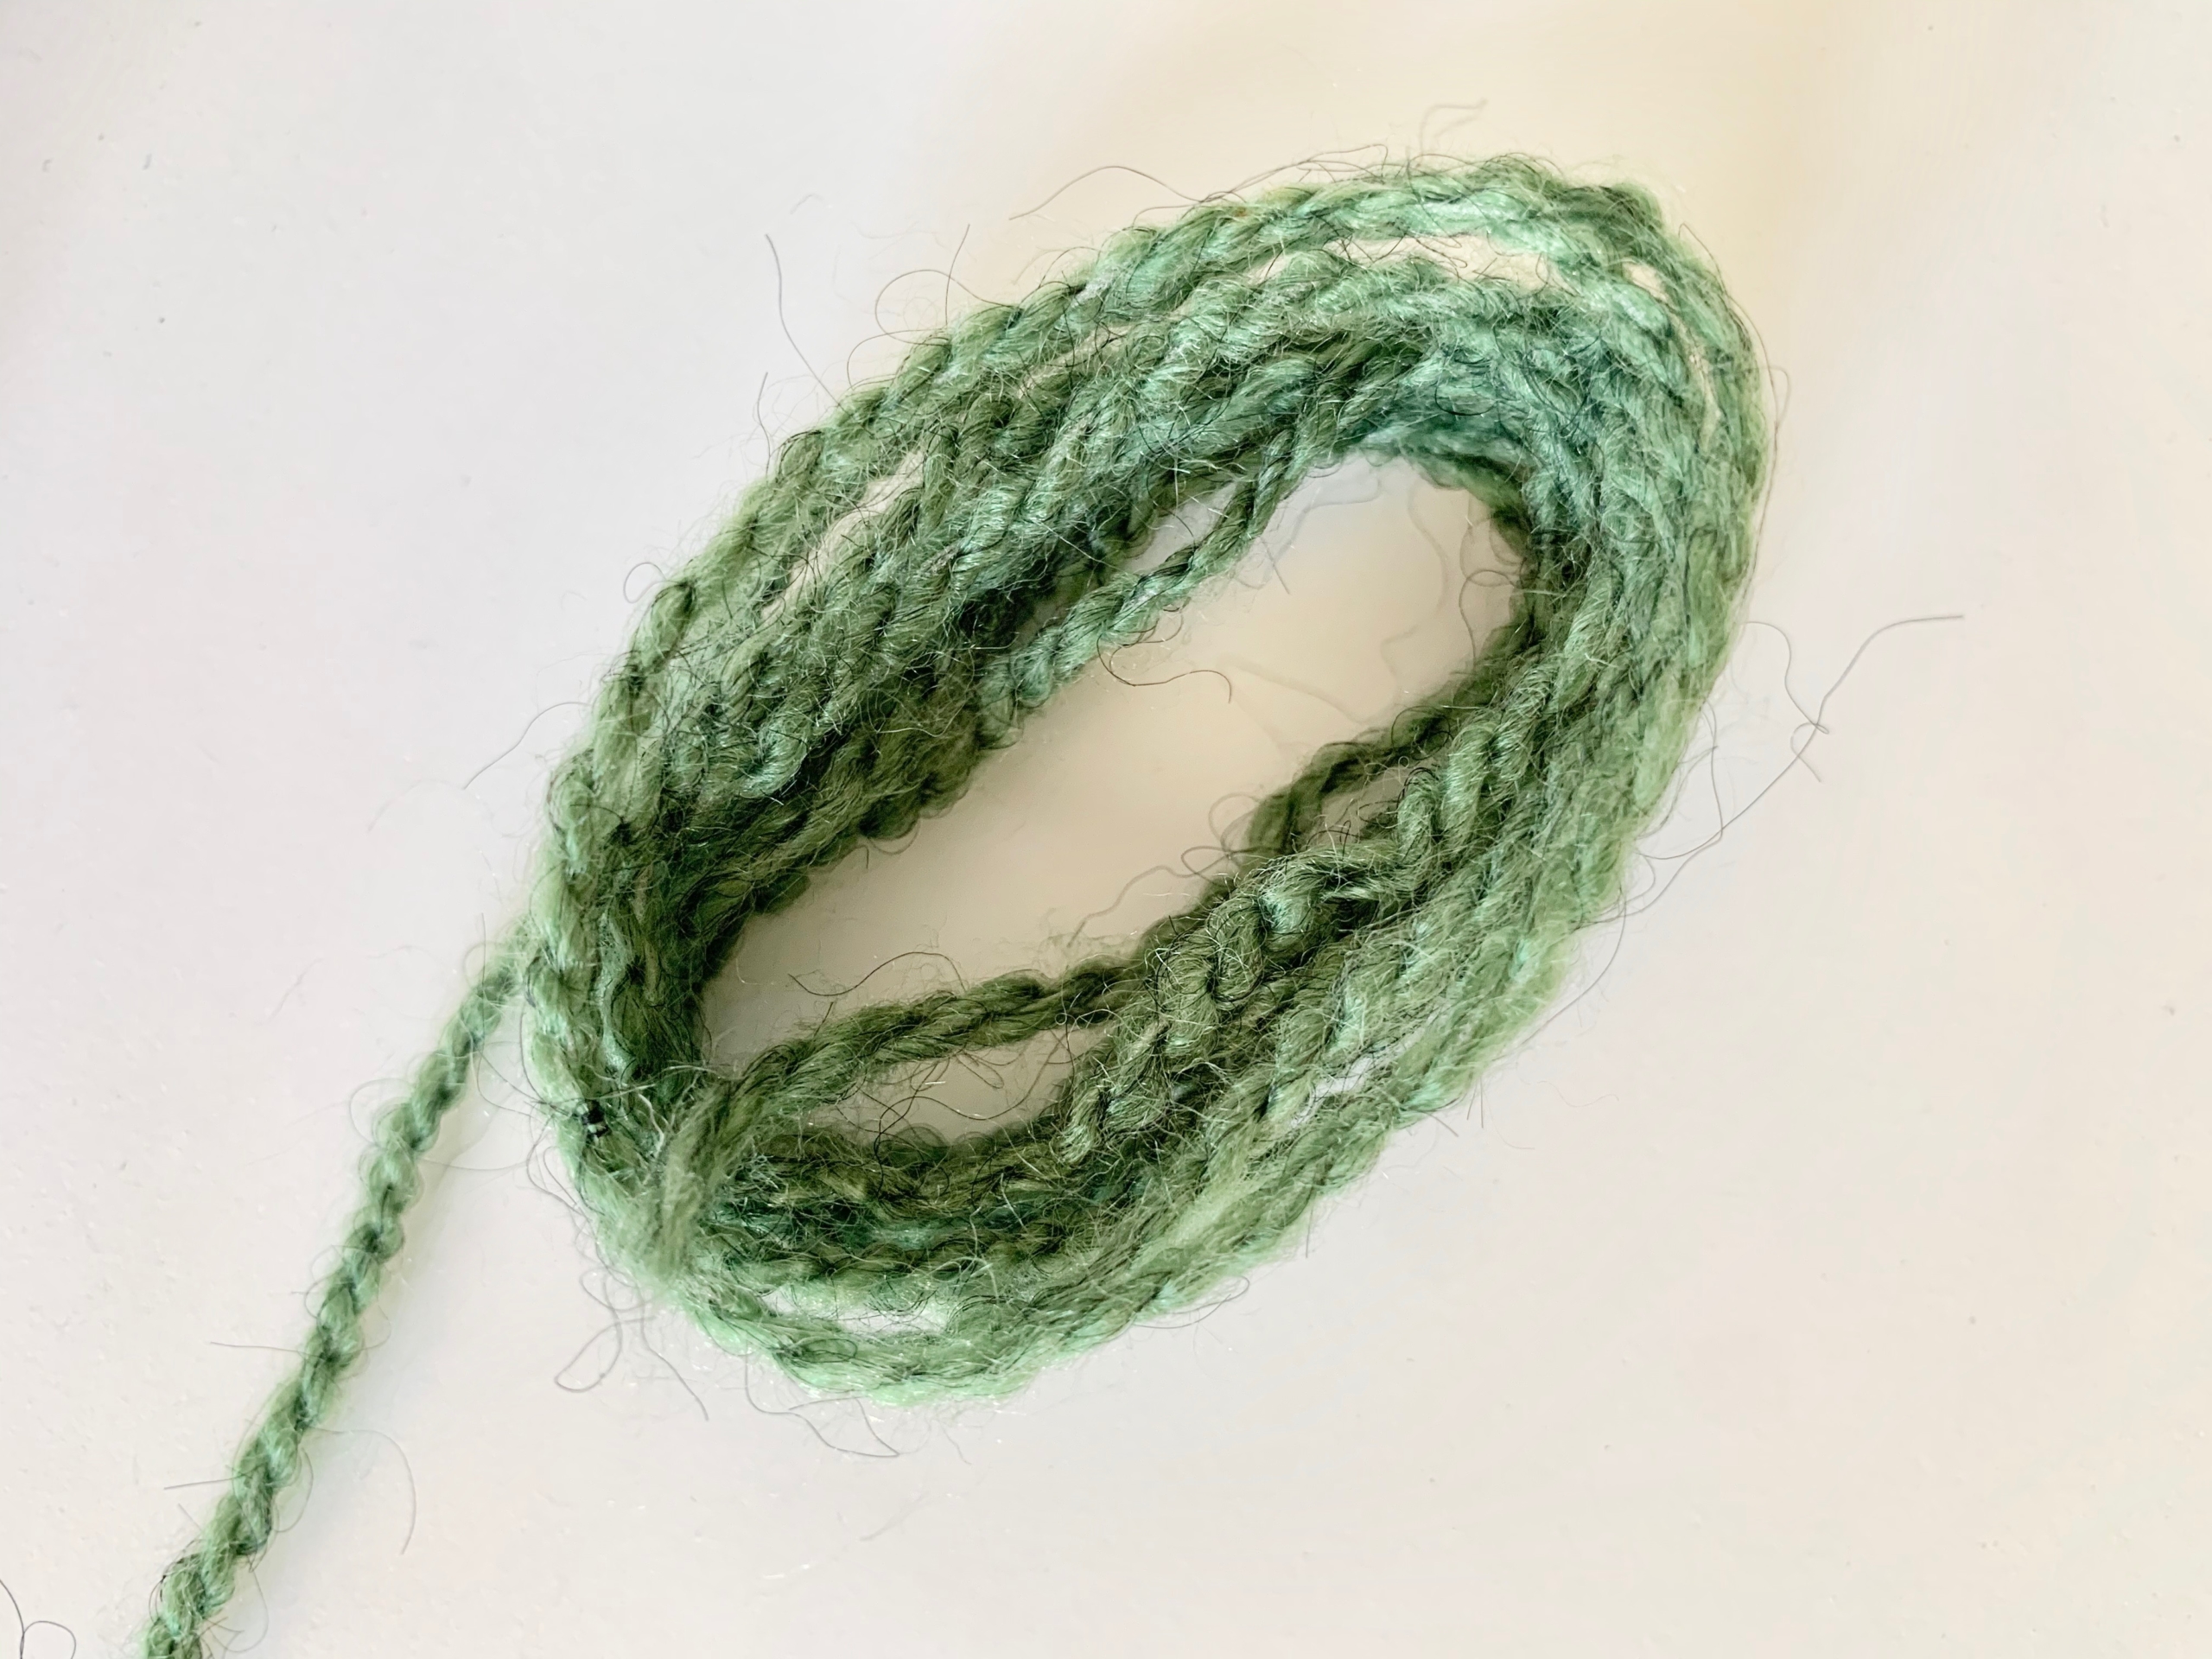
Then using scissors, cut through one end of the loop, and cut the tail off.
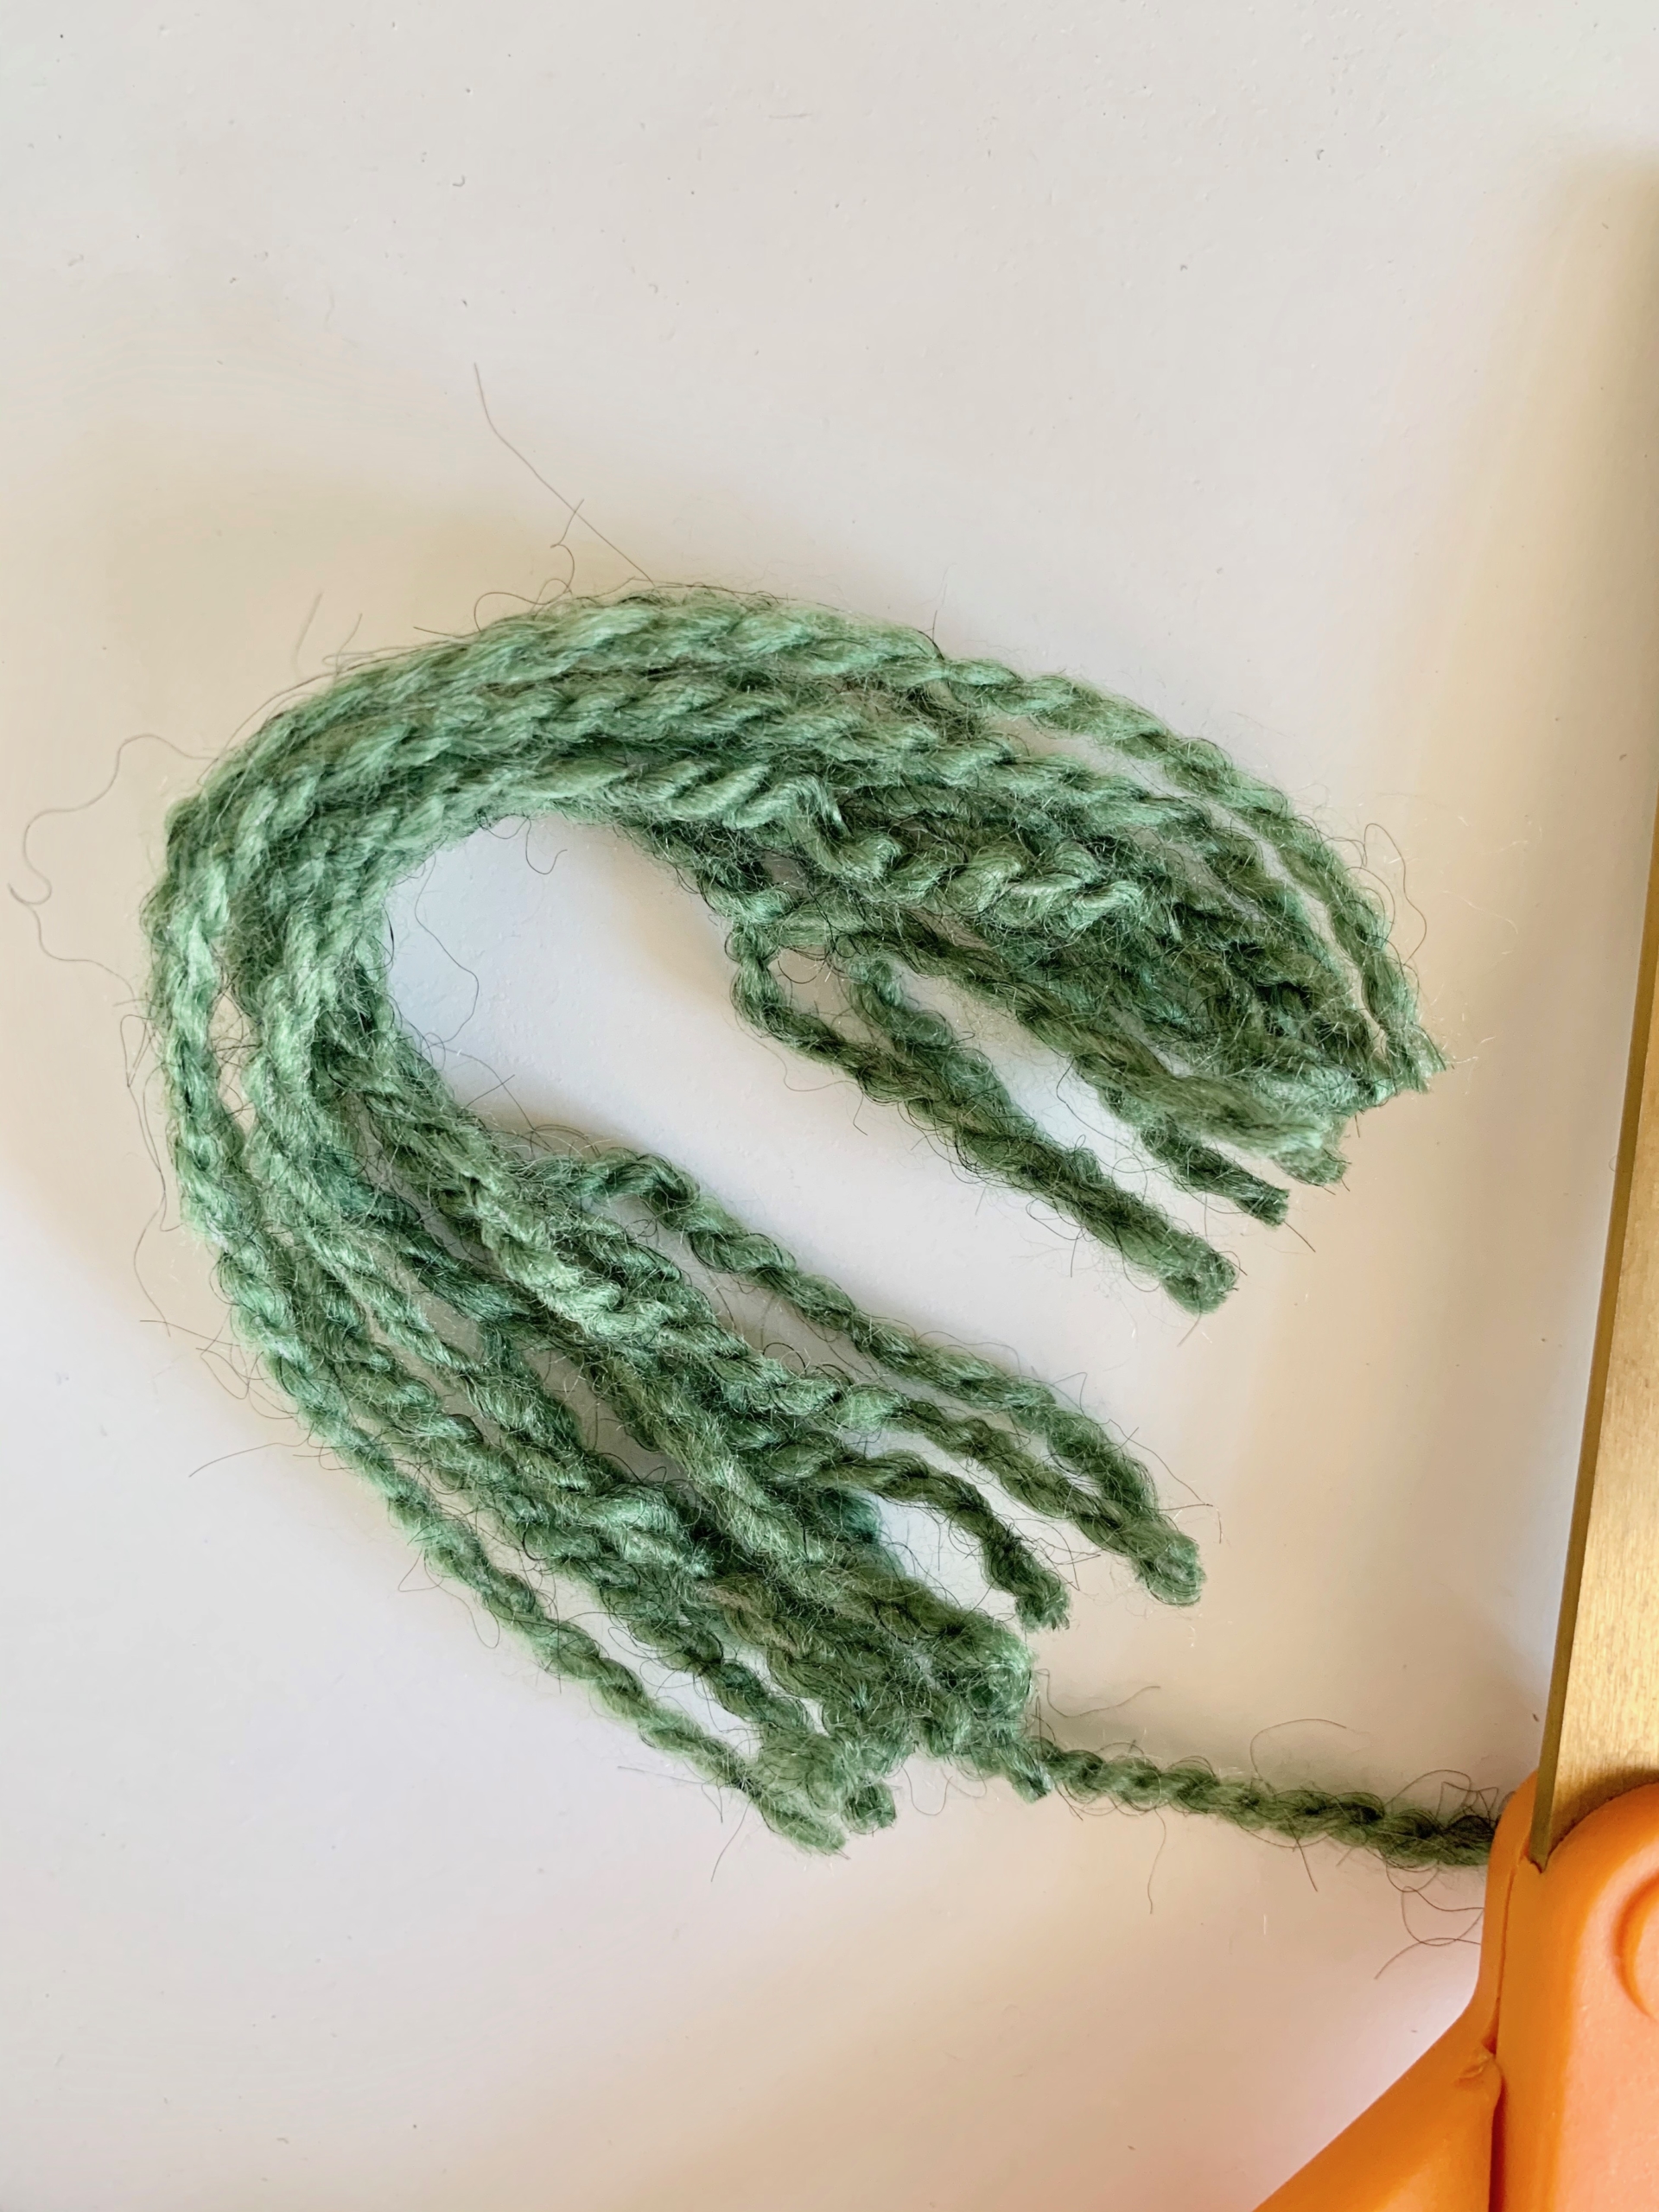
Next, using a 3 inch piece of yarn, tie a knot halfway down as shown below.
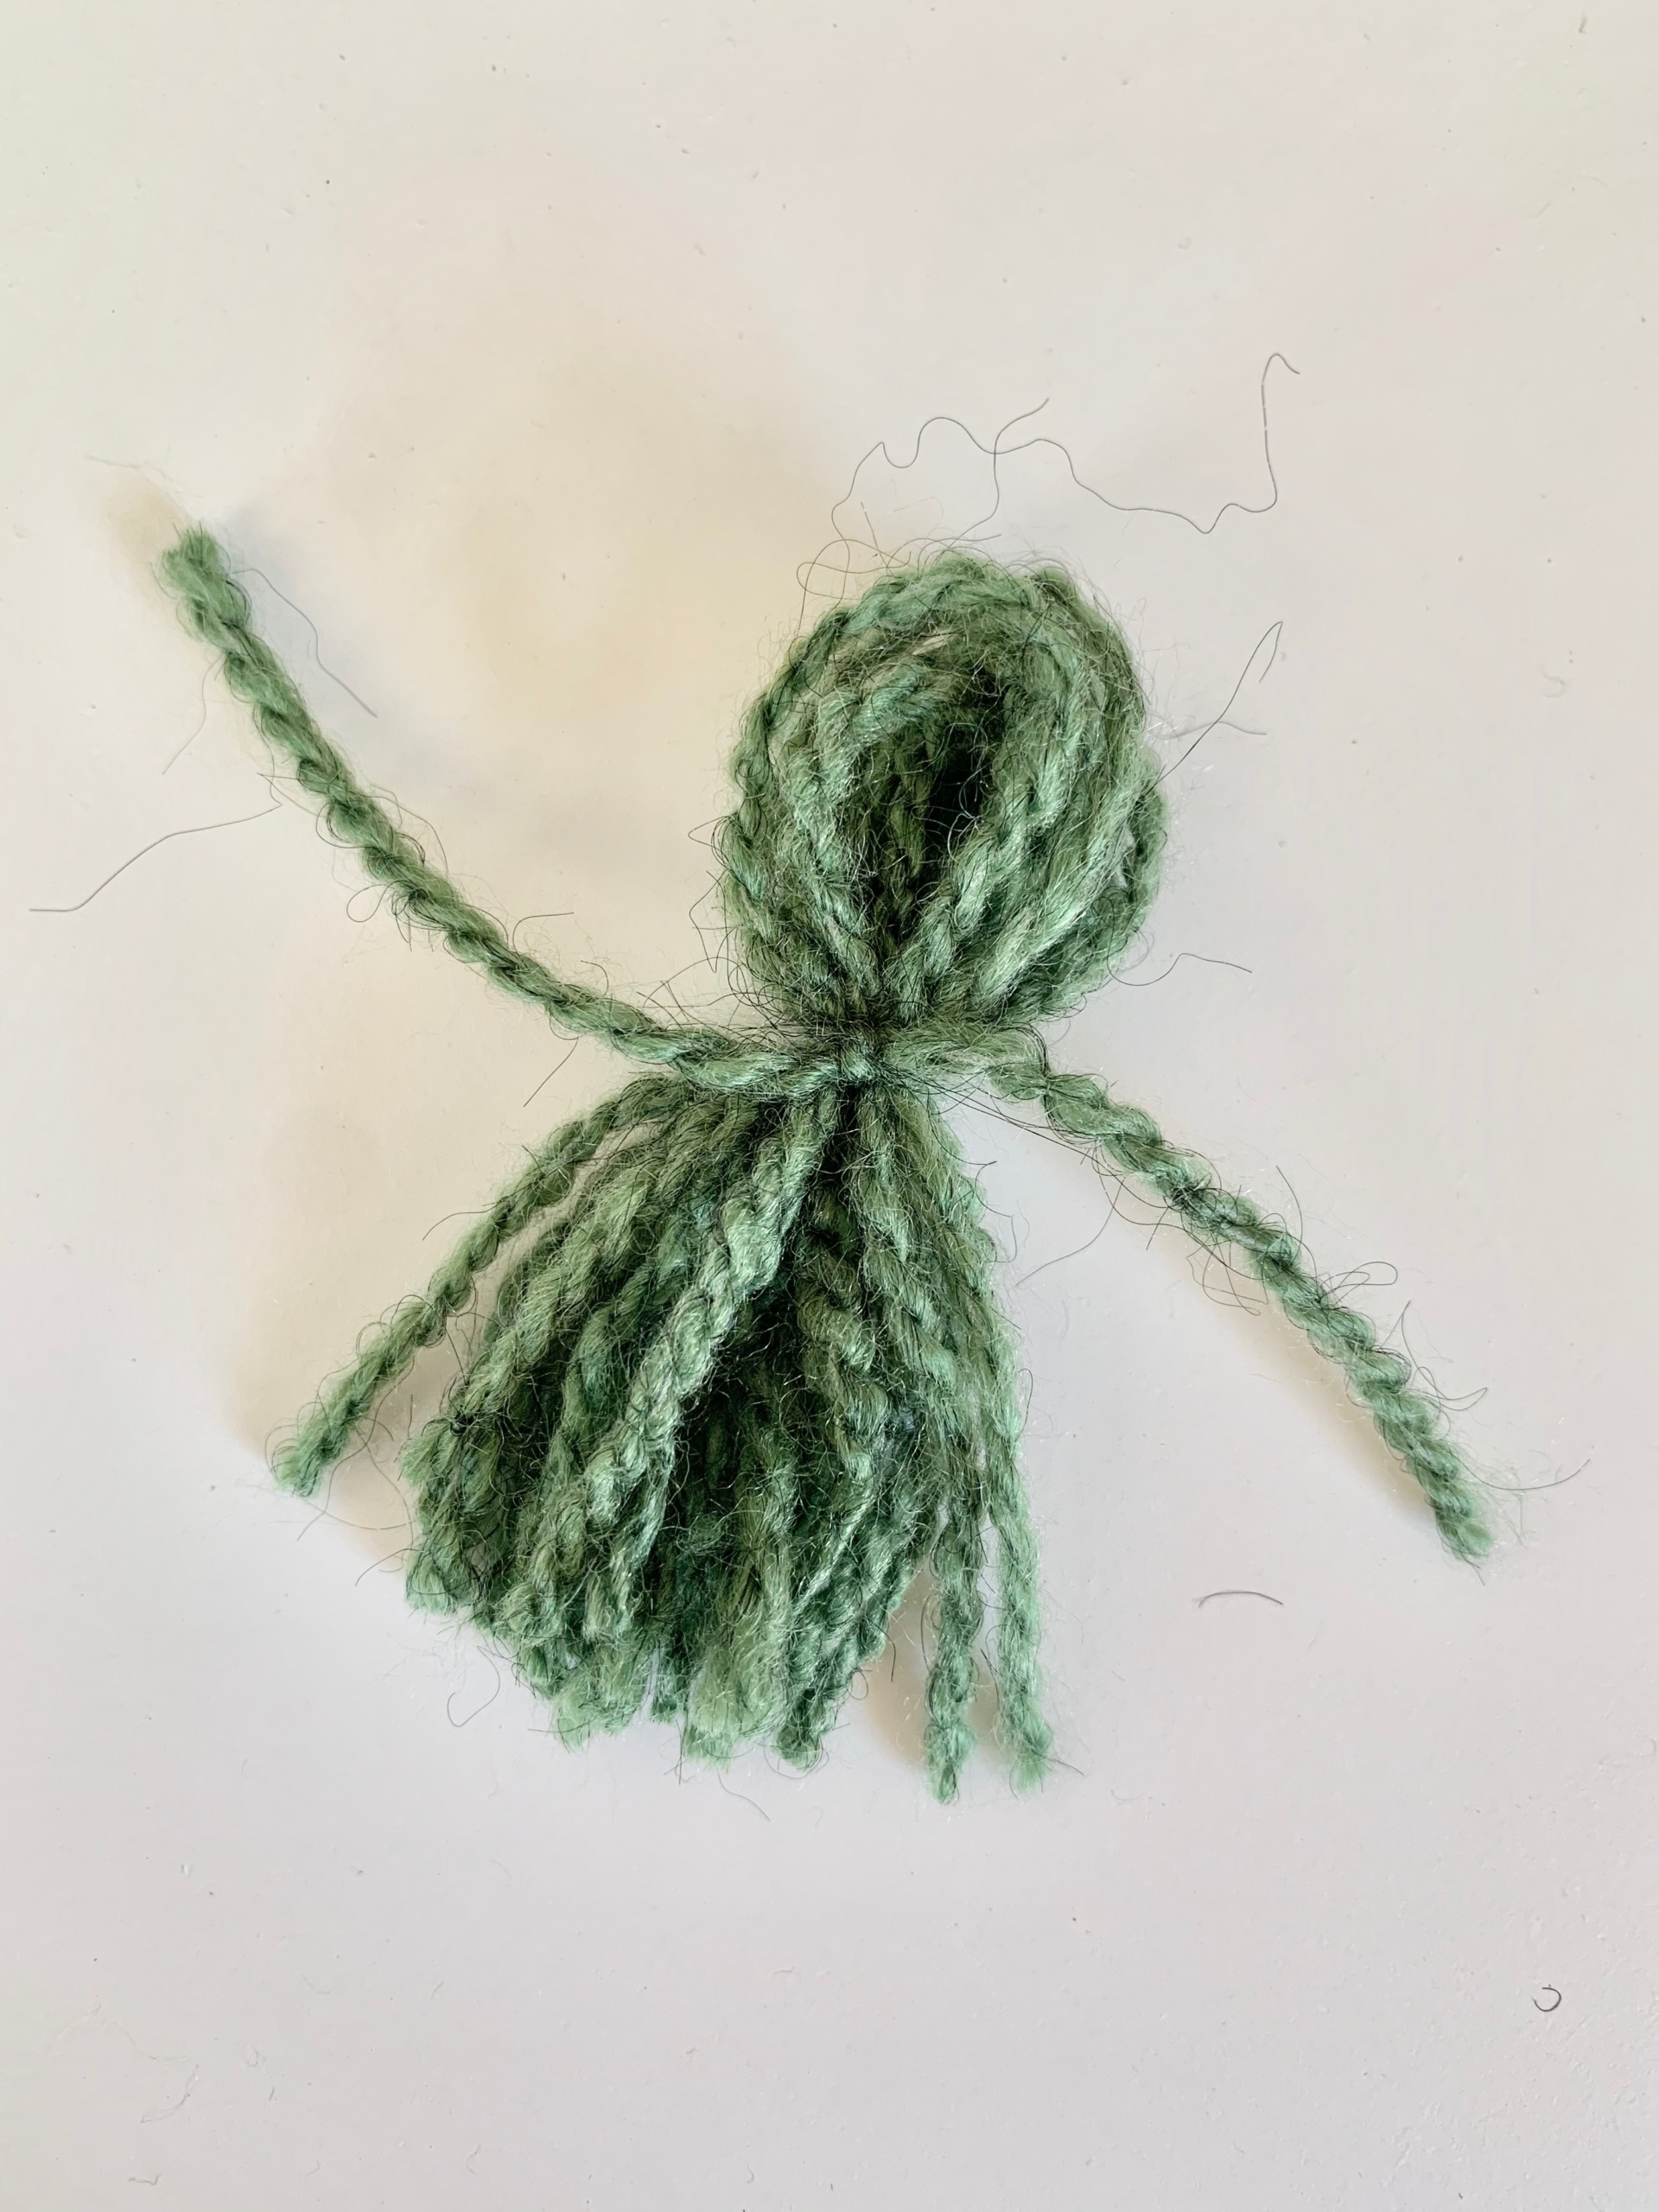
Finally, pull down those tails to blend into the tassel.
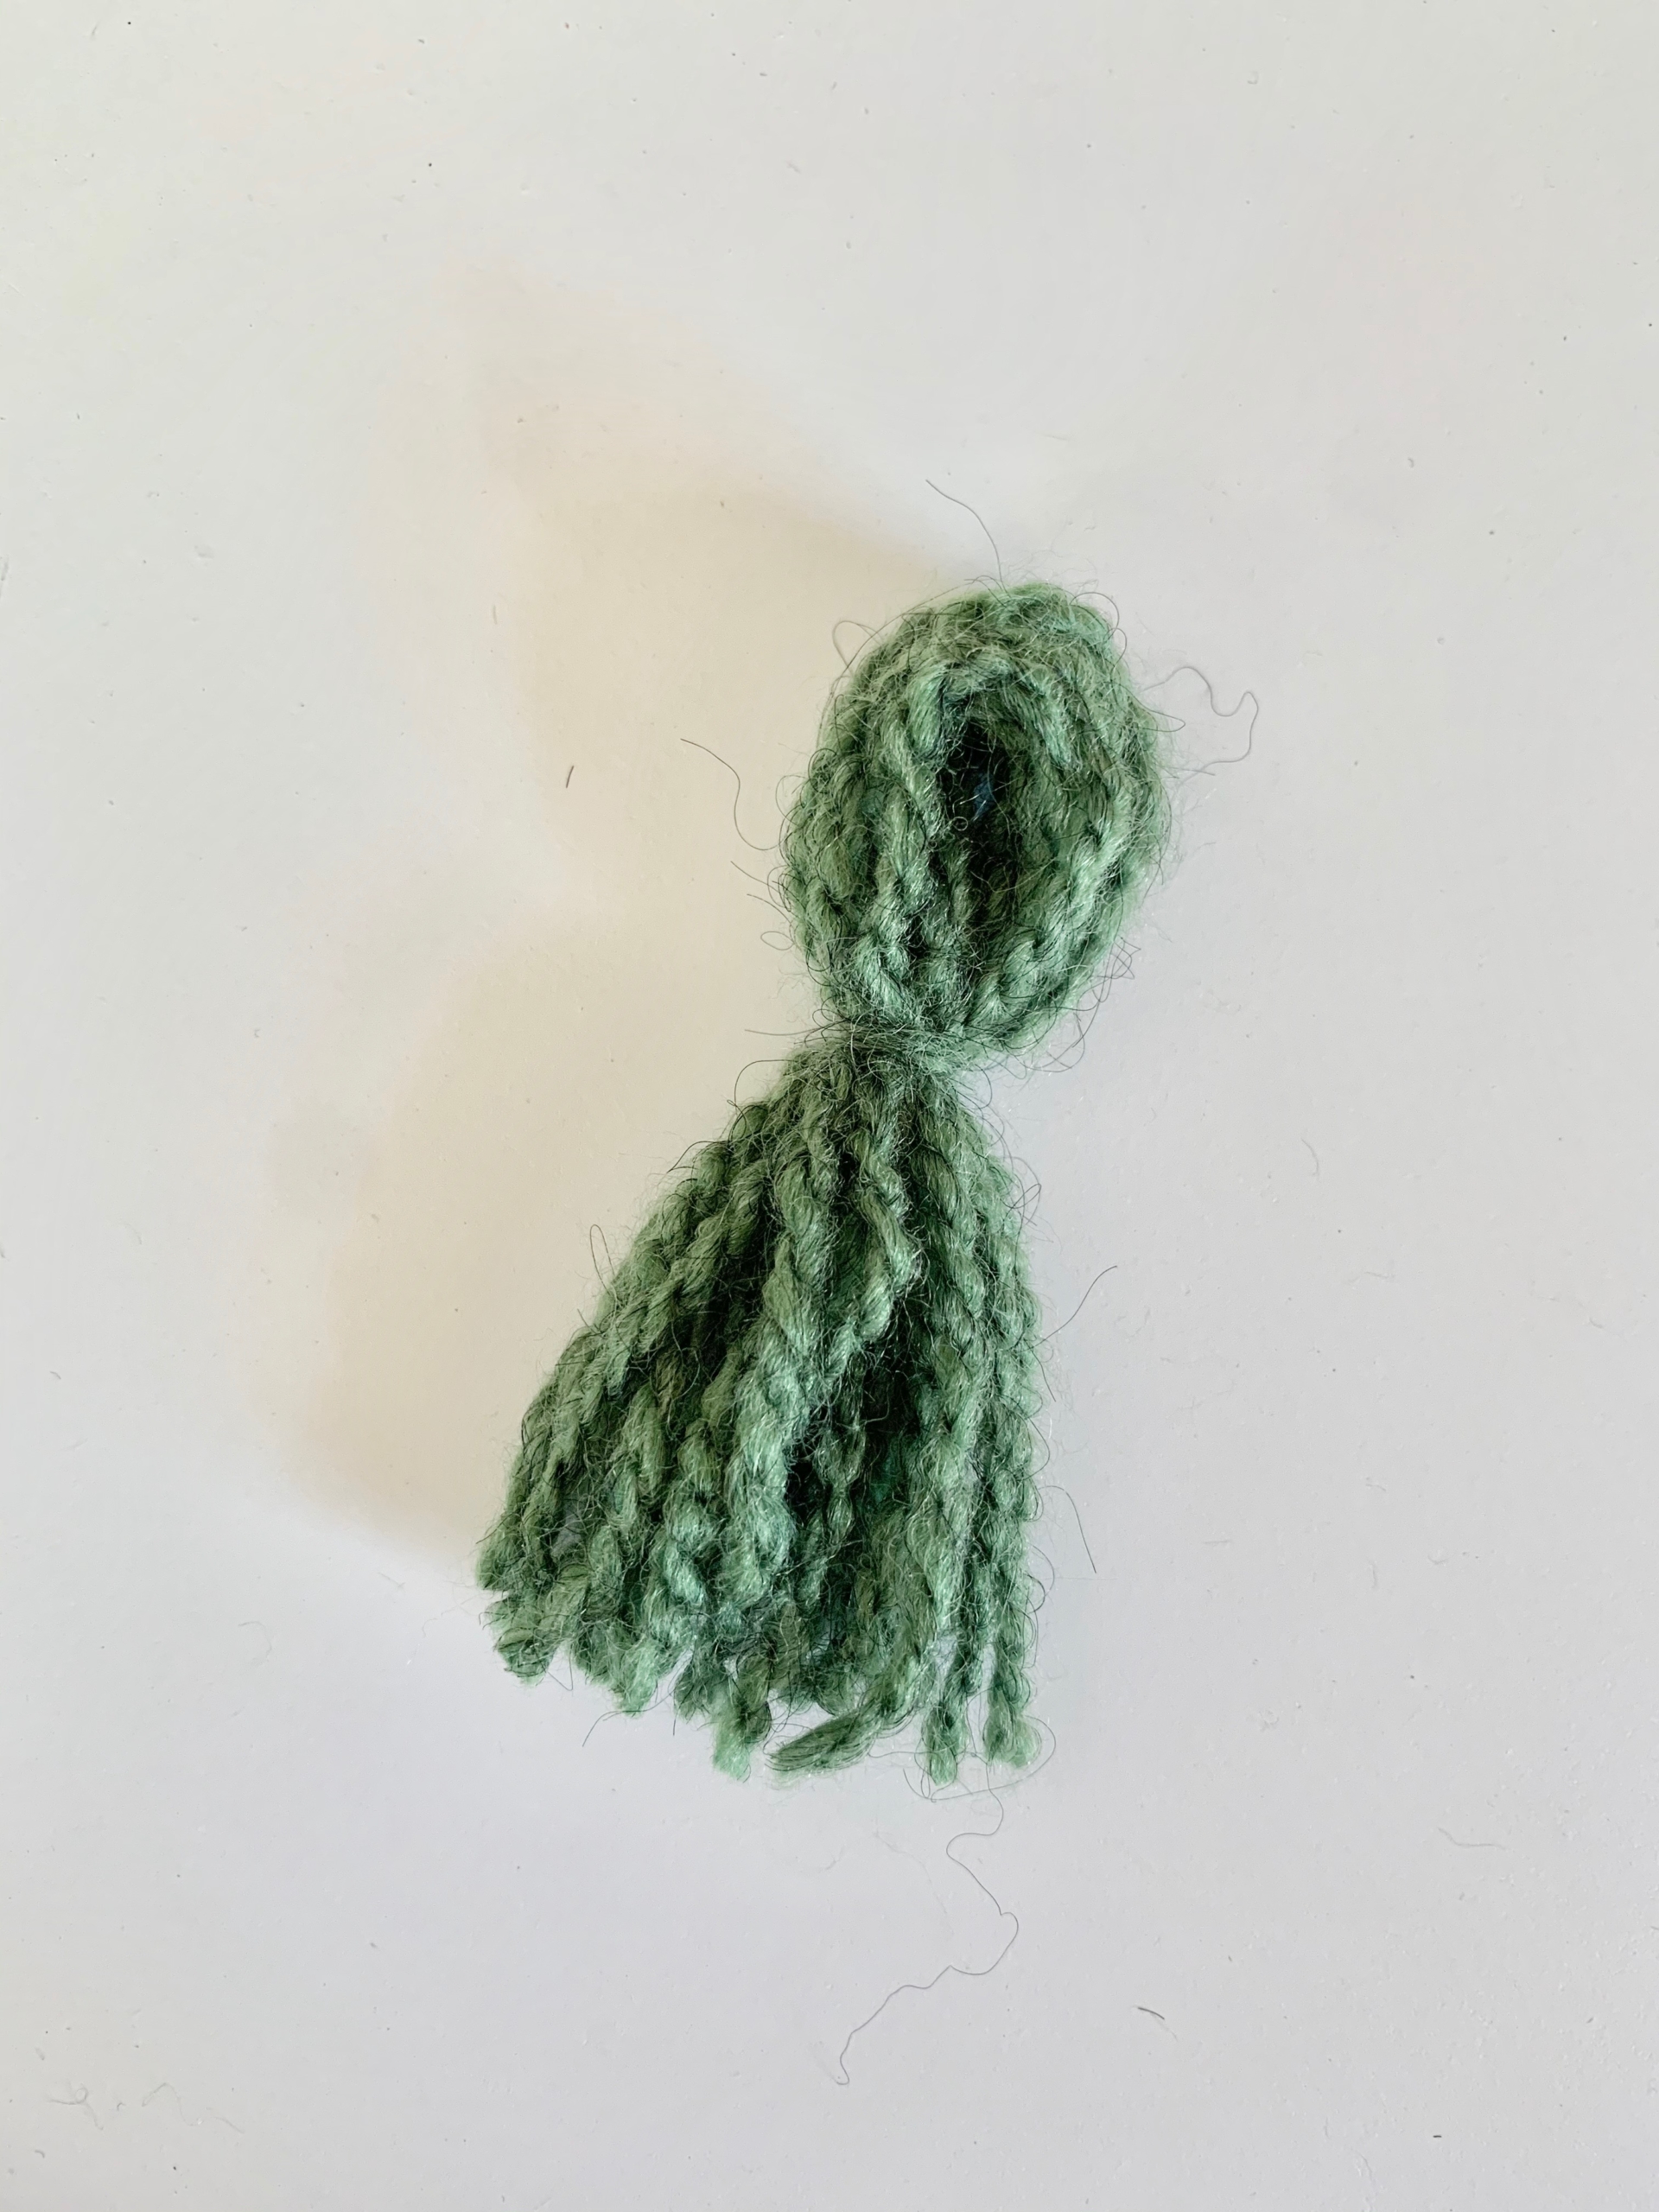
Make 13 tassels.
Then begin arranging them into the Christmas tree shape, following the pictures.
When you are happy with how your tree looks, hot glue each tassel down under the loop.
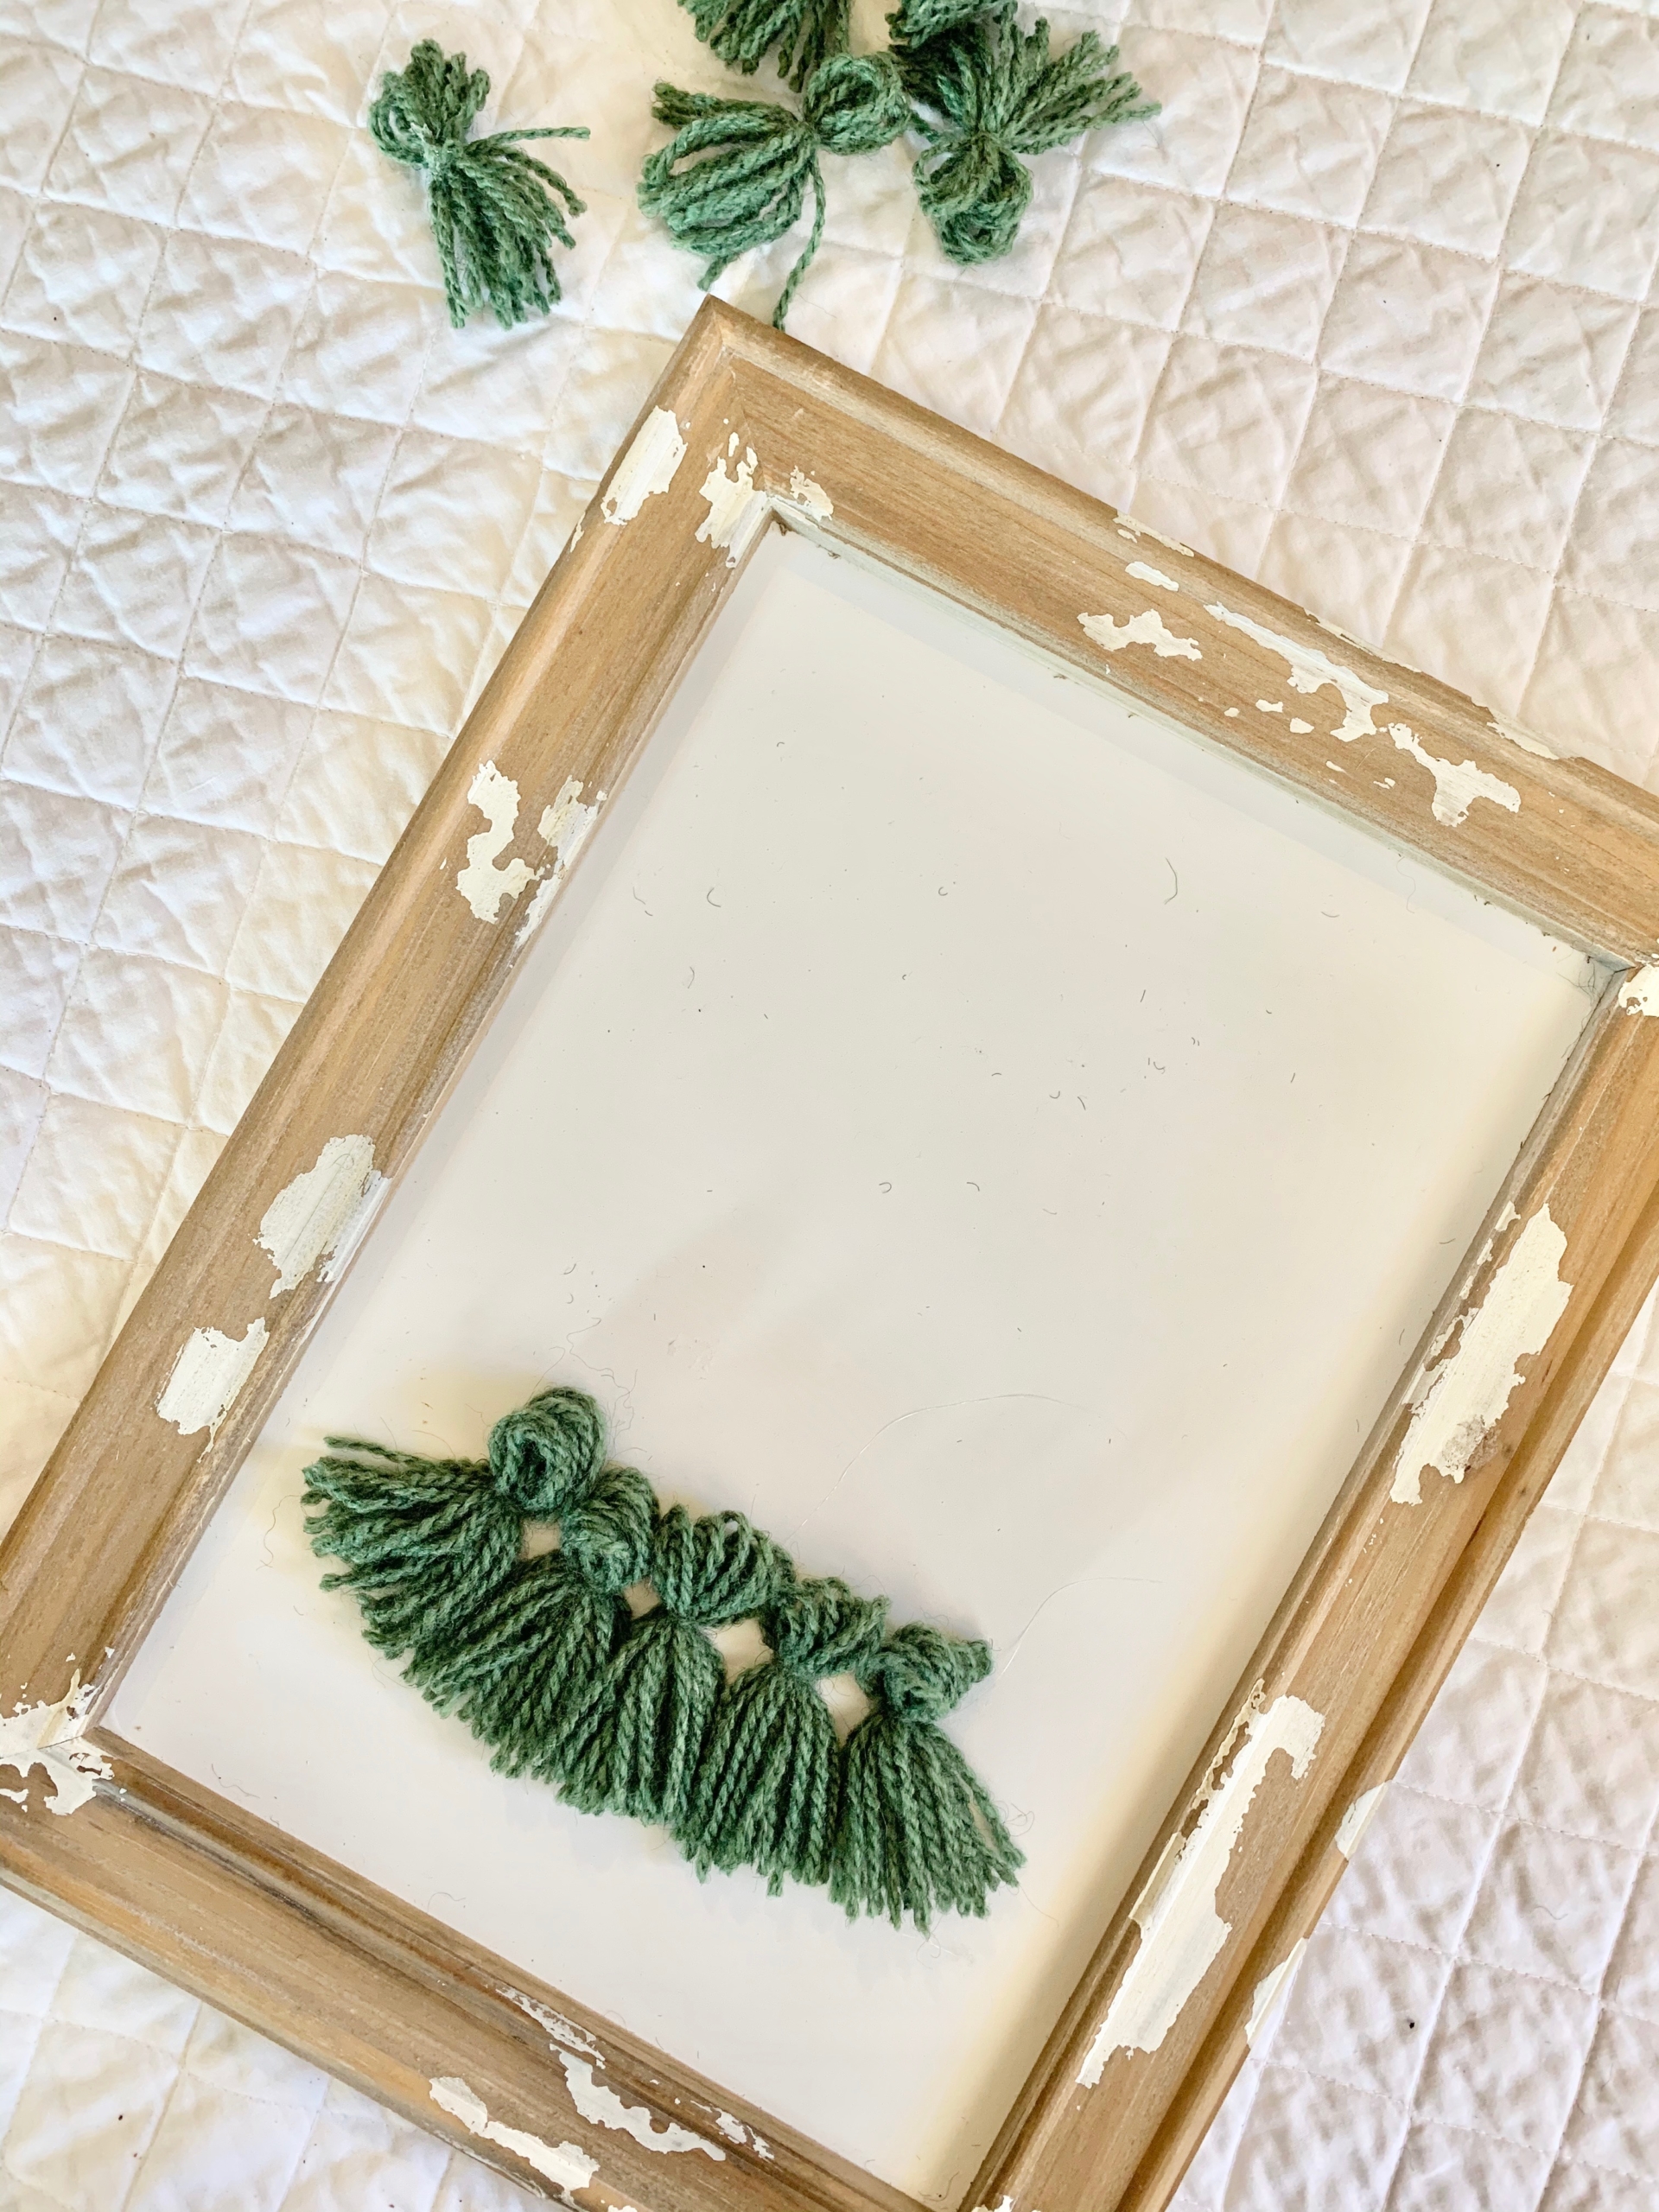

To make the bow on the top, take a piece of twine or string, tie a bow, and hot glue it to the top tassel.
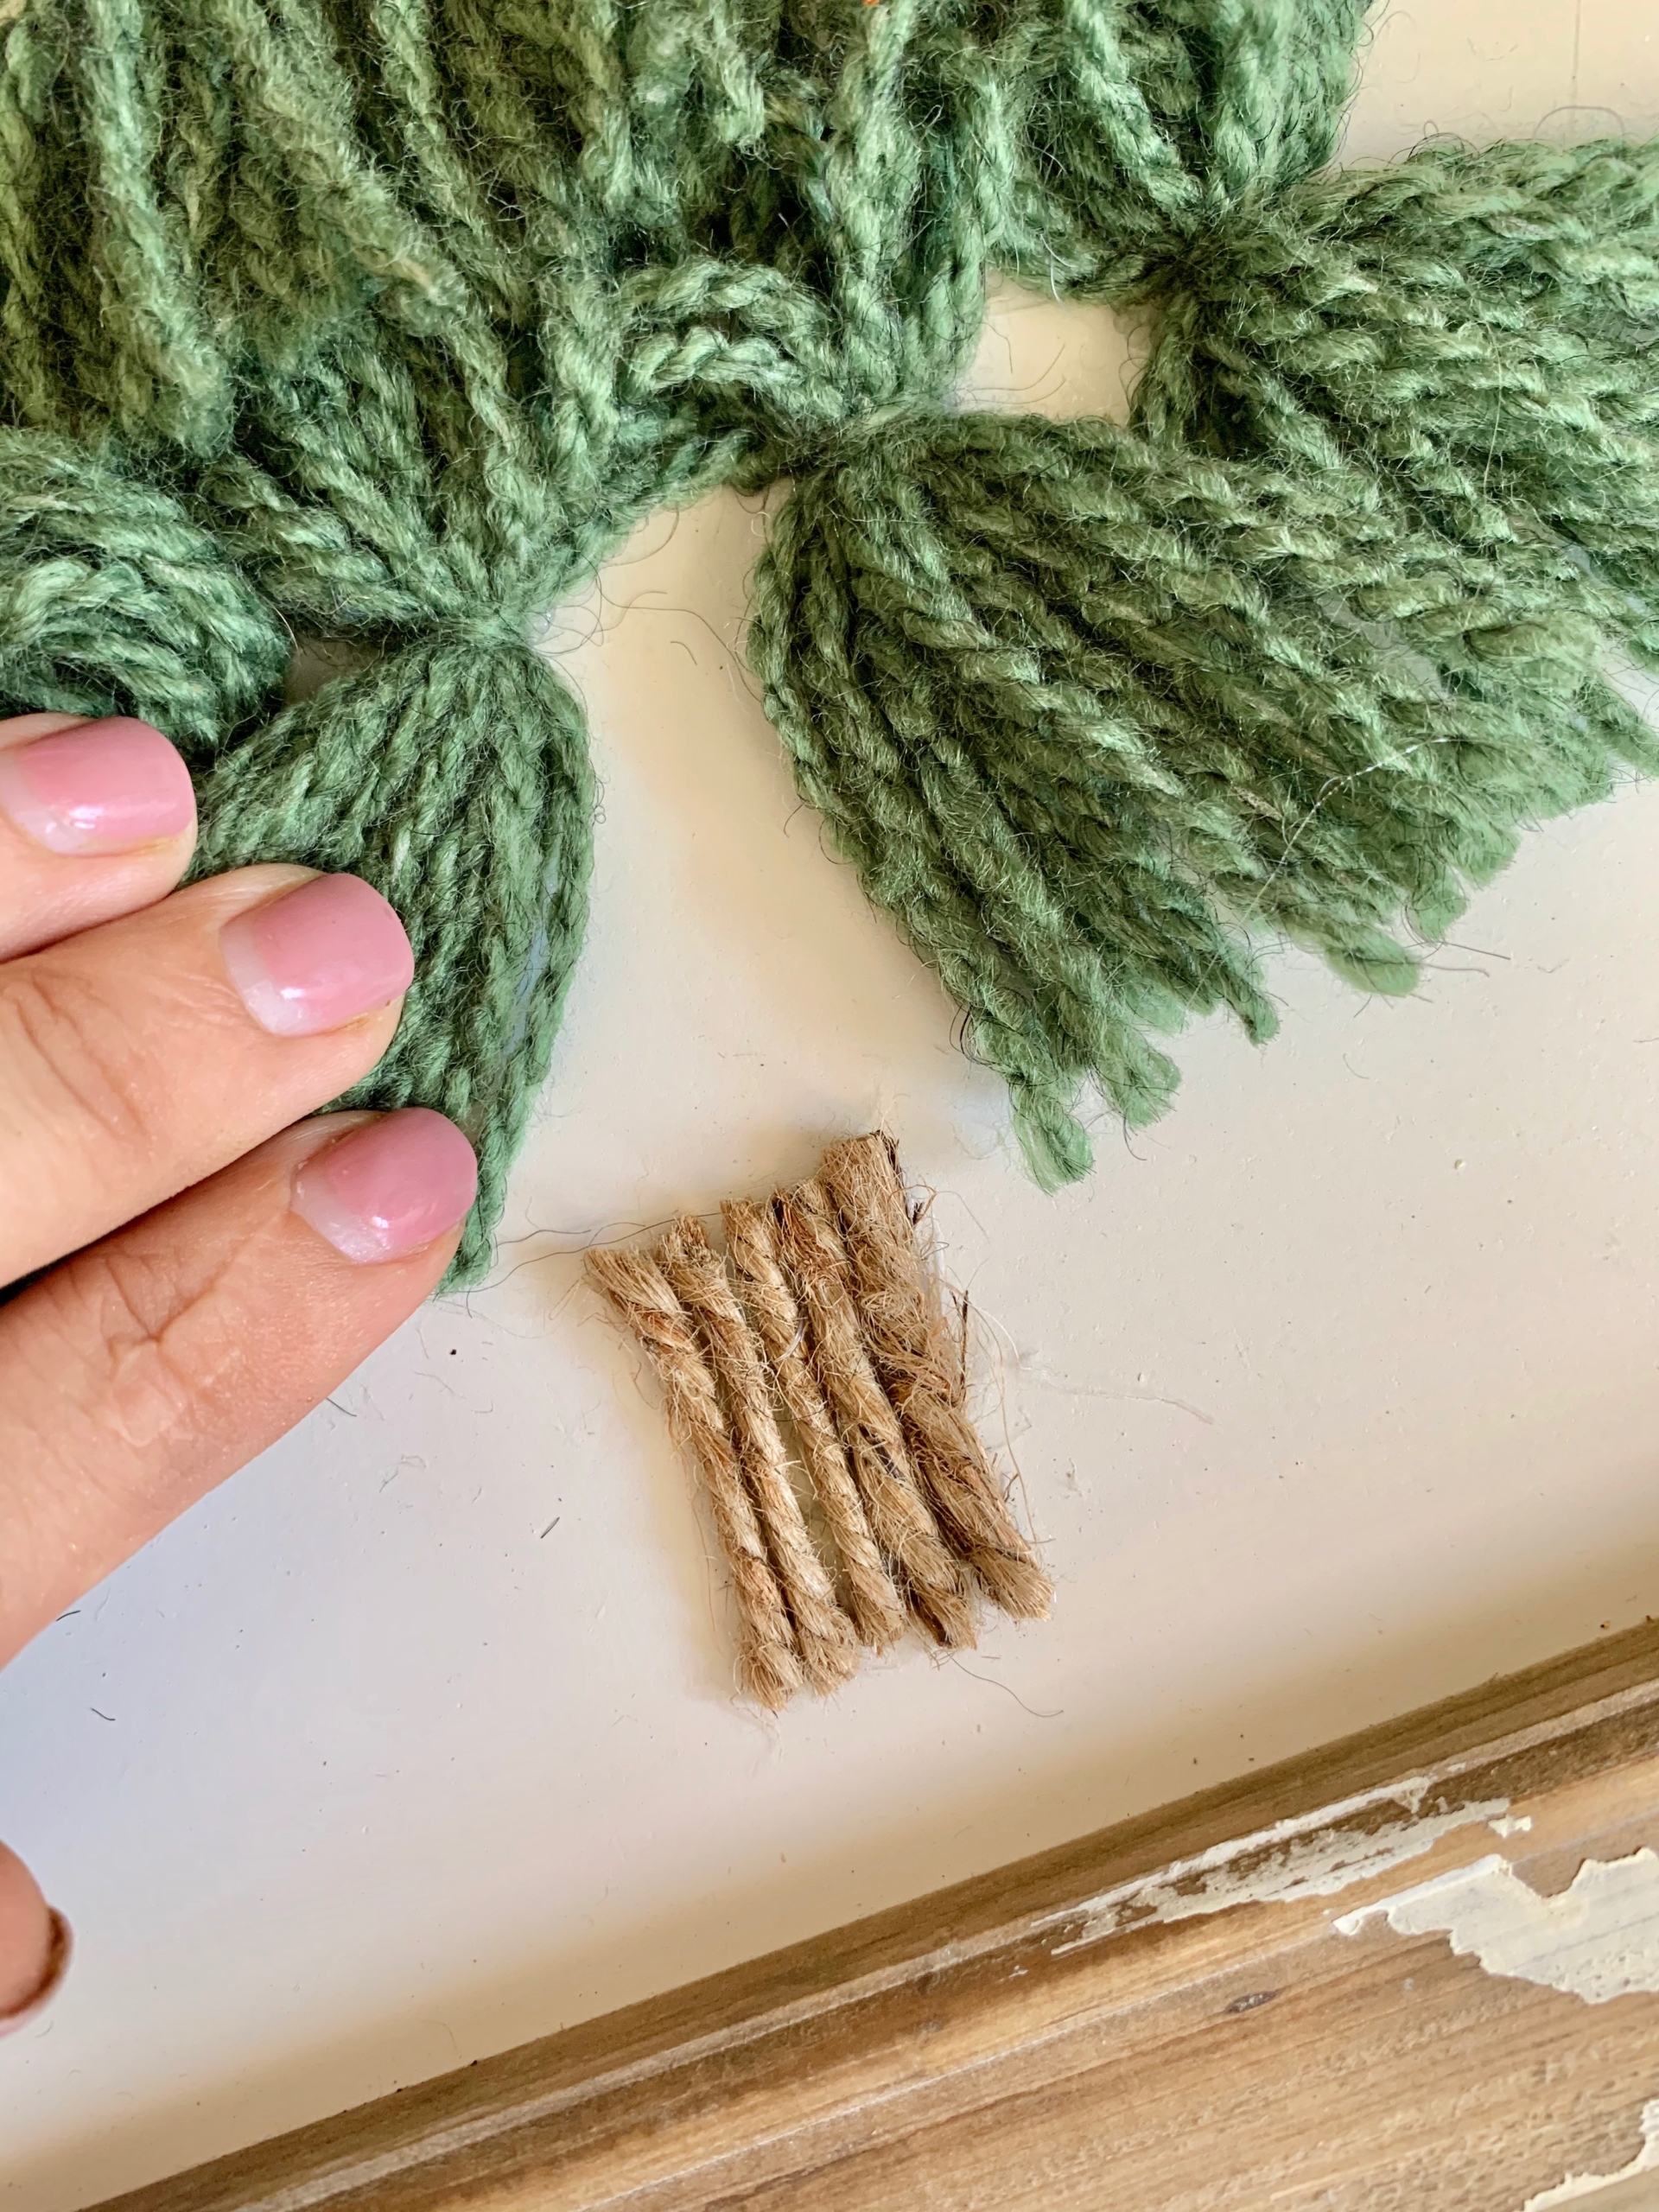
The tree trunk is just small pieces of twine hot glued into a trunk shape!

And there is your BEAUTIFUL farmhouse style Christmas tree wooden sign!



HERE IS ANOTHER GORGEOUS CHRISTMAS SIGN YOU CAN MAKE!
I ALSO LOVE THESE DIFFERENT CHRISTMAS GARLANDS TO CHANGE THINGS UP!


canadian pharmacy sarasota: USACanadaPharm – 77 canadian pharmacy
https://usacanadapharm.com/# canada drug pharmacy
USACanadaPharm: canadian pharmacy price checker – usa canada pharm
canadian pharmacy 24h com: USACanadaPharm – USACanadaPharm
online canadian pharmacy review [url=http://usacanadapharm.com/#]USACanadaPharm[/url] buy prescription drugs from canada cheap
safe canadian pharmacies http://usacanadapharm.com/# USACanadaPharm
canadian pharmacy antibiotics
http://usacanadapharm.com/# usa canada pharm
usa canada pharm: safe canadian pharmacy – canadian pharmacies comparison
usa canada pharm: cross border pharmacy canada – USACanadaPharm
http://usacanadapharm.com/# onlinepharmaciescanada com
USACanadaPharm: USACanadaPharm – pharmacy com canada
usa canada pharm [url=https://usacanadapharm.shop/#]canada discount pharmacy[/url] usa canada pharm
USACanadaPharm: USACanadaPharm – usa canada pharm
http://usacanadapharm.com/# canadian pharmacy ed medications
usa canada pharm: www canadianonlinepharmacy – USACanadaPharm
canadian pharmacy ed medications: canada cloud pharmacy – canadian pharmacy 24h com
canadian pharmacy no scripts: usa canada pharm – reputable canadian pharmacy
usa canada pharm [url=https://usacanadapharm.shop/#]usa canada pharm[/url] USACanadaPharm
https://usacanadapharm.shop/# canada pharmacy
USACanadaPharm: usa canada pharm – my canadian pharmacy
usa canada pharm: pharmacies in canada that ship to the us – reliable canadian pharmacy
USACanadaPharm: canadian pharmacy 365 – usa canada pharm
USACanadaPharm: canadian pharmacy prices – canadian pharmacy cheap
http://usacanadapharm.com/# USACanadaPharm
canadapharmacyonline: safe canadian pharmacies – northern pharmacy canada
usa canada pharm [url=https://usacanadapharm.com/#]pharmacy wholesalers canada[/url] USACanadaPharm
reliable canadian pharmacy reviews: USACanadaPharm – usa canada pharm
USACanadaPharm: USACanadaPharm – USACanadaPharm
https://usacanadapharm.shop/# reputable canadian online pharmacy
canadian pharmacy ratings: canadian pharmacy online ship to usa – USACanadaPharm
usa canada pharm: USACanadaPharm – legit canadian pharmacy
usa canada pharm [url=https://usacanadapharm.com/#]USACanadaPharm[/url] usa canada pharm
https://usacanadapharm.com/# usa canada pharm
world pharmacy india: indian pharmacies safe – online shopping pharmacy india
reputable indian online pharmacy: USA India Pharm – mail order pharmacy india
https://usaindiapharm.com/# USA India Pharm
world pharmacy india [url=https://usaindiapharm.com/#]top online pharmacy india[/url] UsaIndiaPharm
online shopping pharmacy india: UsaIndiaPharm – online shopping pharmacy india
top 10 pharmacies in india: indian pharmacy online – USA India Pharm
USA India Pharm: USA India Pharm – UsaIndiaPharm
http://usaindiapharm.com/# USA India Pharm
best online pharmacy india: india pharmacy – USA India Pharm
online shopping pharmacy india: cheapest online pharmacy india – india pharmacy
indian pharmacy online: top online pharmacy india – UsaIndiaPharm
online shopping pharmacy india: USA India Pharm – best online pharmacy india
UsaIndiaPharm [url=http://usaindiapharm.com/#]USA India Pharm[/url] india pharmacy
https://usaindiapharm.shop/# buy prescription drugs from india
reputable indian pharmacies: reputable indian pharmacies – UsaIndiaPharm
buy prescription drugs from india: india pharmacy mail order – top 10 pharmacies in india
UsaIndiaPharm: UsaIndiaPharm – indian pharmacy
http://usaindiapharm.com/# indian pharmacy paypal
USA India Pharm: UsaIndiaPharm – best india pharmacy
Online medicine order [url=http://usaindiapharm.com/#]indian pharmacy paypal[/url] UsaIndiaPharm
UsaIndiaPharm: buy prescription drugs from india – UsaIndiaPharm
UsaIndiaPharm: UsaIndiaPharm – USA India Pharm
http://usaindiapharm.com/# Online medicine home delivery
USA India Pharm: USA India Pharm – UsaIndiaPharm
Online medicine order: reputable indian online pharmacy – USA India Pharm
cheapest online pharmacy india: USA India Pharm – indian pharmacies safe
https://usaindiapharm.com/# UsaIndiaPharm
indian pharmacy paypal [url=http://usaindiapharm.com/#]USA India Pharm[/url] USA India Pharm
п»їlegitimate online pharmacies india: UsaIndiaPharm – Online medicine order
buy medicines online in india: indian pharmacies safe – UsaIndiaPharm
http://usaindiapharm.com/# USA India Pharm
USA India Pharm: pharmacy website india – USA India Pharm
UsaIndiaPharm: USA India Pharm – UsaIndiaPharm
indian pharmacies safe: USA India Pharm – USA India Pharm
india online pharmacy [url=https://usaindiapharm.shop/#]UsaIndiaPharm[/url] UsaIndiaPharm
https://usaindiapharm.com/# USA India Pharm
online pharmacy india: reputable indian pharmacies – cheapest online pharmacy india
USA India Pharm: USA India Pharm – USA India Pharm
UsaIndiaPharm: indian pharmacies safe – indian pharmacies safe
http://usaindiapharm.com/# UsaIndiaPharm
UsaIndiaPharm: USA India Pharm – USA India Pharm
UsaIndiaPharm: india pharmacy mail order – UsaIndiaPharm
cheapest online pharmacy india [url=https://usaindiapharm.com/#]USA India Pharm[/url] Online medicine home delivery
pharmacy website india: india pharmacy – USA India Pharm
india pharmacy: top online pharmacy india – п»їlegitimate online pharmacies india
https://usaindiapharm.shop/# cheapest online pharmacy india
USA India Pharm: india pharmacy – USA India Pharm
USA India Pharm: buy medicines online in india – UsaIndiaPharm
india pharmacy: mail order pharmacy india – online pharmacy india
USA India Pharm: online shopping pharmacy india – UsaIndiaPharm
UsaIndiaPharm [url=https://usaindiapharm.com/#]Online medicine order[/url] UsaIndiaPharm
USA India Pharm: UsaIndiaPharm – world pharmacy india
world pharmacy india: reputable indian online pharmacy – reputable indian pharmacies
http://usmexpharm.com/# Us Mex Pharm
Mexican pharmacy ship to USA: Mexican pharmacy ship to USA – certified Mexican pharmacy
pharmacies in mexico that ship to usa: Us Mex Pharm – usa mexico pharmacy
USMexPharm [url=https://usmexpharm.shop/#]Us Mex Pharm[/url] certified Mexican pharmacy
http://usmexpharm.com/# reputable mexican pharmacies online
Mexican pharmacy ship to USA: UsMex Pharm – USMexPharm
UsMex Pharm: Mexican pharmacy ship to USA – mexican border pharmacies shipping to usa
USMexPharm: usa mexico pharmacy – mexican pharmacy
https://usmexpharm.com/# usa mexico pharmacy
certified Mexican pharmacy: mexican pharmacy – Us Mex Pharm
Us Mex Pharm [url=https://usmexpharm.shop/#]UsMex Pharm[/url] usa mexico pharmacy
mexican pharmacy: Us Mex Pharm – Mexican pharmacy ship to USA
UsMex Pharm: mexican pharmacy – buying prescription drugs in mexico
https://usmexpharm.shop/# USMexPharm
mexican pharmacy: mexican pharmacy – certified Mexican pharmacy
mexican pharmacy: UsMex Pharm – mexican pharmaceuticals online
UsMex Pharm: Us Mex Pharm – certified Mexican pharmacy
https://usmexpharm.com/# mexican pharmacy
certified Mexican pharmacy [url=https://usmexpharm.com/#]Us Mex Pharm[/url] Us Mex Pharm
mexican pharmacy: UsMex Pharm – mexican pharmacy
buying from online mexican pharmacy: usa mexico pharmacy – usa mexico pharmacy
usa mexico pharmacy: certified Mexican pharmacy – usa mexico pharmacy
https://usmexpharm.shop/# usa mexico pharmacy
Us Mex Pharm: Us Mex Pharm – Us Mex Pharm
Mexican pharmacy ship to USA: usa mexico pharmacy – mexican pharmacy
UsMex Pharm [url=https://usmexpharm.com/#]mexican rx online[/url] Mexican pharmacy ship to USA
UsMex Pharm: Mexican pharmacy ship to USA – Mexican pharmacy ship to USA
mexican pharmacy: Us Mex Pharm – Mexican pharmacy ship to USA
https://usmexpharm.shop/# Mexican pharmacy ship to USA
certified Mexican pharmacy: certified Mexican pharmacy – UsMex Pharm
mexican rx online: UsMex Pharm – certified Mexican pharmacy
Us Mex Pharm: mexican pharmaceuticals online – UsMex Pharm
http://usmexpharm.com/# usa mexico pharmacy
yeni siteler [url=https://casibom1st.com/#]casibom resmi[/url] yeni gГјncel deneme bonusu veren siteler casibom1st.shop
orisbet giriЕџ: casibom guncel giris – casino bet gГјncel giriЕџ casibom1st.com
deneme bonusu veren siteler: lisansl? casino siteleri – deneme bonusu veren siteler casinositeleri1st.com
sweet bonanza: sweet bonanza yorumlar – sweet bonanza giris sweetbonanza1st.shop
sweet bonanza: sweet bonanza slot – sweet bonanza sweetbonanza1st.shop
2025 yatД±rД±m ЕџartsД±z deneme bonusu veren siteler: casibom guncel giris – yasal kumar oyunlarД± casibom1st.com
http://sweetbonanza1st.com/# sweet bonanza siteleri
gГјvenilir bahis siteleri [url=https://casibom1st.com/#]casibom guncel adres[/url] en iyi iddaa sitesi casibom1st.shop
sweet bonanza oyna: sweet bonanza 1st – sweet bonanza slot sweetbonanza1st.shop
yeni siteler bahis: casibom guncel adres – internet kumar oyunu casibom1st.com
sweet bonanza giris: sweet bonanza oyna – sweet bonanza yorumlar sweetbonanza1st.shop
sweet bonanza yorumlar: sweet bonanza yorumlar – sweet bonanza siteleri sweetbonanza1st.shop
https://sweetbonanza1st.com/# sweet bonanza siteleri
lisansl? casino siteleri: lisansl? casino siteleri – deneme bonusu veren siteler casinositeleri1st.com
bahis giriЕџ [url=https://casibom1st.com/#]casibom guncel adres[/url] canlД± casino bonusu veren siteler casibom1st.shop
sweet bonanza 1st: sweet bonanza giris – sweet bonanza 1st sweetbonanza1st.shop
vidobet: casibom mobil giris – gГјzel siteler casibom1st.com
jackpot play nedir: casibom mobil giris – en iyi bahis siteleri 2024 casibom1st.com
sweet bonanza yorumlar: sweet bonanza yorumlar – sweet bonanza sweetbonanza1st.shop
en gГјvenilir bahis siteleri [url=https://casibom1st.shop/#]casibom guncel adres[/url] bonus veren site casibom1st.shop
sweet bonanza slot: sweet bonanza oyna – sweet bonanza demo sweetbonanza1st.shop
sweet bonanza giris: sweet bonanza siteleri – sweet bonanza yorumlar sweetbonanza1st.shop
guvenilir casino siteleri: lisansl? casino siteleri – casino siteleri casinositeleri1st.com
sweet bonanza giris: sweet bonanza demo – sweet bonanza giris sweetbonanza1st.shop
sweet bonanza demo: sweet bonanza slot – sweet bonanza sweetbonanza1st.shop
sweet bonanza: sweet bonanza slot – sweet bonanza siteleri sweetbonanza1st.shop
deneme bonusu veren siteler: casino siteleri – casino siteleri 2025 casinositeleri1st.com
guvenilir casino siteleri [url=http://casinositeleri1st.com/#]deneme bonusu veren siteler[/url] guvenilir casino siteleri casinositeleri1st.shop
sweet bonanza: sweet bonanza oyna – sweet bonanza sweetbonanza1st.shop
en yeni bet siteleri: casibom giris – п»їcasino casibom1st.com
bilinmeyen bahis siteleri: casibom guncel adres – lisanslД± kumar siteleri casibom1st.com
en Г§ok kazandД±ran bahis siteleri: casibom resmi – 300 tl bonus veren bahis sitesi casibom1st.com
sweet bonanza yorumlar: sweet bonanza demo – sweet bonanza 1st sweetbonanza1st.shop
casino siteleri [url=https://casinositeleri1st.com/#]guvenilir casino siteleri[/url] casino siteleri casinositeleri1st.shop
yabancД± mekan isimleri: casibom mobil giris – yeni siteler bahis casibom1st.com
http://casinositeleri1st.com/# casino siteleri
sweet bonanza yorumlar: sweet bonanza demo – sweet bonanza giris sweetbonanza1st.shop
yurtdД±ЕџД± bahis siteleri: casibom mobil giris – 100tl hosgeldin bonusu veren siteler casibom1st.com
tГјrkiye yasal bahis siteleri: casibom guncel adres – bet bahis giriЕџ casibom1st.com
sweet bonanza demo: sweet bonanza 1st – sweet bonanza giris sweetbonanza1st.shop
casino malta [url=https://casibom1st.shop/#]casibom giris[/url] deneme bonusu veren siteler casino casibom1st.shop
gГјvenli siteler: lisansl? casino siteleri – guvenilir casino siteleri casinositeleri1st.com
https://casibom1st.com/# bonus slot
canlД± casino bahis siteleri: casibom mobil giris – tГјrkiye bahis siteleri casibom1st.com
how to get generic clomid price: can you buy generic clomid no prescription – Clom Fast Pharm
AmOnlinePharm: where to buy amoxicillin over the counter – AmOnlinePharm
http://amonlinepharm.com/# amoxicillin 500mg capsules antibiotic
AmOnlinePharm: AmOnlinePharm – AmOnlinePharm
AmOnlinePharm [url=https://amonlinepharm.shop/#]AmOnlinePharm[/url] AmOnlinePharm
ZithPharmOnline: ZithPharmOnline – zithromax antibiotic without prescription
prednisone 30 mg tablet: prednisone pak – Pred Pharm Net
https://clomfastpharm.shop/# how to get generic clomid online
Pred Pharm Net: Pred Pharm Net – Pred Pharm Net
Pred Pharm Net: Pred Pharm Net – Pred Pharm Net
order amoxicillin no prescription: AmOnlinePharm – AmOnlinePharm
Clom Fast Pharm: cost of cheap clomid – Clom Fast Pharm
can you buy amoxicillin uk [url=https://amonlinepharm.com/#]where to get amoxicillin over the counter[/url] AmOnlinePharm
https://predpharmnet.shop/# prednisone brand name canada
can i purchase cheap clomid prices: Clom Fast Pharm – Clom Fast Pharm
lisinopril 20 mg buy: Lisin Express – Lisin Express
Clom Fast Pharm: Clom Fast Pharm – how can i get cheap clomid without prescription
where to get cheap clomid for sale: Clom Fast Pharm – where buy cheap clomid
generic prednisone pills: prednisone pills cost – prednisone 30
Lisin Express: Lisin Express – zestoretic 10 12.5
prednisone prescription drug [url=https://predpharmnet.shop/#]Pred Pharm Net[/url] Pred Pharm Net
https://amonlinepharm.shop/# buying amoxicillin online
Clom Fast Pharm: Clom Fast Pharm – cost of generic clomid tablets
cost of amoxicillin prescription: buying amoxicillin online – amoxicillin online canada
AmOnlinePharm: amoxicillin 875 125 mg tab – AmOnlinePharm
Clom Fast Pharm [url=https://clomfastpharm.com/#]where can i get generic clomid now[/url] how to get clomid for sale
lisinopril medication generic: lisinopril 120mg – Lisin Express
prednisone 2.5 mg tab: Pred Pharm Net – Pred Pharm Net
get cheap clomid online: can i order generic clomid price – can i get clomid
https://amonlinepharm.shop/# cost of amoxicillin prescription
Pred Pharm Net: Pred Pharm Net – where can you buy prednisone
lisinopril 30 mg: Lisin Express – lisinopril sale
Clom Fast Pharm: where buy clomid no prescription – can i purchase clomid now
AmOnlinePharm [url=http://amonlinepharm.com/#]where can i get amoxicillin[/url] AmOnlinePharm
https://clomfastpharm.com/# cost generic clomid without insurance
Pred Pharm Net: prednisone 5093 – Pred Pharm Net
ZithPharmOnline: zithromax drug – ZithPharmOnline
can i get cheap clomid pills: Clom Fast Pharm – how to get cheap clomid without a prescription
https://amonlinepharm.com/# amoxicillin 500
Lisin Express: lisinopril 20 mg tab price – Lisin Express
Clom Fast Pharm: can you get cheap clomid without a prescription – Clom Fast Pharm
Clom Fast Pharm: where can i get clomid prices – can you buy clomid
can i buy amoxicillin over the counter in australia [url=https://amonlinepharm.com/#]AmOnlinePharm[/url] AmOnlinePharm
https://lisinexpress.shop/# lisinopril 10 mg daily
zestril price: Lisin Express – lisinopril buy without prescription
Pred Pharm Net: Pred Pharm Net – cheap generic prednisone
world pharmacy india: www india pharm – www india pharm
canadapharmacyonline [url=https://gocanadapharm.com/#]go canada pharm[/url] trustworthy canadian pharmacy
https://agbmexicopharm.shop/# mexican pharmaceuticals online
Agb Mexico Pharm: buying prescription drugs in mexico online – pharmacies in mexico that ship to usa
purple pharmacy mexico price list: mexican rx online – Agb Mexico Pharm
www india pharm: www india pharm – www india pharm
www india pharm: reputable indian pharmacies – Online medicine home delivery
http://agbmexicopharm.com/# purple pharmacy mexico price list
canadadrugpharmacy com: GoCanadaPharm – canadian pharmacy com
Agb Mexico Pharm: mexican border pharmacies shipping to usa – Agb Mexico Pharm
www india pharm [url=https://wwwindiapharm.shop/#]п»їlegitimate online pharmacies india[/url] buy medicines online in india
buying prescription drugs in mexico online: Agb Mexico Pharm – mexico drug stores pharmacies
http://agbmexicopharm.com/# purple pharmacy mexico price list
mexico drug stores pharmacies: Agb Mexico Pharm – Agb Mexico Pharm
mexican border pharmacies shipping to usa: mexican pharmaceuticals online – mexican drugstore online
canadian pharmacy drugs online: go canada pharm – canadian pharmacy online store
buying prescription drugs in mexico: Agb Mexico Pharm – mexican drugstore online
https://gocanadapharm.com/# canadian pharmacy
canadian pharmacy no scripts: go canada pharm – prescription drugs canada buy online
www india pharm [url=https://wwwindiapharm.shop/#]Online medicine home delivery[/url] indian pharmacies safe
canadian 24 hour pharmacy: canadian pharmacy king – canadian pharmacy online
purple pharmacy mexico price list: Agb Mexico Pharm – Agb Mexico Pharm
www india pharm: india pharmacy mail order – www india pharm
http://wwwindiapharm.com/# www india pharm
canada pharmacy world: legitimate canadian mail order pharmacy – cheap canadian pharmacy
canada online pharmacy [url=http://gocanadapharm.com/#]go canada pharm[/url] canadian discount pharmacy
www india pharm: www india pharm – www india pharm
mexican drugstore online: Agb Mexico Pharm – pharmacies in mexico that ship to usa
http://gocanadapharm.com/# global pharmacy canada
www canadianonlinepharmacy: canadian drugs online – medication canadian pharmacy
canada rx pharmacy: go canada pharm – canadian pharmacy 1 internet online drugstore
cheapest online pharmacy india: www india pharm – world pharmacy india
onlinepharmaciescanada com: go canada pharm – canadian pharmacy meds reviews
https://gocanadapharm.shop/# canadian pharmacy store
canada drugs [url=https://gocanadapharm.com/#]best canadian online pharmacy[/url] reliable canadian pharmacy
Agb Mexico Pharm: buying prescription drugs in mexico – Agb Mexico Pharm
best canadian online pharmacy reviews: go canada pharm – real canadian pharmacy
www india pharm: www india pharm – Online medicine home delivery
https://agbmexicopharm.shop/# Agb Mexico Pharm
reputable mexican pharmacies online: mexican drugstore online – Agb Mexico Pharm
Agb Mexico Pharm: Agb Mexico Pharm – Agb Mexico Pharm
pharmacies in mexico that ship to usa [url=http://agbmexicopharm.com/#]Agb Mexico Pharm[/url] Agb Mexico Pharm
www india pharm: www india pharm – www india pharm
https://agbmexicopharm.com/# buying prescription drugs in mexico online
canadian mail order pharmacy: GoCanadaPharm – canadian pharmacy prices
https://kamagrapotenzmittel.com/# Kamagra Gel
de online drogist kortingscode: Online apotheek Nederland met recept – Beste online drogist
http://kamagrapotenzmittel.com/# Kamagra Gel
de online drogist kortingscode [url=https://apotheekmax.shop/#]Apotheek online bestellen[/url] ApotheekMax
https://kamagrapotenzmittel.com/# Kamagra online bestellen
online apotheek: Online apotheek Nederland met recept – online apotheek
Kamagra Original: kamagra – Kamagra Gel
https://apotekonlinerecept.com/# apotek online recept
http://kamagrapotenzmittel.com/# Kamagra Original
apotek online recept: Apoteket online – apotek pa nett
http://apotekonlinerecept.com/# Apoteket online
Beste online drogist: Betrouwbare online apotheek zonder recept – Online apotheek Nederland zonder recept
https://apotekonlinerecept.shop/# Apoteket online
http://apotekonlinerecept.com/# apotek online
Online apotheek Nederland zonder recept: Apotheek Max – Apotheek online bestellen
apotek online recept: apotek online – Apotek hemleverans idag
https://apotheekmax.com/# ApotheekMax
http://apotekonlinerecept.com/# Apotek hemleverans recept
Apotek hemleverans recept: Apoteket online – apotek pa nett
Kamagra Oral Jelly: Kamagra kaufen ohne Rezept – Kamagra online bestellen
http://kamagrapotenzmittel.com/# Kamagra kaufen
http://apotekonlinerecept.com/# apotek online
apotek online: Apotek hemleverans idag – apotek online
https://apotekonlinerecept.shop/# Apoteket online
apotek pa nett [url=http://apotekonlinerecept.com/#]apotek online[/url] Apotek hemleverans idag
Kamagra Original: Kamagra Oral Jelly kaufen – kamagra
http://apotheekmax.com/# Online apotheek Nederland zonder recept
Kamagra Gel: Kamagra Original – Kamagra Oral Jelly
de online drogist kortingscode: de online drogist kortingscode – Online apotheek Nederland zonder recept
https://kamagrapotenzmittel.com/# Kamagra Gel
Online apotheek Nederland met recept: ApotheekMax – online apotheek
apotek online recept: Apotek hemleverans recept – Apotek hemleverans recept
https://kamagrapotenzmittel.shop/# Kamagra Original
Apotek hemleverans idag: Apotek hemleverans recept – Apoteket online
https://apotheekmax.com/# ApotheekMax
Apotek hemleverans recept: apotek online recept – Apotek hemleverans recept
Kamagra Oral Jelly kaufen [url=http://kamagrapotenzmittel.com/#]Kamagra online bestellen[/url] Kamagra kaufen ohne Rezept
https://kamagrapotenzmittel.shop/# Kamagra Oral Jelly
http://apotekonlinerecept.com/# apotek online
Online apotheek Nederland zonder recept: Apotheek Max – ApotheekMax
https://apotekonlinerecept.com/# apotek pa nett
https://kamagrapotenzmittel.com/# kamagra
Beste online drogist [url=https://apotheekmax.shop/#]de online drogist kortingscode[/url] Apotheek online bestellen
online apotheek: de online drogist kortingscode – Apotheek online bestellen
Kamagra kaufen: Kamagra kaufen – Kamagra Original
пин ап казино официальный сайт – пинап казино
пин ап казино: https://pinupkz.life/
kamagra gel kopen [url=https://kamagrakopen.pro/#]kamagra pillen kopen[/url] Kamagra Kopen Online
пин ап вход – пин ап вход
пинап казино – пинап казино
пин ап зеркало – pinup 2025
buy generic 100mg viagra online [url=https://generic100mgeasy.shop/#]Generic Viagra online[/url] Generic100mgEasy
пин ап зеркало – пин ап казино
пин ап казино зеркало – pinup 2025
пин ап казино: https://pinupkz.life/
Tadalafil Easy Buy [url=https://tadalafileasybuy.shop/#]TadalafilEasyBuy.com[/url] TadalafilEasyBuy.com
пин ап казино зеркало – пин ап зеркало
пин ап казино: https://pinupkz.life/
пинап казино – пин ап казино зеркало
пин ап казино официальный сайт – пинап казино
Buy Tadalafil 5mg [url=https://tadalafileasybuy.shop/#]Buy Tadalafil 5mg[/url] Tadalafil Easy Buy
пин ап зеркало – пин ап зеркало
пин ап: https://pinupkz.life/
пин ап зеркало – пин ап казино зеркало
пин ап – пинап казино
Buy Cialis online: cialis without a doctor prescription – TadalafilEasyBuy.com
cialis without a doctor prescription: Tadalafil Easy Buy – cialis without a doctor prescription
https://tadalafileasybuy.com/# Tadalafil price
https://kamagrakopen.pro/# KamagraKopen.pro
kamagra gel kopen [url=https://kamagrakopen.pro/#]kamagra gel kopen[/url] Kamagra
Tadalafil Easy Buy: cialis without a doctor prescription – Cialis 20mg price
Tadalafil Easy Buy: Tadalafil Easy Buy – Cialis over the counter
https://tadalafileasybuy.com/# cialis without a doctor prescription
kamagra kopen nederland: kamagra gel kopen – Kamagra
http://generic100mgeasy.com/# sildenafil online
Generic Cialis price [url=https://tadalafileasybuy.com/#]Tadalafil Easy Buy[/url] cialis without a doctor prescription
kamagra kopen nederland: Kamagra – kamagra kopen nederland
http://tadalafileasybuy.com/# Tadalafil Easy Buy
http://tadalafileasybuy.com/# Cialis 20mg price in USA
TadalafilEasyBuy.com: Tadalafil Easy Buy – TadalafilEasyBuy.com
Tadalafil Easy Buy: Buy Tadalafil 5mg – cialis without a doctor prescription
http://tadalafileasybuy.com/# buy cialis pill
Kamagra Kopen Online: kamagra gel kopen – Kamagra Kopen
kamagra kopen nederland [url=https://kamagrakopen.pro/#]Kamagra Kopen[/url] kamagra gel kopen
https://kamagrakopen.pro/# Kamagra
Tadalafil Easy Buy: TadalafilEasyBuy.com – Tadalafil Easy Buy
buy generic 100mg viagra online: buy generic 100mg viagra online – Sildenafil Citrate Tablets 100mg
https://kamagrakopen.pro/# Kamagra Kopen Online
Generic 100mg Easy: buy generic 100mg viagra online – Generic100mgEasy
https://kamagrakopen.pro/# kamagra jelly kopen
Generic 100mg Easy: Generic100mgEasy – Generic100mgEasy
kamagra jelly kopen [url=https://kamagrakopen.pro/#]Kamagra[/url] KamagraKopen.pro
https://generic100mgeasy.shop/# Generic 100mg Easy
https://tadalafileasybuy.com/# cheapest cialis
TadalafilEasyBuy.com: Cialis over the counter – TadalafilEasyBuy.com
Kamagra Kopen Online: kamagra gel kopen – KamagraKopen.pro
https://tadalafileasybuy.com/# Generic Tadalafil 20mg price
https://tadalafileasybuy.com/# TadalafilEasyBuy.com
TadalafilEasyBuy.com [url=https://tadalafileasybuy.shop/#]TadalafilEasyBuy.com[/url] Tadalafil Easy Buy
Buy Cialis online: Tadalafil Easy Buy – TadalafilEasyBuy.com
Generic100mgEasy: best price for viagra 100mg – Generic 100mg Easy
https://generic100mgeasy.com/# Generic 100mg Easy
https://tadalafileasybuy.com/# cialis without a doctor prescription
cheap viagra: Generic100mgEasy – Generic100mgEasy
Generic100mgEasy: buy generic 100mg viagra online – Generic 100mg Easy
https://kamagrakopen.pro/# kamagra kopen nederland
Viagra online price [url=https://generic100mgeasy.com/#]buy generic 100mg viagra online[/url] buy generic 100mg viagra online
https://generic100mgeasy.com/# buy generic 100mg viagra online
Tadalafil Easy Buy: Tadalafil Easy Buy – cialis without a doctor prescription
https://generic100mgeasy.com/# Buy generic 100mg Viagra online
https://generic100mgeasy.shop/# buy generic 100mg viagra online
canadian pharmacy 1 internet online drugstore [url=http://interpharmonline.com/#]Online pharmacy USA[/url] best online canadian pharmacy
mexican drug stores online: Mexican Pharm Inter – mexican pharmacy online store
https://mexicanpharminter.shop/# Mexican Pharm Inter
https://interpharmonline.com/# canadian pharmacy ed medications
canadian drugs pharmacy
Mexican Pharm Inter: Mexican Pharm Inter – MexicanPharmInter
https://mexicanpharminter.com/# mexican pharmacy online
vipps approved canadian online pharmacy
mexican pharmacy online store [url=http://mexicanpharminter.com/#]Mexican Pharm International[/url] MexicanPharmInter
canadian pharmacies that deliver to the us: legitimate canadian pharmacies online – canadian pharmacy oxycodone
https://indiamedfast.com/# online medicine shopping in india
canadian pharmacy drugs online: canada pharmacy no prescription – adderall canadian pharmacy
https://interpharmonline.com/# canada drug pharmacy
http://mexicanpharminter.com/# Mexican Pharm International
thecanadianpharmacy
the canadian pharmacy: most trusted canadian pharmacies online – canadianpharmacy com
online canadian drugstore [url=https://interpharmonline.com/#]Certified International Pharmacy Online[/url] buying drugs from canada
MexicanPharmInter: Mexican Pharm Inter – Mexican Pharm International
https://mexicanpharminter.shop/# mexican pharmacy online store
http://interpharmonline.com/# best canadian pharmacy to buy from
canadian pharmacy sarasota
Mexican Pharm International: mexican pharmacy online order – buying from online mexican pharmacy
ed drugs online from canada [url=https://interpharmonline.shop/#]canadian drugstore online no prescription[/url] canada ed drugs
https://mexicanpharminter.com/# mexican pharmacy online order
https://indiamedfast.com/# lowest prescription prices online india
northwest pharmacy canada
online medicine shopping in india: online medicine shopping in india – order medicines online india
online pharmacy india: lowest prescription prices online india – online pharmacy india
https://indiamedfast.shop/# India Med Fast
https://interpharmonline.com/# canadian online drugs
canadian online drugs
india pharmacy without prescription: india online pharmacy store – online medicine shopping in india
the canadian drugstore [url=https://interpharmonline.shop/#]most reliable canadian online pharmacies[/url] reputable canadian pharmacy
canadian pharmacy online reviews: most trusted canadian pharmacies online – canadian pharmacy 24h com
https://mexicanpharminter.shop/# MexicanPharmInter
canadapharmacyonline
alo789 chinh th?c: alo789 chinh th?c – alo 789 dang nh?p
You sisters are clever indeed! I love the tassle tree and intend to make a few. I give some away and I love having something new for my own home. Thanks for sharing.