Quick & Easy Tissue Paper Flower Tutorial
Quick & Easy Tissue Paper Flower Tutorial

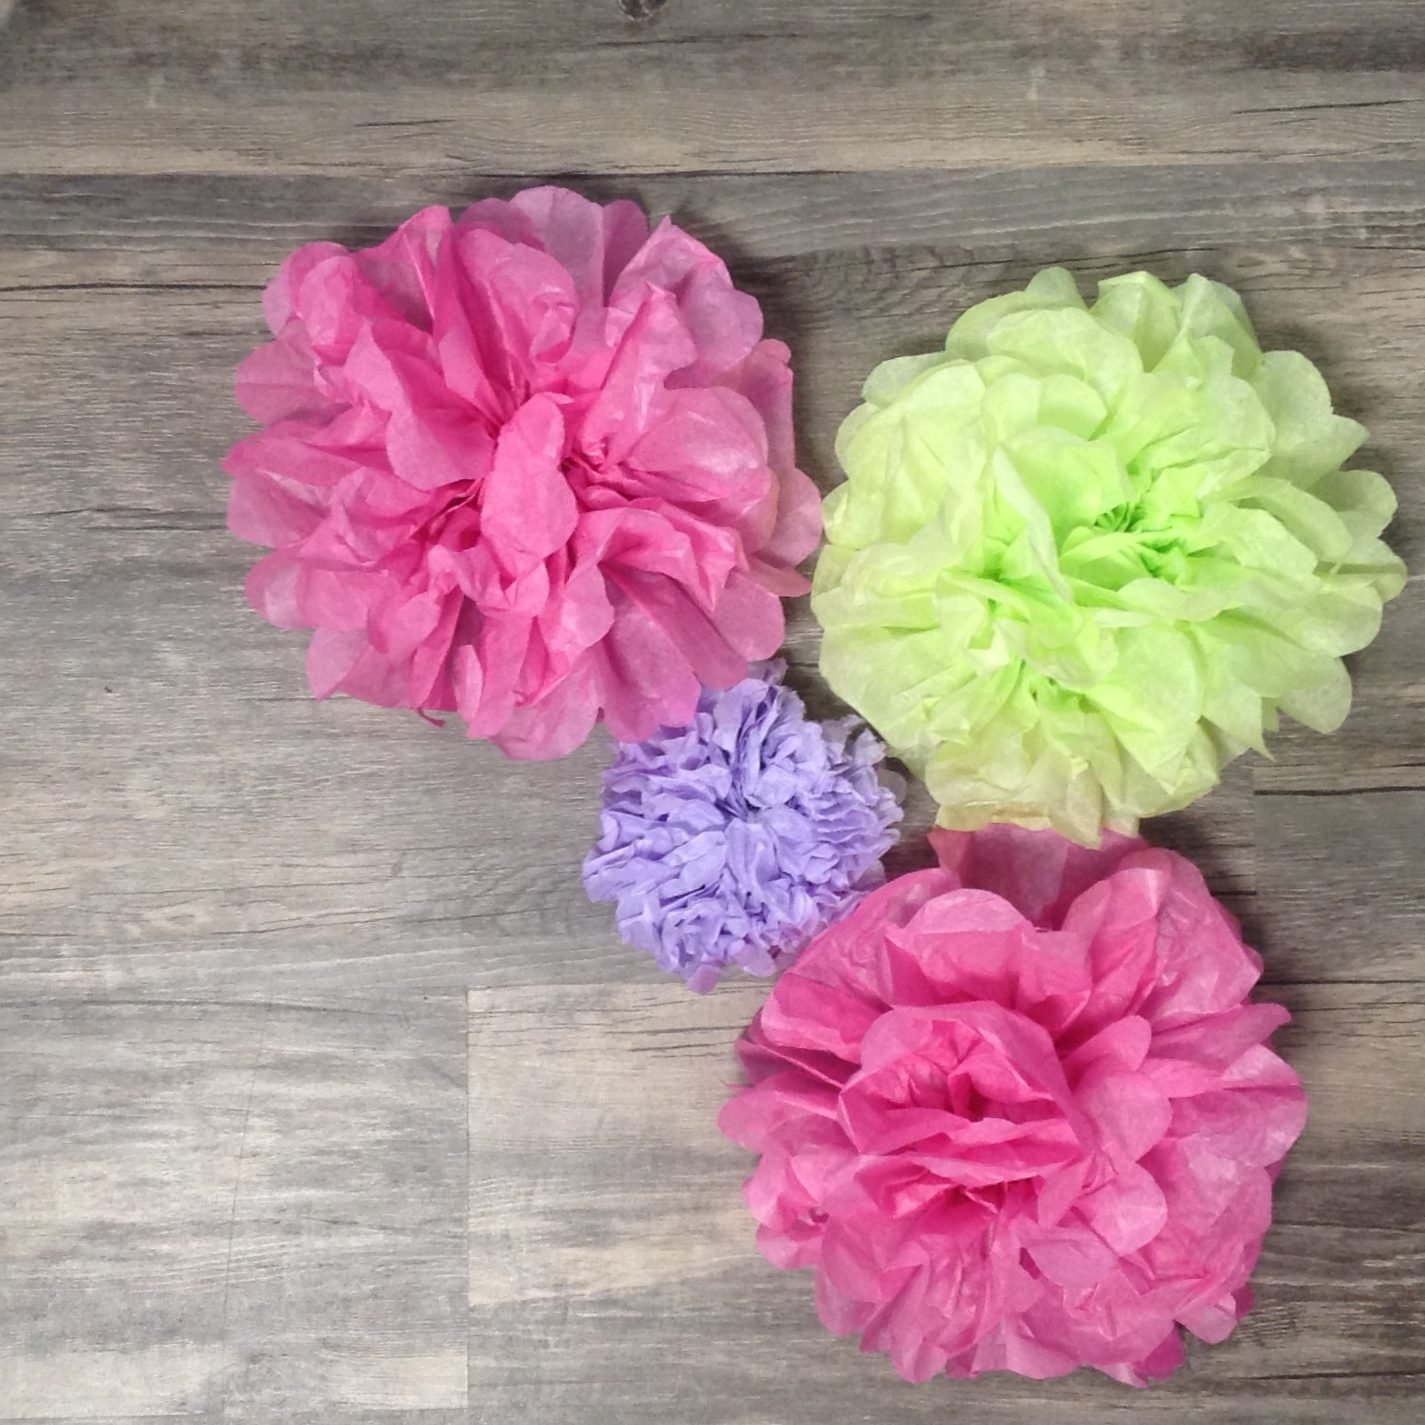
These easy tissue paper flowers are a fun and inexpensive way to add a pop of color and creativity to any occasion. Whether you’re decorating for a birthday party, wedding, Mother’s Day, or simply want to bring a bit of cheer into your home, tissue paper flowers are an easy and versatile craft that anyone can master. In this blog post, we’ll guide you through the steps of this simple craft to make your very own tissue paper flowers, no matter your crafting skill level!
What You’ll Need:
- Sheets of tissue paper (in your choice of colors)
- Scissors
- Floral wire or pipe cleaners (for the flower stem)
- Optional: glue or tape
- Optional: glitter, beads, or embellishments for extra flair
Step 1: Choose Your Color of Tissue Paper
Start by selecting the colors of tissue paper you’d like to use for your flowers. You can choose a single color for a monochromatic look or mix and match different colors of tissue paper for a more vibrant and multi-dimensional flower.
For example, a red, orange, and yellow combination can give a sunset-like effect, while a soft pink or lavender can create a more delicate, pastel flower.
Step 2: Cut the Tissue Paper
Next, cut the tissue paper into rectangular shapes. You’ll need to layer several pieces of tissue paper for a fuller flower. Depending on if you want giant tissue paper flowers or small flowers, you can cut the tissue paper to different sizes. A good standard size is 8 x 10 inches, but you can adjust this based on your preference.
For a simple flower, aim for about 6–8 layers of tissue paper sheets. For a fluffier, fuller flower, you can use 10–12 layers of tissue paper layers. Different styles of flowers require different amounts of layered tissue paper.
Step 3: Stack and Accordion Fold the Tissue Paper
Once you have your pieces of tissue paper cut, stack them neatly on top of each other. Start folding the tissue paper in an accordion or fan style. Begin with one inch folds, keeping the folds even and consistent.
Once you’ve folded all the way to the end of the paper, secure the folded tissue paper in the center point with a piece of floral wire, string, or a pipe cleaner. This will act as the “stem” and help keep the folds in place. This is the center of the flower.

Step 4: Trim the Edges
To create the signature petal shape, trim the edges of your tissue paper with a pair of scissors that are nice and sharp. You can round the corners or cut them into a point, depending on the look you prefer. Rounded edges will give you soft, rounded flower petals, while pointed edges will create a more spiky, petal-like effect.
Be creative! There are a variety of ways to trim the ends of the tissue paper to form different petal shapes for your flowers.

Step 5: Fluff the Tissue Paper
Now comes the fun part – fluffing up your flower! Gently pull apart each layer of tissue paper, one at a time, starting from the top. Be careful not to tear the tissue, but don’t worry if some small rips occur – they only add to the flower’s charm. The more layers you have, the fuller and fluffier your flower will be.
Work your way around the entire flower, lifting each layer until the flower starts to take shape.

Step 6: Adjust the Shape
Once all the layers are fluffed, you can gently adjust the flower’s shape by fluffing and arranging the petals to your liking. If the center point of your flower looks a bit sparse, you can also add a small piece of contrasting tissue paper to create a center, or glue a button or bead for a unique touch. TIssue paper pom poms also can be used for the center of the flower.

Step 7: Create the Stem (Optional)
If you want to give your tissue paper flower a more realistic look, you can use a floral wire or a green pipe cleaner to create the flower stem. Simply attach the wire to the base of the flower (where you secured the center point with your wire or string) and gently bend it into a stem shape. You can also wrap the wire with green floral tape for a more polished look, or wrap it in a piece of green tissue paper for a stem-like look as well.
Alternatively, you can skip the stem and use the flowers for other decor, like wreaths or centerpieces. Tissue paper flowers without stems also make a great photo backdrop for parties and bridal showers. Using various colors and sizes of tissue paper flowers make for a big impact and will make the backdrop wall look full and textured.
Tips for Extra Flair:
- Layering Colors: Try layering tissue papers in varying shades to make the tissue paper flowers look like real flowers, or mix contrasting colors for a bold, eye-catching design. Deep colors will create beautiful vibrant flowers that would look beautiful as party decor for a holiday party!
- Make Large or Small Flowers: By adjusting the size of your tissue paper pieces and the number of layers, you can create flowers of all sizes. Tiny blooms are perfect for embellishing gift wraps or adding to hair accessories.
- Add Embellishments: Use glitter, beads, buttons, or sequins to embellish the center of your flowers. You can also lightly spray the petals with glitter for a sparkly effect.
- Make a Flower Bouquet: Combine several tissue paper flowers on stems to create a beautiful bouquet. This makes for a thoughtful DIY gift, or you can use it as a piece of home decor. A bouquet of tissue paper flowers could also be a thoughtful gift to give someone special on Valentine’s Day.
Creative Uses for Tissue Paper Flowers:
Once you’ve mastered making tissue paper flowers, there are endless ways you can use them to brighten up your space or event. Here are a few ideas:
- Party Decorations: Create a fun and festive backdrop by hanging clusters of tissue paper flowers on walls, ceilings, or in a DIY photo booth, as stated above. A wall of flower in an ombre effect would be a beautiful statement wall behind a mom-to-be at a baby shower, or as a backdrop to a cake table at a wedding!
- Gift Wrapping: Add a handmade tissue paper flower to a gift box or gift bags for an extra special touch.
- Home Décor: Make a flower garland to decorate a mantle, mirror, or window frame. You could even mix a variety of tissue paper flowers with fabric flowers for decor with even more depth and texture difference!
- Bridal and Baby Showers: Tissue paper flowers are perfect for wedding or baby shower décor, and you can even use them as centerpieces or attach them to party hats or favors. Pink tissue paper flowers for a baby girl shower sounds just perfect.
Making tissue paper flowers is a simple and rewarding craft that’s perfect for both beginners and seasoned crafters. With just a few basic supplies and some creativity, you can create beautiful flowers that will brighten up any occasion. The best part? They’re reusable and long-lasting, so you can enjoy your handmade blooms for years to come.
Happy crafting, and don’t forget to let your imagination blossom!


